Insert Custom Relations and Attributes
Insert Custom Relations and Attributes
This section contains a short guide on how to use custom relations and attributes for individual concepts or concept schemes.
On a selected custom scheme tab you can define attributes and relations, similar to working on the SKOS tab.
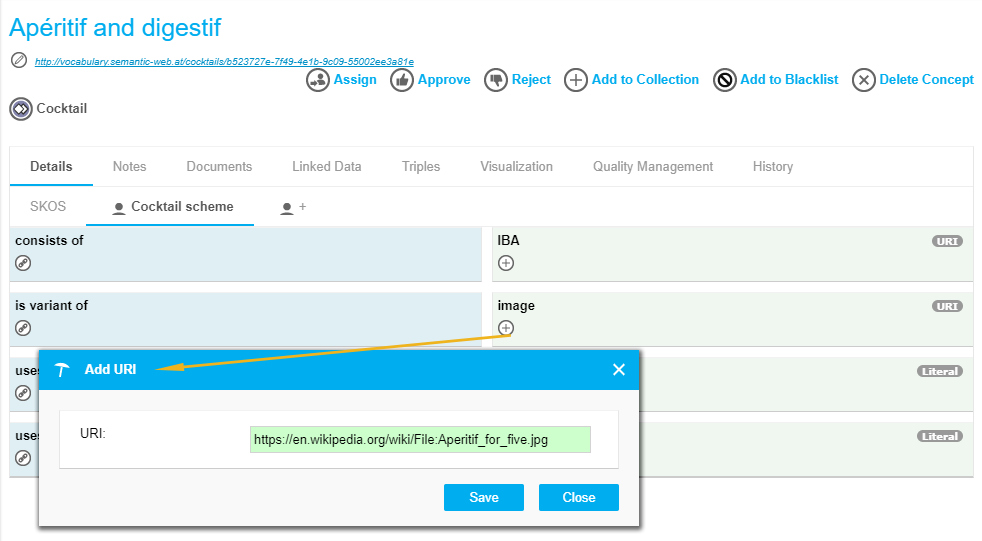
You can insert Attribute values in the green sections column on the right. The screenshot below shows how to add an image URI to a top-concept:
Click the Add icon. The Add URI dialogue opens. Enter the URI for the desired image into the URI field.
Click Save to confirm your changes.
 |
Note
For all values an import validation is in place that allows to only add values in the correct format. For the date and date/time attributes a calendar widget is provided.
When you add a value of an attribute that is a sub-property of another attribute, the value of the superordinate attribute will also be automatically populated through inference. The same does not apply the other way round.
When you edit or delete a value of an attribute that is a sub-property of another attribute, the value of the superordinate attribute that was initially populated through inference will not be automatically updated or deleted. Please review the inferred value of the superordinate attribute and if applicable, edit or delete it manually.
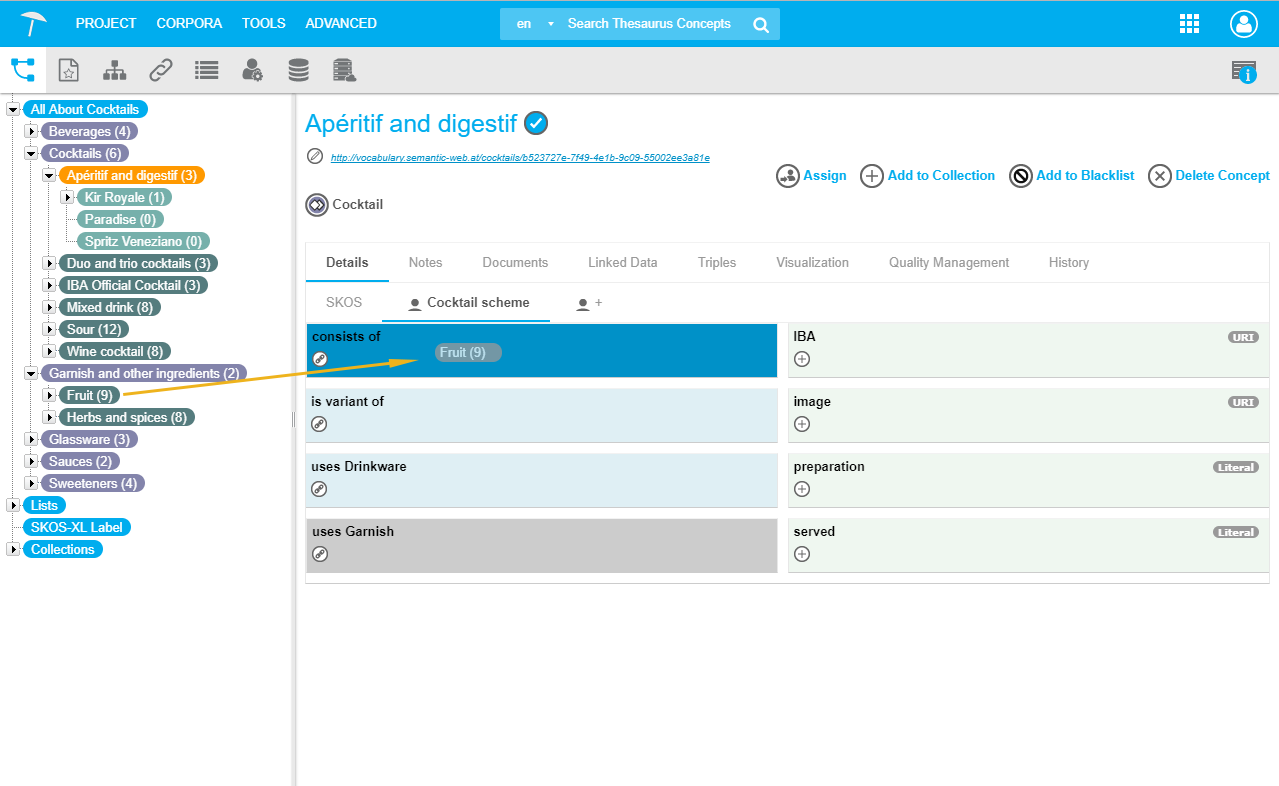
You can insert Relations in the blue sections column on the left.
You can add relations via drag and drop or autocomplete.
In the example below you can see the insertion of a relation per drag and drop:
Here the Domain of the relation is 'Aperitif and digestif', so it is active in the tree. The Range of this relation is the concept 'Fruit'.
Click the concept and drag and drop it onto the relation of the active custom scheme tab, 'consists of', in this example.
 |
Note
When you create relations, domain and range restrictions defined for the custom scheme are taken into account.
When you add a value of a relation that is a sub-property of another relation, the value of the superordinate relation will be also automatically populated through inference. The same does not apply the other way round.
When you edit or delete a value of a relationship that is a sub-property of another relation, the value of the superordinate relation that was initially populated through inference will not be automatically updated or deleted. Please review the inferred value of the superordinate relation and if applicable, edit or delete it manually.
Using the custom scheme tab you can only create custom relations within one project. If you want to create custom relations between projects you can do that by using project linking.
For a programmatic approach you can use the PoolParty API calls Web Service Method: Add Custom Attribute and Web Service Method: Add a Custom Relation to a Resource.