Create a New User
As a PoolPartySuperAdmin, you can add new PoolParty users. Follow this step-by-step guide, which will lead you through the procedure.
Users in the PoolPartySuperAdmin role can add new PoolParty users. For more information on the PoolPartySuperAdmin role, see User Roles in PoolParty.
Open the User Management using the icon in the toolbar.
Select the Users node in the User Administration tree on the left.
Select Create User.
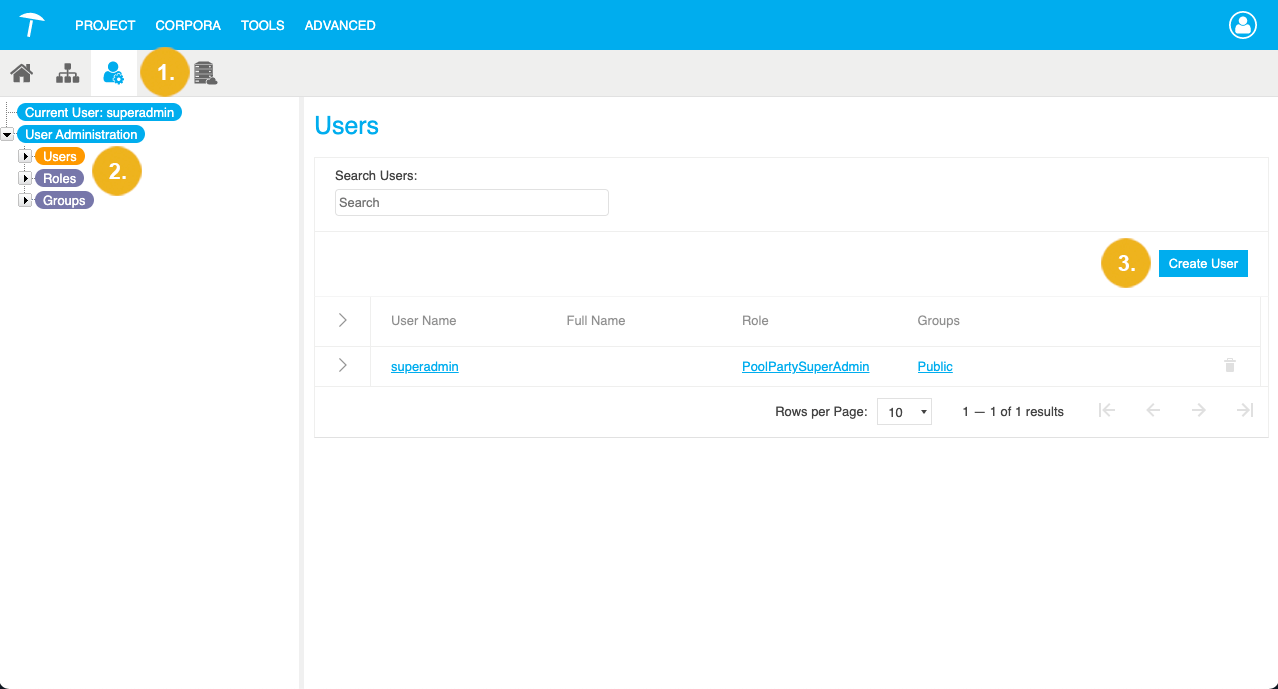
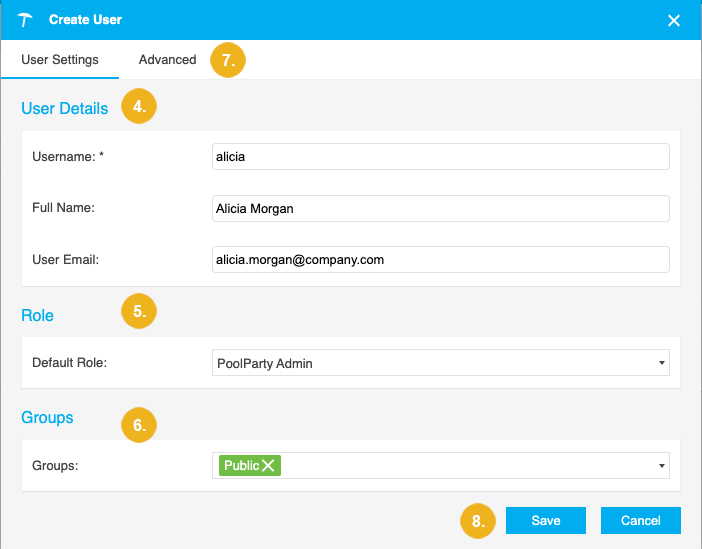
The Create User dialogue opens.
Enter the Username (mandatory), Full Name (optional) and User Email (optional).
Note
The Username cannot be changed once the user has been created.
Select the user's Default Role. For more information, see User Roles in PoolParty.
Select the Groups that the user will be a member of. For more information, see User Groups in PoolParty.
Optional: Go to the Advanced tab to define the user's custom URI. For more information, see Define a Custom User URI.
Note
You cannot edit the user's URI once you have created the user.
Confirm with Save.
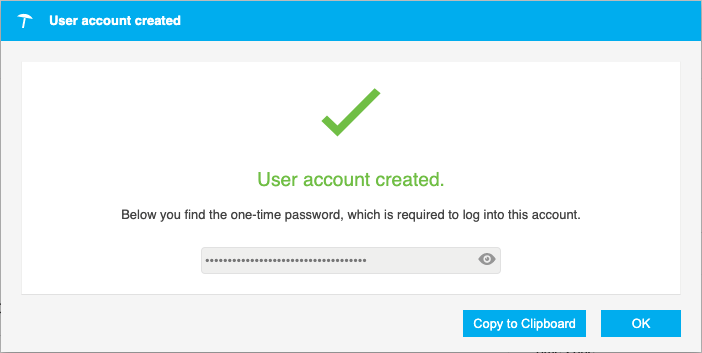
The User account created dialogue opens. You can find a password there, which you can display or copy to your clipboard. The new user needs this password to activate their account before they can use it. For more information, see Activate or Reactivate Your User Account.
Tip
If you would like to learn more about this topic, please watch this PoolParty Academy Tutorial video: