Creating Projects
30/09/2025
To be able to create and manage taxonomies in PoolParty you have to create a project which will be then managed in the Thesaurus Manager.
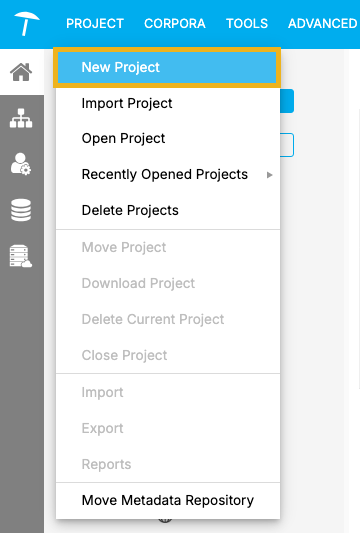
In the PROJECT menu, select New Project to create a new project.
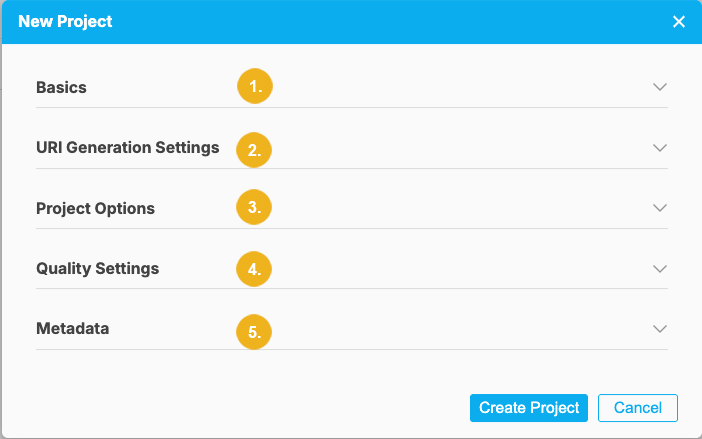
The New Project dialog opens where you can enter information in five different sections:
Tip
All mandatory input fields are marked by a trailing asterisk.
Note
When you click on the arrow on the right pointing down you can access any of the five groups of settings for the new project. The Basics section is always open by default when you click on the New Project menu item.
Basics (1) - contains mandatory fields: Title, Languages, Default Language and User Groups
After clicking on the New Project menu item the New Project dialog opens with the Basics section which contains five input fields; all these fields are mandatory.

Specify the name of your project in the Title (2) field; then use the Languages pulldown (3) to select languages for the project, and specify the default language of your project then using the corresponding pulldown (4) - when you open this pulldown you will only see the languages you have previously selected for your project. The last mandatory setting in this section is User Groups where you can select the appropriate user group(s) (5).
URI Generation (2) - the following mandatory settings are configured in this section: Base URI, Project Identifier, ID Generation, the starting increment for the ID generation. At the end of this section you see the sample of the URI.
These settings are also mandatory.
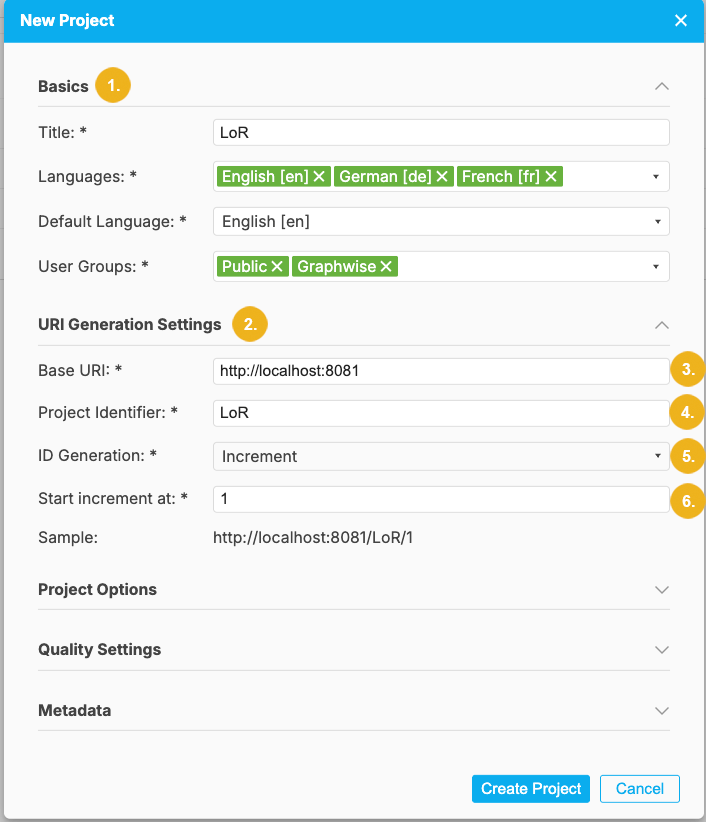
Base URI is in our example the URL along with the port (3), Project Identifier - in our example we use the same value as for the project title, but you can use any meaningful abbreviation or name here (4). You have to specify how the URI will be generated (5) - the available options are: increment, UUID, from preferred label and manual. We however do not recommend using the manual option since you will have to be very careful when specifying the URI for every single concept. The Start Increment at field (6) is only available when you specifed Increment as the desired ID generation method in the field above (5), otherwise it will be grayed out.
Note
The default settings in this section are automatically prefilled on project creation.
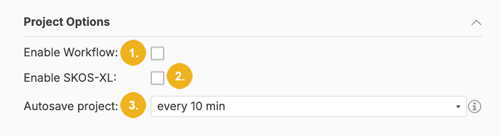
Project Options (3) - this section is comprised of two checkboxes - Enable Workflow and Enable SKOS-XL and a pulldown called Autosave project.
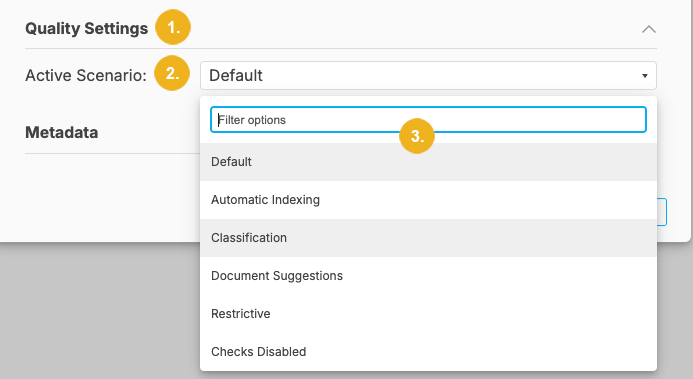
Quality Settings (4) - here you can select an Active Scenario to be used for your project.
Metadata (5) is the last section containing the following fields: Subject, Description, Creator, Publisher (Organization), Contributor and License.
The Metadata section contains no mandatory fields.
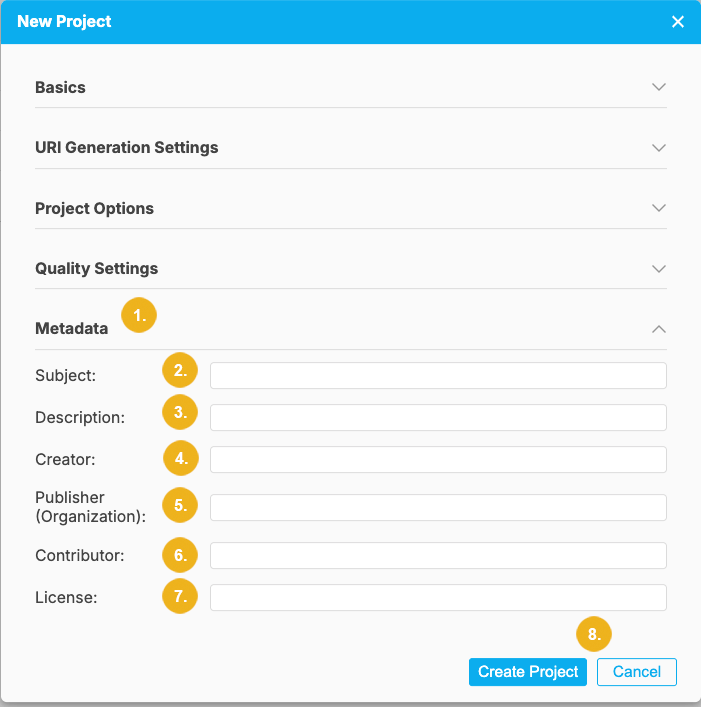
You can specify the Subject (2) of your new project, add a description (3), the person who created this project (4), the publisher (5), the contributor (6) and if applicable the license (7). This information is optional but can turn out to be useful at some point.
After having specified all mandatory details and desired optional information click on the Create Project button on the bottom of this dialog window or on Cancel to abort the operation and discard all inputs.
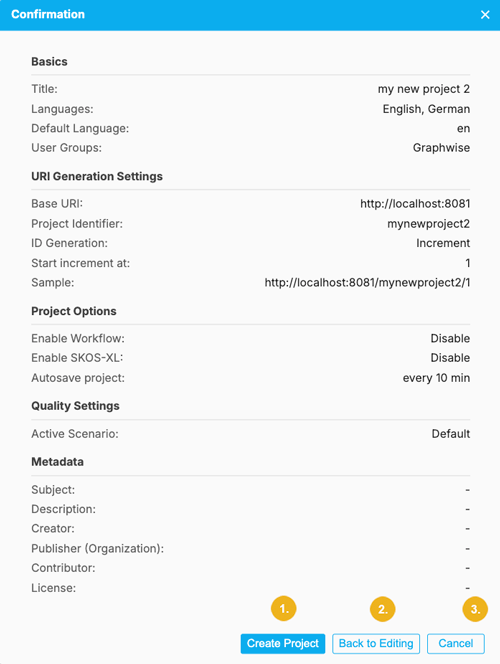
After clicking the Create Project button a new window opens showing all the details you have specified for your new project. At the bottom of this Confirmation window are three buttons:
Create Project (1) - if all details shown in this window are correct and you want to create this new project click this button.
Back to Editing (2) - if you want to change any of the details and settings, use this button to return to the previous dialog.
Cancel (3) - click this button to cancel the operation and discard all inputs.