Check Metadata and Quick-Edit a Webhook Notification
Learn how to check on metadata of an existing webhook notification or quickly enable or disable it with the PoolParty user guide.
Webhook notifications in PoolParty can be quickly enabled or disabled when you expand the respective notification's node. You can also edit the frequency of the notifications to be sent here.
Additionally, its metadata is available here.
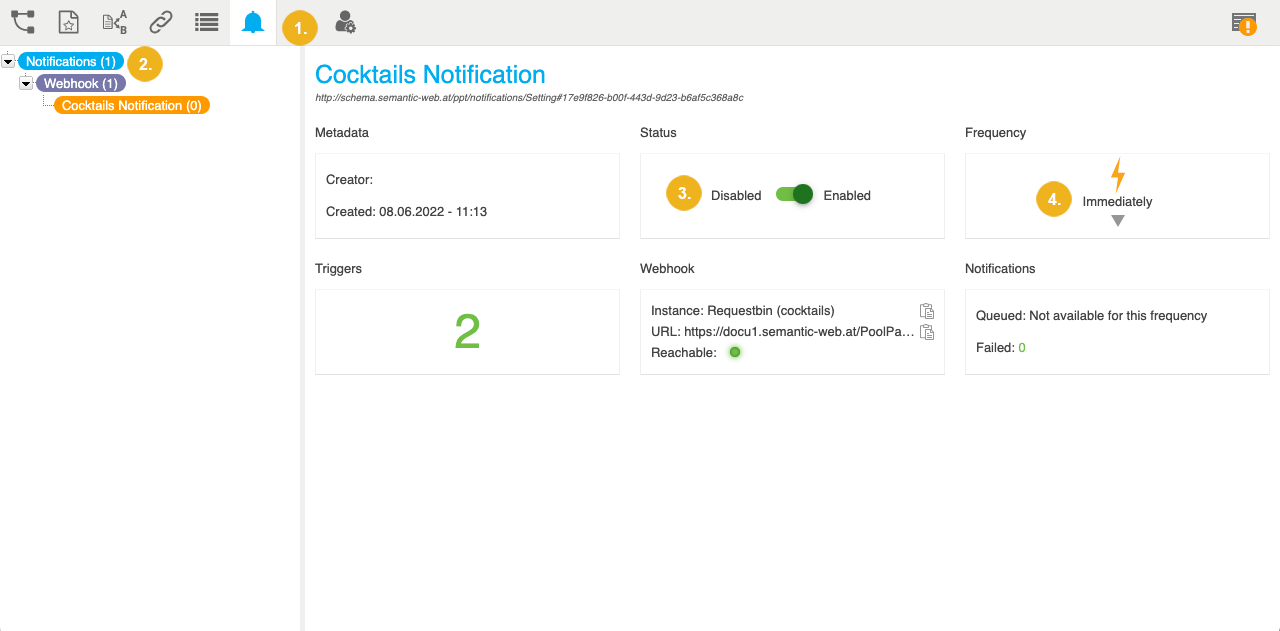
In your opened PoolParty project, open the Notifications Dashboard by clicking its icon in the toolbar.
Expand the Webhook node. Below it find and activate the notification's node you want to edit.
On the right in the Details View, the following sections are available:
Metadata: the date of creation and the creator's user name are displayed here.
Status: the slider to quickly enable or disable the notification is visible here.
Frequency: the actual setting is displayed here. You can use the drop down to change the frequency to a different value.
Triggers: the number of activated change action triggers is displayed in this section.
Webhook: according to the settings in the Semantic Middleware Configuratoryou see the webhook configured there and set for this notification. For more information, see How to Set Up a Connection to a Webhook Service.
Notifications: this section provides details about the queue of notifications and a number for failed notifications.
Note
The queue information is not available for the frequency option Immediately, since no notifications will be queued for this frequency type.
Use the slider in the Status section to enable or disable the notification.
Use the drop down in the Frequency section to select a different interval for that notification's callback settings.