Upgrade PoolParty to Version 8.1 on Linux
Introduction
To upgrade your PoolParty installation, follow the steps described below. PoolParty's automated upgrade process for GNU/Linux hosts makes this process a breeze.
Warning
We strongly recommend to completely back up your installation before you try to perform an upgrade. Be advised that the users of PoolParty need to refresh their browser's cache after an upgrade. Failure to do that might result in unexpected behaviour when using PoolParty (this is a common phenomenon for applications using Ajax technology). Please refer the users to the Troubleshooting in the user manual for instructions on how to clear cache of their browser.
Note
An OpenJDK or a 64-bit build of a Sun/Oracle Java 11 SE Development Kit is required to run PoolParty.
Note
These instructions assume you are upgrading a PoolParty default installation for GNU/Linux with PoolParty installed at /opt/poolparty, unless otherwise stated.
Note
Password Change Policy (mandatory):
New users and legacy users have to change passwords on their first login. After logging in a user cannot execute any functions, until the password is changed. This way a password is less likely to be misused.
Upgrade Process
Note
On upgrade we replace SesameSetup.xml file in the config folder. Backup of the original file is done and this is stored in /opt/poolparty/config/SesameSetup.old file.
In order to upgrade you need to stop the PoolParty server.
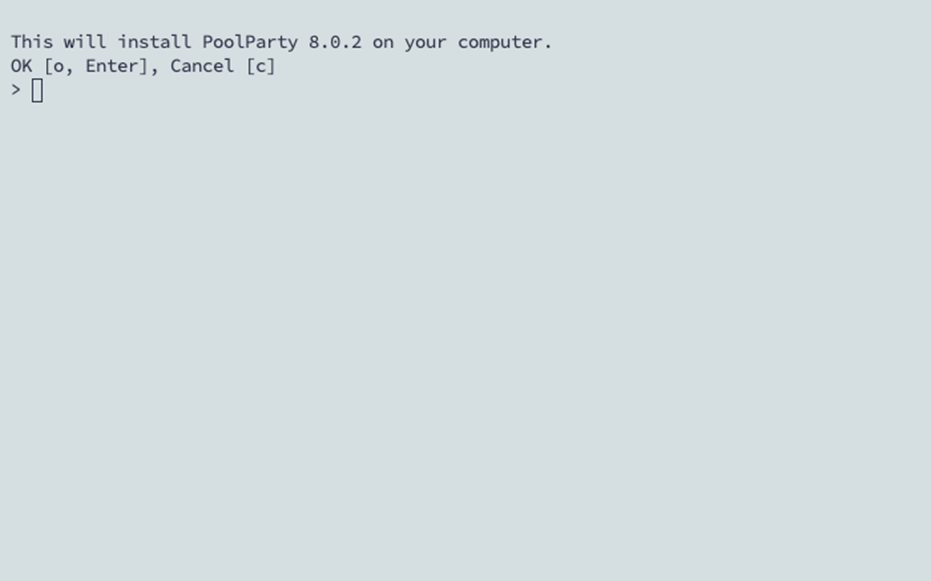
This opens a dialogue in the terminal. By hitting Enter you start the process.
In the next step choose to do an upgrade by entering option '2' and hitting Enter.
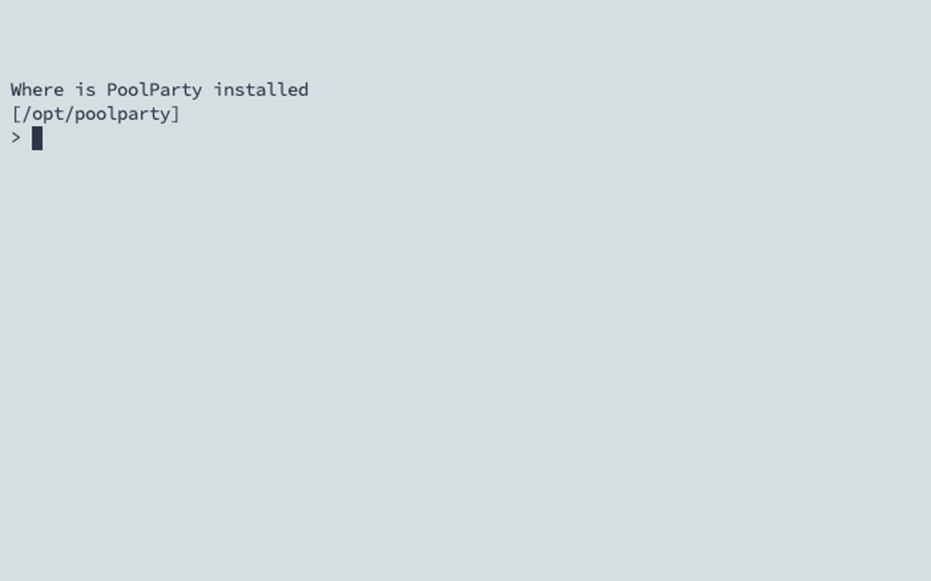
Provide the path for your PoolParty application directory (default: /opt/poolparty). Enter the path of your installation if different than /opt/poolparty and hit Enter or just hit Enter to use the default path.
If a PPDataDir is found in the PPAppDir the upgrade just skips the next step.
If your installation has a separate path for the PPDataDir enter the path and hit Enter.
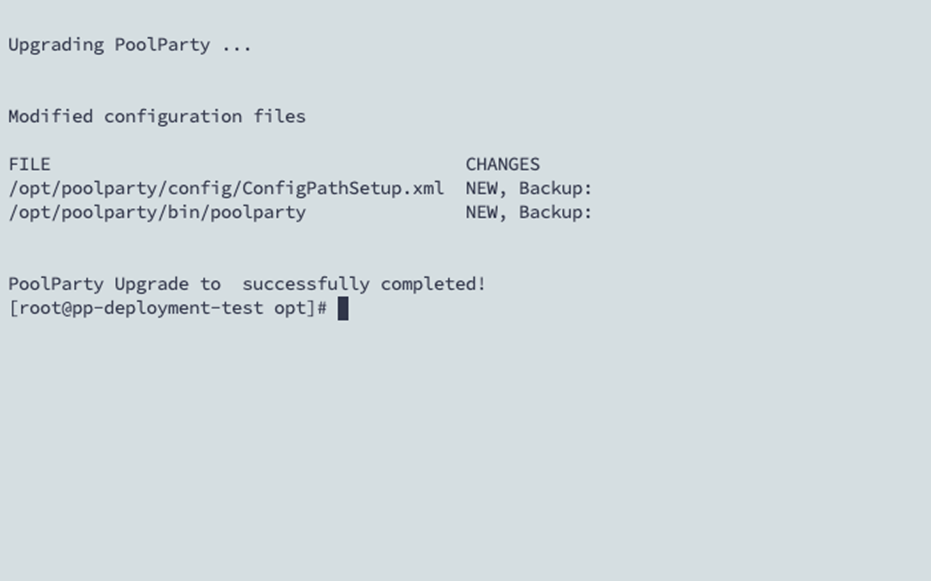
You are presented with an overview of the settings you made. You can then finalize the upgrade process by hitting Enter.
Post-Upgrade Tasks
You have to clear your browser cache after the upgrade as changes to CSS and javascript used in the PoolParty UI have been done.
After you login into PoolParty for the first time after the upgrade, you have to run the PoolParty migration script:
https://<your-serverurl>/PoolParty/!/migrate/upgrade
The script lists all updates that will be done. Trigger the migration by clicking Start Migration.
A progress bar and an info box show the progress and status of the migration. When the process has been finished an overview of the migration steps per project is provided.
Changes to the configuration of the PoolParty extraction model have been done. You have to recalculate all extraction models after the upgrade.
Note
You need to have the Superadministrator role assigned to be able to run those scripts.