Recommender Workbench Installation and Upgrade Guide (Linux)
Introduction and Prerequisites
Currently the installer for PoolParty Recommender Workbench only runs on a Linux system. The following prerequisites must be satisfied for running the installation procedure:
64bit GNU/Linux Server (CentOS/RHEL/Oracle Linux 7 and 8) (recommended)
OpenJDK in the same version as currently installed for your PoolParty instance (currently supported are OpenJDK 11 and 17)
installed and configured Keycloak (with client secret for the "recommender" client); PoolParty 9.1. installation includes Keycloak version 21.1.2
the Recommender Workbench installer, called for instance
RecommenderWorkbench_1.0.1_snapshot.runproperly set up
JAVA_HOMEthe recommended disk space and RAM settings for PoolParty Recommender Workbench are: min 5 GB disk space and min 4 GB RAM (Apache Tomcat requirement)
Tip
The client secret value for the Keycloak "recommender" client can be accessed in Keycloak, where you are automatically redirected to the Administration Console. There go to Clients and select the client "recommender"; subsequently click on the Credentials tab where you can see the client secret value for the selected Keycloak client; you can also regenerate this value, if required.
Note
Since the PoolParty Recommender Workbench uses Elasticsearch for the recommend request call to the API endpoint, you do not need to set up Solr. You however have to make sure that the index selected for the search space you are going to use configuring your recommender instance using the Recommender Workbench is indeed Elasticsearch.
Caution
It is recommended to run the installation as a root user to ensure smooth installation process and avoid any permission issues during the installation procedure.
Note
Default ports used by PoolParty installation:
Apache Tomcat will be running as localhost using port 8081.
Keycloak will be running as localhost using port 8181.
The built-in Apache Solr server will be running as localhost using port 8983.
Installation Procedure
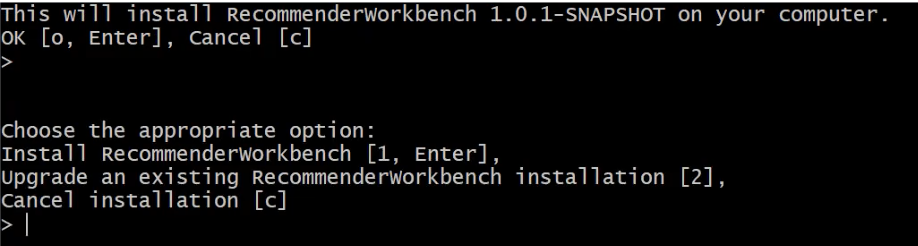
STEP 1: Open the terminal and run there the installer RecommenderWorkbench_1.0.1_snapshot.run. At first you will be prompted that PoolParty Recommender Workbench will be installed on your system. To confirm press either o or Enter. If you want to cancel the installation press c.
STEP 2: Now you are presented two options for your installation - you can either install a new or upgrade the Recommender Workbench instance. Start a new installation by either entering 1 or pressing Enter.
STEP 3: Now you are prompted to specify whether you want to install the Recommender Workbench as a standalone application (i.e. with its own Tomcat 9.x instance) or as an application which shares an Apache Tomcat 9 instance. Press 1 or Enter to continue with the first option.
STEP 4: Now you are prompted to review the settings you just made. If everything is OK, proceed with the installation by pressing o or Enter , press c to cancel and change these settings as required.
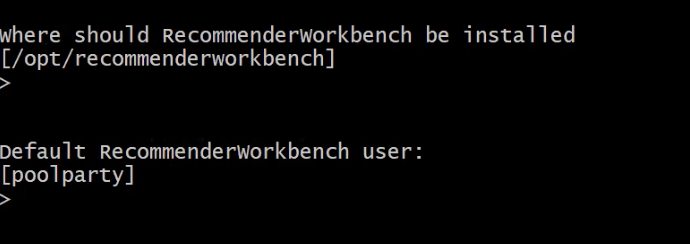
STEP 5: Now you need to enter the URLs to the PoolParty and Keycloak instances to be used. Let us use the default settings here, for instance a https://your.poolparty.server:port and https://KEYCLOAK_URL>: KEYCLOAK_PORT. Then specify the realm to be used in the Keycloak instance (default poolparty ) and the enter the client secret value of the Keycloak client "recommender".
STEP 6: Review the settings again and proceed by pressing o or Enter, respectively press c and make any required adjustments to these settings.
In this step press o. or Enter to run the install script and install the Recommender Workbench instance.
STEP 7: Since we are installing the Recommender Workbench with a separate Apache Tomcat 9.x instance you will need to manually start Tomcat after having completed the installation. This may look like this:
ROOT-SURFACE:           /opt/recommenderworkbench/bin# ./startup.sh
using CATALINA_BASE:    /opt/recommenderworkbench
using CATALINA_HOME:    /opt/recommenderworkbench
using CATALINA_TMPDIR:  /opt/recommenderworkbench/temp
using JRE_HOME:         /usr
using CLASPATH:         /opt/recommenderworkbench/bin/boostrap.jar:/opt/
recommenderworkben/bin/tomcat-9.jar
using CATALINA_OPTS:
Tomcat started.
STEP 8: Start the PoolParty Recommender Workbench to verify that everything works as desired.
Open a browser and access your PoolParty Recommender Workbench installation at your.poolparty.server/RecommenderWorkbench. You will have to log in using your user credentials set in PoolParty.
Note
Since Recommender Workbench relies on PoolParty for user management, you need to have a PoolParty user account in place. The same user credentials are used for accessing the PoolParty and the Recommender Workbench.
Important
The installer of the Recommender Workbench creates the entire directory structure including the /recommenderworkbench/data/ directory where the database storing all recommender configurations is located. Currently you will have to manually back up this directory before installing a new Tomcat or PoolParty version since such upgrade/installation will overwrite this directory. The easiest way is to copy the directory to a desired backup location using the cp command.
Upgrading an Existing Recommender Workbench Instance
The upgrade procedure is very similar to the initial installation process. The only thing to keep in mind is to back up the /recommenderworkbench/data/ directory where the database storing all recommender configurations is located, if the upgrade includes a new version of Tomcat.
Important
If you are installing a new version of Tomcat you will always have to manually stop Tomcat prior to running the installation or upgrade as well as restart it manually after having completed the installation or upgrade.
STEP 1: Open the terminal and run there the installer RecommenderWorkbench_1.0.1_snapshot.run. At first you will be prompted that PoolParty Recommender Workbench will be installed on your system. To confirm press either o or Enter. If you want to cancel the installation press c.
STEP 2: Now you are presented two options for your installation - you can either install a new or upgrade the Recommender Workbench instance. Start the upgrade by entering 2.
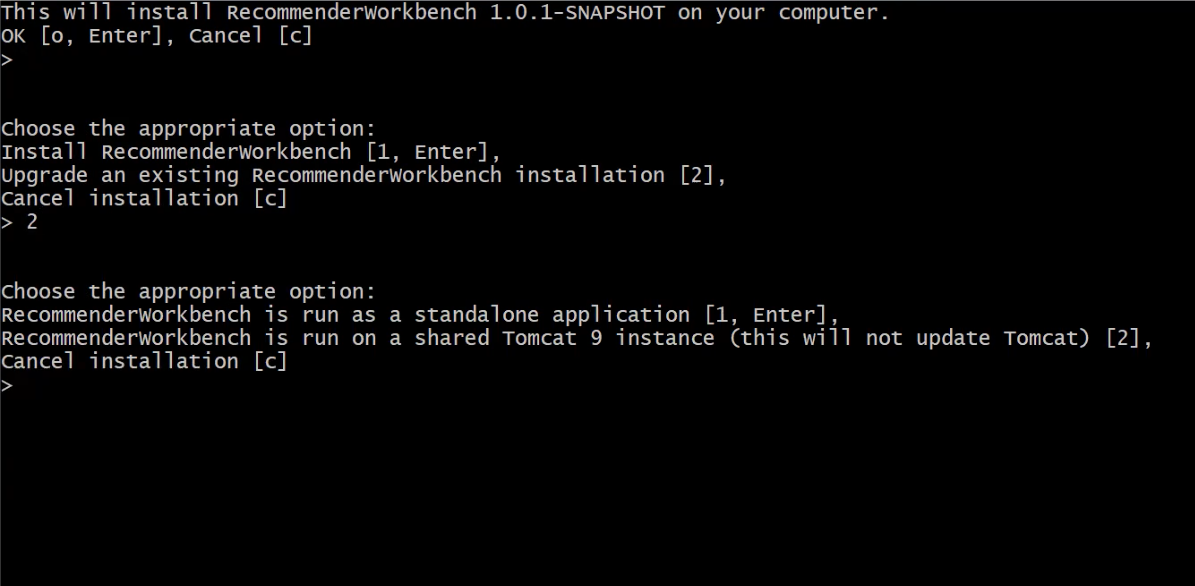
STEP 3: Now you are prompted to specify whether you want to upgrade the Recommender Workbench as a standalone application (i.e. with its own Tomcat 9.x instance) or as an application which shares an Apache Tomcat 9 instance. Press 1 or Enter to continue with the first option since our original installation was as a standalone application.
STEP 4: Now you are prompted to review the settings made during the initial installation. If everything is OK, proceed with the upgrade by pressing o or Enter , press c to cancel and change these settings as required.
STEP 5: After completing the upgrade launch the Recommender Workbench to verify that everything works as desired.
Open a browser and access your PoolParty Recommender Workbench installation at your.poolparty.server:port/RecommenderWorkbench. You will have to log in using your user credentials set in PoolParty.