Settings Section
Settings Section
This section contains a short guide on the Settings area in UnifiedViews.
The Settings section of the main menu contains a sub-menu.
By selecting a category you can display the respective sub-page and change settings, depending on your user role, namely User or Administrator.
Settings' categories presented in the sub-menu are different for User and Administrator roles.
Note
Terms special to UnifiedViews and their meaning are explained in our UnifiedViews Glossary .
Settings for the User Role
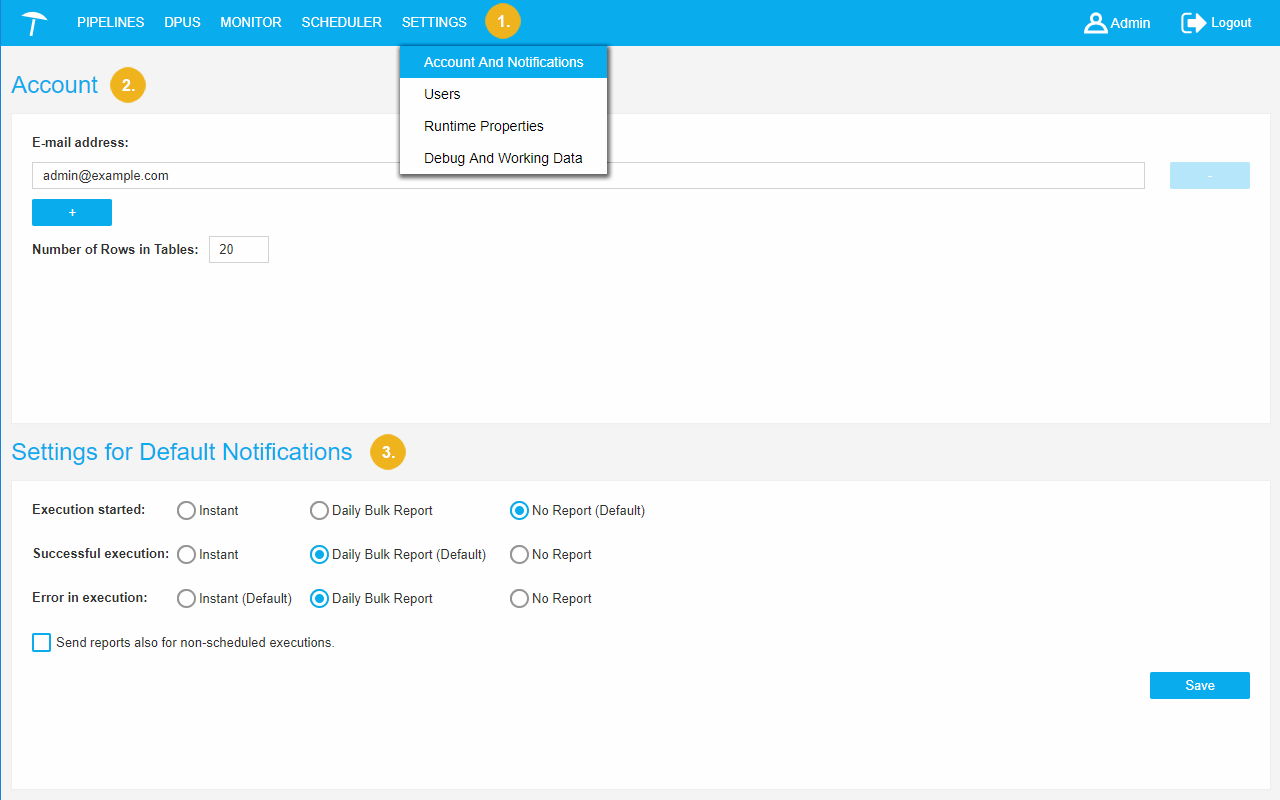 |
Settings available for the User role:
Account and Notifications: e-mail changing, setting a number of rows in tables.
Scheduler Notifications Settings: setting a default format of report about the scheduled pipeline execution.
Settings for the Administrator Role
Settings available forAdministrator role:
Account and Notifications: e-mail changing, setting a number of rows in tables.
Scheduler Notifications Settings: setting a default form of a report about the scheduled pipeline execution.
Users Page: to view, create, delete and edit accounts of users.
Delete Debug and Working Data Page: ability to delete all intermediate graphs created by the pipelines in debug mode.
Account and Notifications
Account and Notifications
This section contains a guide on the available options in the Account and Notifications area of the SETTINGS menu.
The Account and Notifications page contains e-mail or e-mails of a user. To this e-mail(s) the user will receive notifications about the scheduled pipelines execution. One email is mandatory.
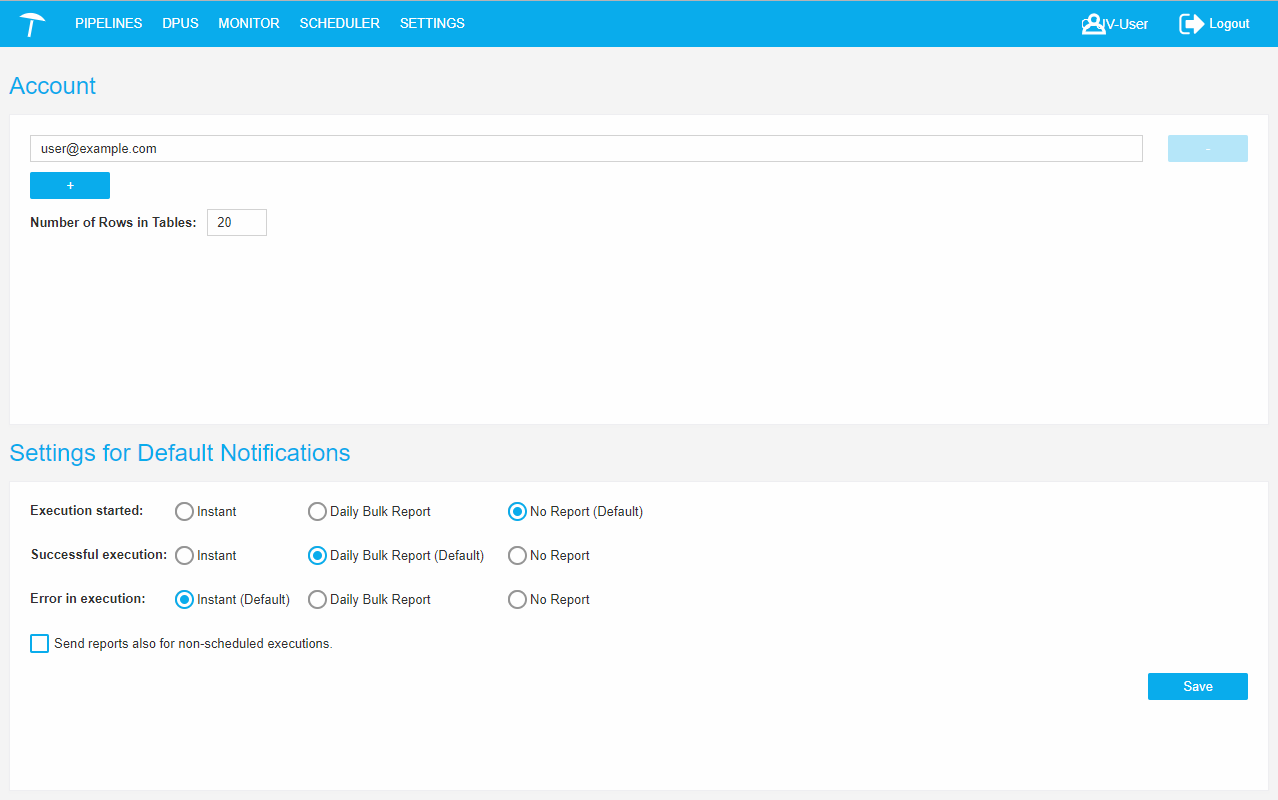 |
Details about the Notifications settings find in this topic: Scheduler Notifications Settings
The user is authorized to change/add/remove e-mails. Also on Account and Notifications page the user may set Number of Rows in Tables. After that tables for date representation in all application will have this number of rows. Number of Rows in Tables must be a number between 5 and 100.
Click Save to save the changes. If you try to leave the Account and Notifications page without saving, the system will show a confirmation dialogue.
 |
Click Save to confirm the changes, or Discard Changes to leave the page without saving the changes.
Note
The system controls the correct format of an e-mail and values in the Number of Rows in Tables field.
If an e-mail is in an incorrect format an exclamation mark on the right side of an e-mail field will be shown.
If Number of Rows in Tables is not an integer number between 5 and 100 an exclamation mark on the right side of the field will be shown.
These errors (at least one of them) do not allow to save the Account and Notifications page settings. You will receive an error message in attempting to save settings.
Scheduler Notifications Settings
Scheduler Notifications Settings
This section contains a short guide on the settings available in the Settings for Default Notifications area of the Account and Notifications page.
In this page you can define, hoe you would like to be informed by default about the scheduled events and their runs.
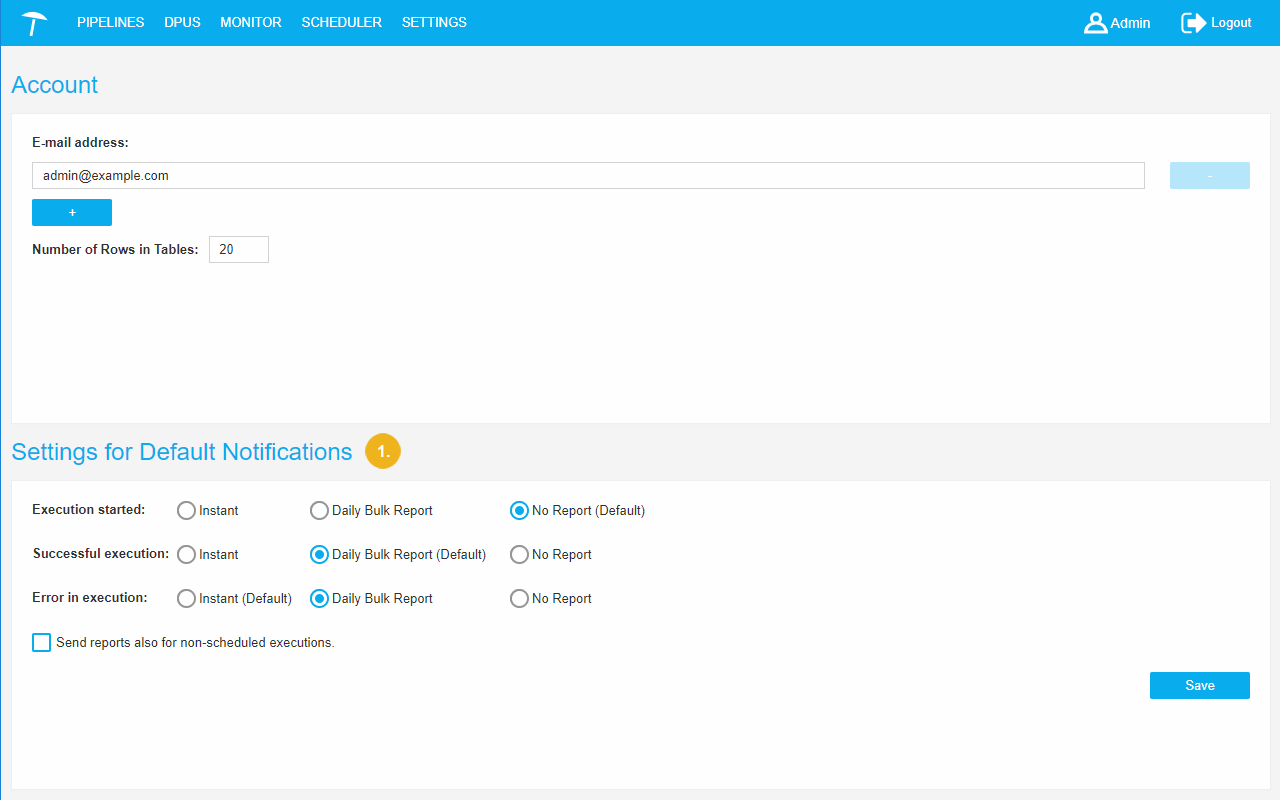
The Settings for Default Notifications area (1) consists of three optional groups:
Execution started:you will be informed when any of the executions you scheduled has been started.
Successful execution: you will be informed when the scheduled pipeline was executed.
Error in execution: you will be informed in case an error occurred in the scheduled pipeline.
All of these groups contain the following ways of informing:
Instant: the user is informed instantly after the pipeline is executed - a new email for every executed pipeline.
Daily Bulk Report: containing reports about executed pipelines in a given time period (day).
No Report: you will not be informed at all.
You can specify the format of notification, this form can be different for notifications and errors. Default: Instant report for Error in execution, Daily bulk report for information about Successful execution.
For bulk report the intermediate information about reports is stored in the database, and in the given time a bulk message is created from them and sent to the user.
 |
Click Save to save the changes. If you try to leave the Settings for Default Notifications page without saving, the system will show a confirmation dialogue (2).
 |
Click Saveto confirm the changes, or Discard Changes (3) to leave the page without saving the changes.
Users Page
Users Page
This section contains a guide on how to manage, create and edit users in the UnifiedViews system.
The Users page is visible for users with an Administrator role only and is used to create and view users in the system.
The following topics in this section will guide you through these options:
Create a User — This section contains a short guide on how to create a user in UnifiedViews.
Edit an Existing User — This section contains a short guide on how to edit existing users in UnifiedViews.
The Users page is represented as a table that contains the following columns:
ID: a user's ID.
User Name: a name used to log in to the system.
Full Name: the first and the second names of a user.
Administrator: a user with an Administrator role.
User: is a user with a User role.
Role(s): a user's role or roles:
Actions:

Edit icon used to view a user's details and edit them.

icon used to remove a user from the system.
Above the table, there are these buttons:
Create New User: for creating a new user in the system.
Reset Filers: for clearing filters of the table.

Create a User
Create a User
This section contains a short guide on how to create a user in UnifiedViews.
Note
You need a user with the Administrator role assigned to it to be able to create users.
To create a new user in the system, click Create New User (1).

After that the User's Details dialogue will be shown:
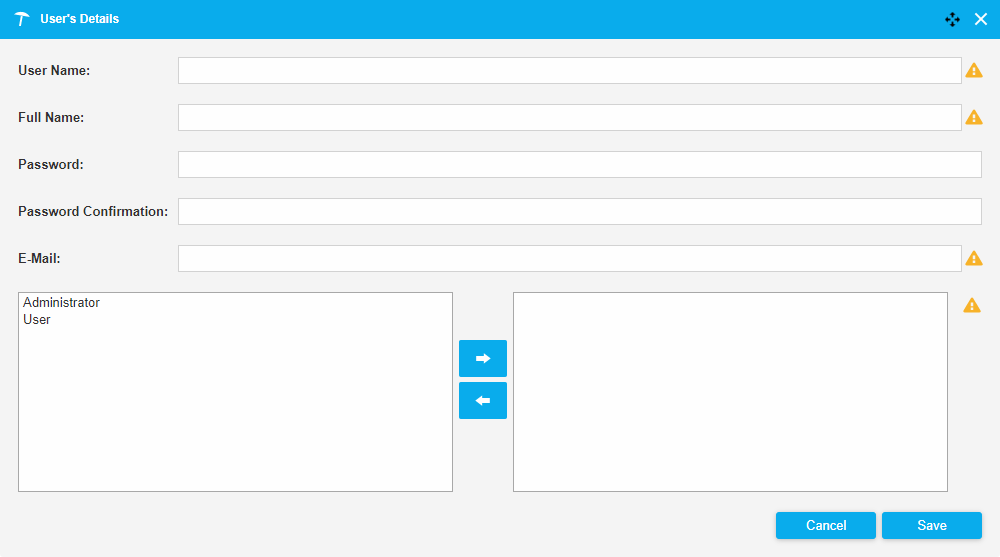 |
In this dialogue as Administrator you need to fill in:
User Name (mandatory): a name to log in to the system.
Full Name: the first and the second names of a user.
Password and Password confirmation(optional): as Administrator you can assign a password to a user. In this case values in both fields will be checked for equivalence. If an admin does not fill the fields, the password will be generated automatically by the system after clicking Save.
E-Mail (mandatory): to this e-mail the user will receive notifications about the scheduled pipeline executions. The system controls the correct format of an e-mail address. If an e-mail is in an incorrect format, an exclamation mark on the right side of an e-mail field will be shown. In this state a user record cannot be stored.
Defined Roles column (mandatory): a user's role or roles, select and click the arrow buttons to add or remove a user role to a user. Adding them for the current user means, move it to the column on the right.
Administrator
User
Note
The fields User Name, E-Mail, and the Defined Roles column are mandatory fields. If at least one of these fields is empty, on the right side of the field a yellow exclamation mark is displayed. In this state a user’s record cannot be stored. The user will get an error message in attempting to save settings.
Edit an Existing User
This section contains a short guide on how to edit existing users in UnifiedViews.
In the Users page, click the Edit icon (1) in the particular user's row in the table.

After that the User's Details dialogue will be shown. It contains the details of the selected user:
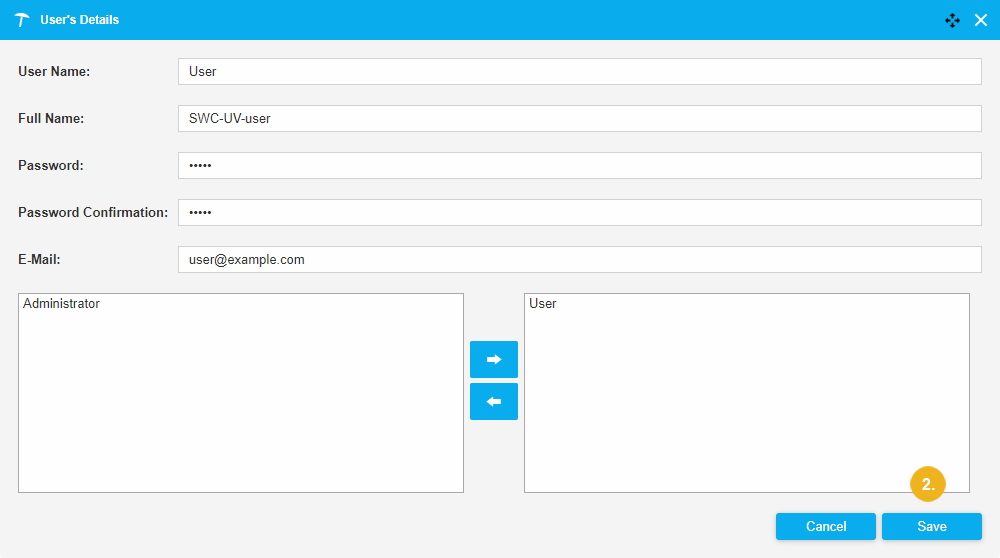 |
Click Save (2) to confirm your changes.
Delete Debug and Working Data Page
Delete Debug and Working Data Page
This section contains a short guide on how to use the Debug and Working Data page in UnifiedViews.
The Debug and Working Data page is visible for users with an Administrator role only and is used to delete all intermediate graphs created by the pipelines in the debug mode.
As a user with Administrator role needs to follow these steps:
In the main menu, click SETTINGS. Select the Debug and Working Data entry. The Debug and Working Data page will open.
In the field enter a number of days data is supposed to be older and which should be deleted. Click Delete.
 |
Note
Deleting will start without a confirmation dialogue, so be sure you are ready to delete.
The space beside Status will show a written report on the actual status of what is going on.
Also in this section you can see the last state of a graph deleted.