Create Custom Attributes
PoolParty allows you to add new attributes to your custom ontology. Learn how with this step-by-step guide.
You can add custom attributes to a custom ontology. For more information on how to create a custom ontology, refer to Create a Custom Ontology.
Note
You can also add custom attributes to custom schemes. For more information, refer to Add Classes, Relations and Attributes to Your Custom Scheme.
Open the Ontology Management by clicking its icon on the toolbar.
Go to Custom Ontologies and right click the node representing the custom ontology to which you want to add a new attribute.
Select New Attribute.
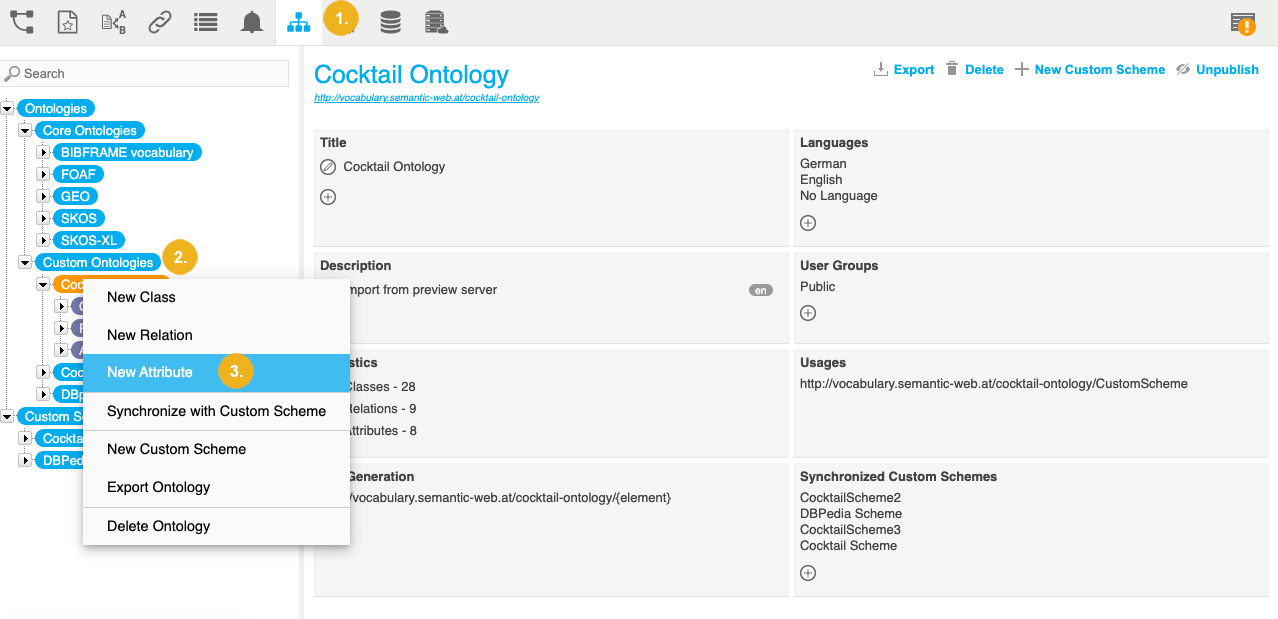
The New Attribute dialog opens.
Specify all mandatory settings. For more information, refer to the Mandatory Settings on the New Attribute Dialog section below.
Optional: Specify the optional settings. For more information, refer to the Optional Settings on the New Attribute Dialog section below.
Confirm with Create.
Open the Ontology Management by clicking its icon on the toolbar.
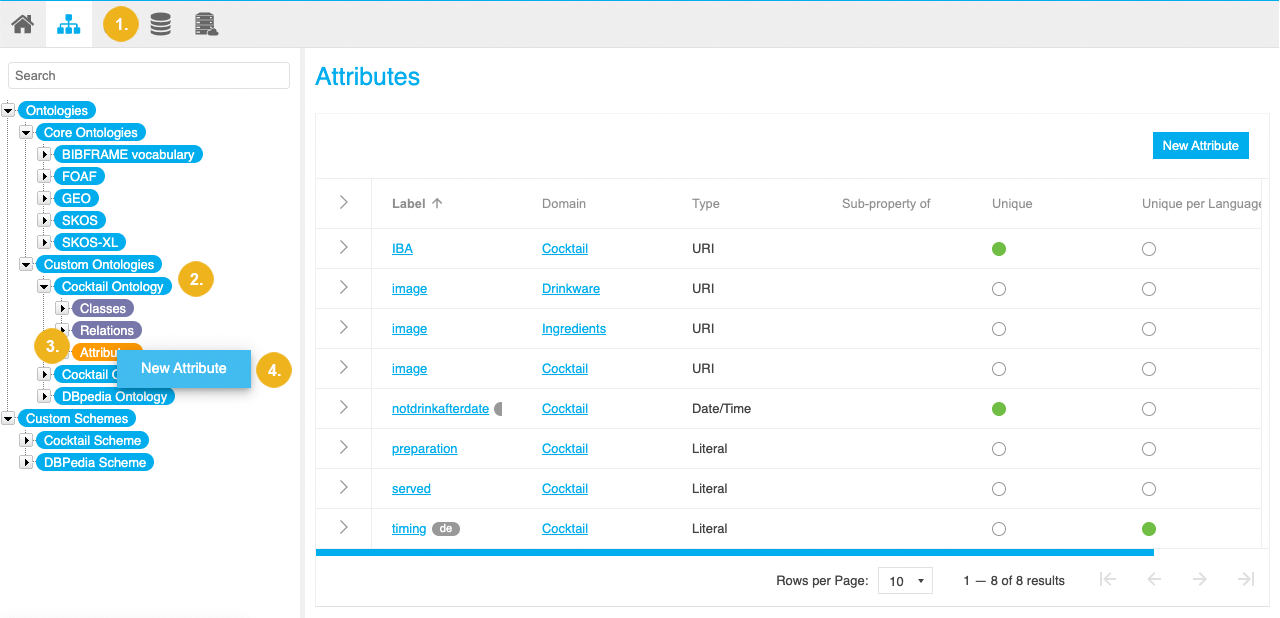
Go to Custom Ontologies and expand the node representing the custom ontology to which you want to add a new attribute.
Right-click Attributes.
Select New Attribute.
Tip
Alternatively, you can access this option by double clicking the Attributes node.
The New Attribute dialog opens.
Specify all mandatory settings. For more information, refer to the Mandatory Settings on the New Attribute Dialog section below.
Optional: Specify the optional settings. For more information, refer to the Optional Settings on the New Attribute Dialog section below.
Confirm with Create.
Open the Ontology Management by clicking its icon on the toolbar.
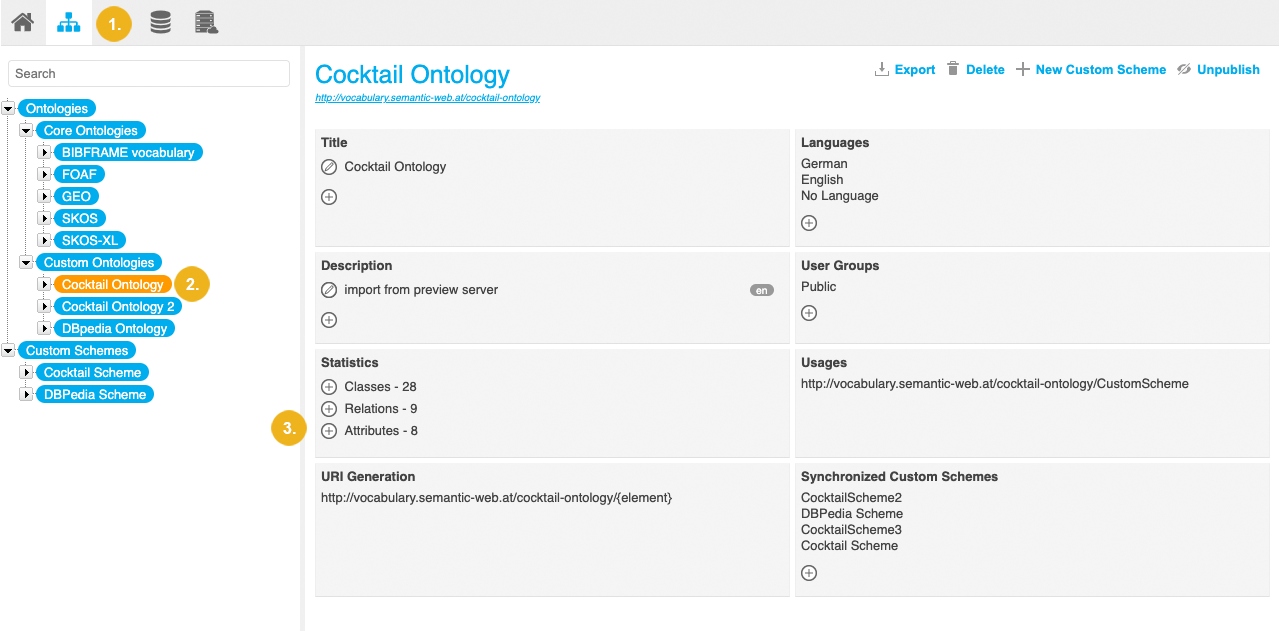
Go to Custom Ontologies and select the node representing the custom ontology to which you want to add a new attribute.
Click Add next to Attributes on the ontology Details View.
The New Attribute dialog opens.
Specify all mandatory settings. For more information, refer to the Mandatory Settings on the New Attribute Dialog section below.
Optional: Specify the optional settings. For more information, refer to the Optional Settings on the New Attribute Dialog section below.
Confirm with Create.
Open the Ontology Management by clicking its icon on the toolbar.
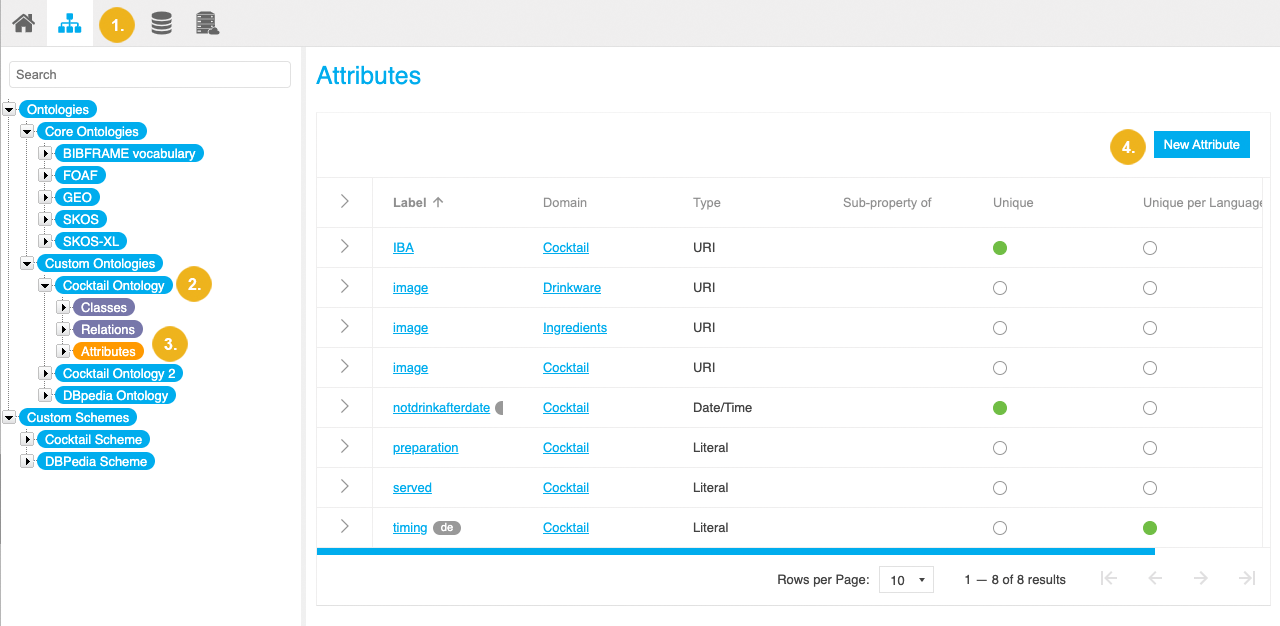
Go to Custom Ontologies and expand the node representing the custom ontology to which you want to add a new attribute.
Select the Attributes node.
Select New Attribute.
The New Attribute dialog opens.
Specify all mandatory settings. For more information, refer to the Mandatory Settings on the New Attribute Dialog section below.
Optional: Specify the optional settings. For more information, refer to the Optional Settings on the New Attribute Dialog section below.
Confirm with Create.
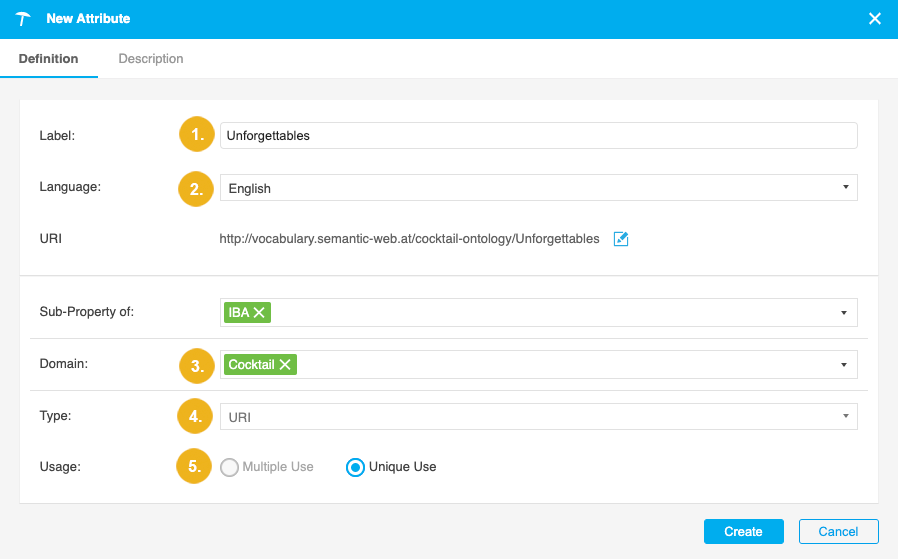
Label (1): name of the attribute.
When you start typing, PoolParty displays every available class from every active predefined and custom ontology via autocomplete. That way you can reuse existing classes.
The specified name without spaces is appended to the base URI and scheme identifier forming an attribute URI. For more information on how to define the URI pattern, refer to Define the URI Pattern for a Custom Ontology or Custom Scheme.
Language(2)
Language of the new attribute. This list depends on the language settings for the custom ontology.
Domain (3)
You can select from all classes available in the ontology. In addition, the SKOS classes 'Concept', 'Label' and 'Concept Scheme' are available.
Selecting No Restriction (default) allows you to use the attribute regardless of the classes assigned to the resources between which you create the relation.
Type (4): type of the attribute.
The selected type determines the data type of your attribute. You can find a list of available data types here: Available Attribute Types.
Usage (5): defines whether an attribute can be used multiple times or only once per resource.
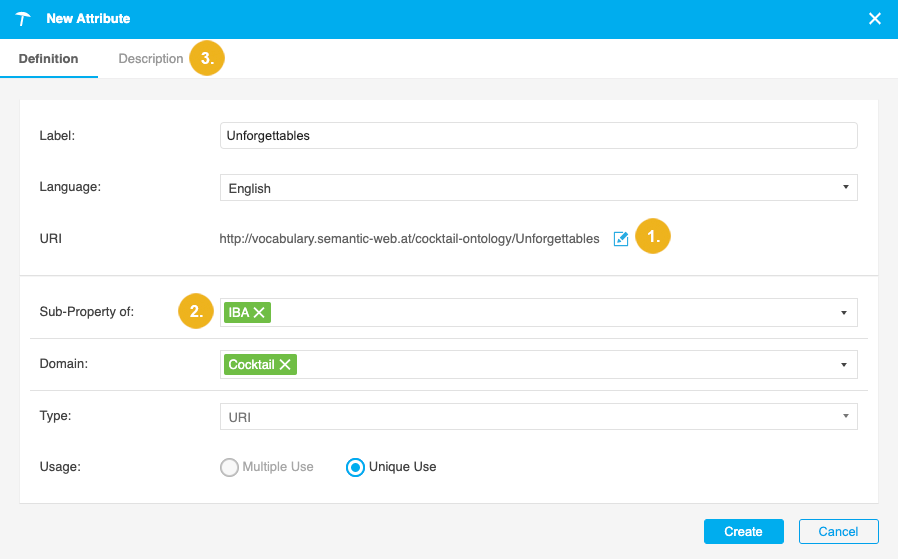
Use the Edit icon (1) to edit the pre-filled attribute URI.
Sub-Property of (2)
If you want this attribute to be a sub-property of another, select the parent attribute from the relations in the ontology and all SKOS relations.
To add a description for the new attribute, go to the Description tab (3).
Note
Below you can see the OWL statements created for an attribute. As you can see a directed relation is defined as an owl:DataTypeProperty and rdfs:label is used for the name. rdfs:domain is used to define the respective class restrictions for the Domain. rdfs:range is used to define the data type restriction for the Range e.g. rdfs:Resource for attribute type URI. Finally, rdfs:comment is used for the description. To indicate Unique Use the relation in addition becomes an owl:FunctionalProperty. The definition of a sub-property is done via the rdfs:subPropertyOf relation.
<http://doku.poolparty.biz/cocktail-ontology/primaryImage> a owl:DatatypeProperty, owl:FunctionalProperty;
  rdfs:domain <http://doku.poolparty.biz/cocktail-ontology/Cocktail>;
  rdfs:label "Primary Image"@en;
  rdfs:comment "Image to be primary used to illustrate the resource."@en
  rdfs:range rdfs:Resource;
  rdfs:subPropertyOf <http://doku.poolparty.biz/cocktail-ontology/Image>.