Upgrade PoolParty 8.1 to PoolParty 9.0 on Linux
Introduction
To upgrade your PoolParty installation, follow the steps described below. PoolParty's automated upgrade process for GNU/Linux hosts makes this process a breeze.
Warning
We strongly recommend to completely back up your installation before you try to perform an upgrade. Be advised that the users of PoolParty need to refresh their browser's cache after an upgrade. Failure to do that might result in unexpected behavior when using PoolParty (this is a common phenomenon for applications using Ajax technology). Please refer the users to the Troubleshooting in the user manual for instructions on how to clear cache of their browser.
Note
You need OpenJDK 11 or 17 to run PoolParty.
Note
These instructions assume you are upgrading a PoolParty default installation for GNU/Linux with PoolParty installed at /opt/poolparty, unless otherwise stated.
Note
You have to complete Keycloak infrastructure preparation to be able to externally access Keycloak. For more details on Keycloak configuration refer to Keycloak Infrastructure Preparation.
PoolParty comes with Keycloak as an authentication and authorization service. A relational database is recommended to run Keycloak. Keycloak comes with H2 as an embedded database.
Important
In accordance with the Keycloak documentation, we recommend using a proper database service instead of the default database Keycloak comes with. For more information on how to migrate to a proper database service, refer to Migrate a Keycloak Embedded Database to a Database Service (Linux).
Note
On upgrade we replace SesameSetup.xml file in the config folder. Backup of the original file is done and this is stored in /opt/poolparty/config/SesameSetup.old file.
In order to upgrade you need to stop the PoolParty server.
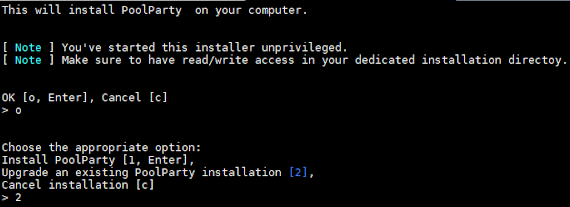
This opens a dialogue in the terminal. Press Enter to start the process.
In the next step, enter option '2' and press Enter.
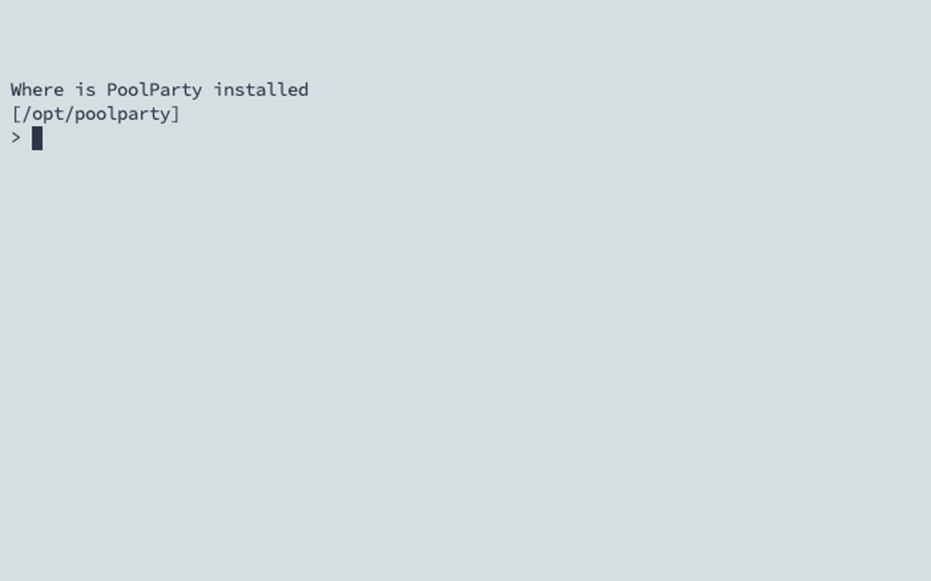
Provide the path for your PoolParty application directory (default: /opt/poolparty). Enter the path of your installation if different than /opt/poolparty and press Enter or just press Enter to use the default path.
If a PPDataDir is found in the PPAppDir the upgrade just skips the next step.
If your installation has a separate path for the PPDataDir enter the path and hit Enter.
You are presented with an overview of the settings you made. You can then finalize the upgrade process by pressing Enter.
SETTING                                                  VALUE
Installation directory                                   /opt/poolparty, Access: OK
Data directory                                           /opt/poolparty/data, Access: OK
PoolParty user:group                                     poolparty:poolparty
Upgrade from 8.1.8 to 9.0.0                              OK
Before you upgrade, make sure that you have a working backup of your existing installation.
This installer can copy the existing PoolParty installation and its data folder to your home folder.
Proceed upgrade?
Backup PoolParty & upgrade [o, Enter], Upgrade only [u], Cancel [c]
> u
Upgrading PoolParty ...
[DEBUG] PoolParty properties file found, reading encrpytion salt and password
::: Auth service initialisation START :::
[ Note ] Authentication service admin  credentials: poolparty_auth_admin/<some-generated-passphrase>
 Configuration is on the way ...
 PoolParty superadmin userID: 6a56616e-d8e8-48db-b642-c7cea4dd5319
 PoolParty Group name Public , GroupID: af33fee8-b6c1-431b-9a0b-11640fe1596a
::: Auth service initialisation   END :::
[ Note ] Superadmin Migration credentials: poolpartymigrate/<some-generated-passphrase>
 update graphdb license
Modified configuration files
FILE          CHANGES
Index         NEW, Binaries updated
Tomcat        NEW, Binaries updated
Auth Service  NEW, Auth service configured
PoolParty Upgrade to 9.0.0 successfully completed!
Assuming that the public URL to Keycloak is https://keycloak.domain.org/auth where keycloak.domain.org should be replaced with the actual domain name assigned to Keycloak by your organization, then the following variables should be set accordingly to reflect this URL in the respective configuration files:
Note
Note that it is assumed that the PoolParty installation directory is /opt/poolparty. Please adapt accordingly when PoolParty is installed to a different location.
PP_auth_server_urlin/opt/poolparty/config/poolparty.confserverUrlin/opt/poolparty/config/keycloak/admin-keycloak.jsonauth-server-urlin/opt/poolparty/config/keycloak/ppt-keycloak.jsonauth-server-urlin/opt/poolparty/config/keycloak/ppgs-keycloak.jsonauth-server-urlin/opt/poolparty/config/keycloak/ppx-keycloak.json
Additionally the actual domain name part of the URL (e.g., keycloak.domain.org) should be set to the value of variable hostname in file /opt/poolparty/auth_service/keycloak/conf/keycloak.conf
Keycloak automatically starts when PoolParty is launched. Once PoolParty starts, please verify that Keycloak is correctly accessible by visiting the corresponding Keycloak URL https://keycloak.domain.org/auth
Post-Upgrade Tasks
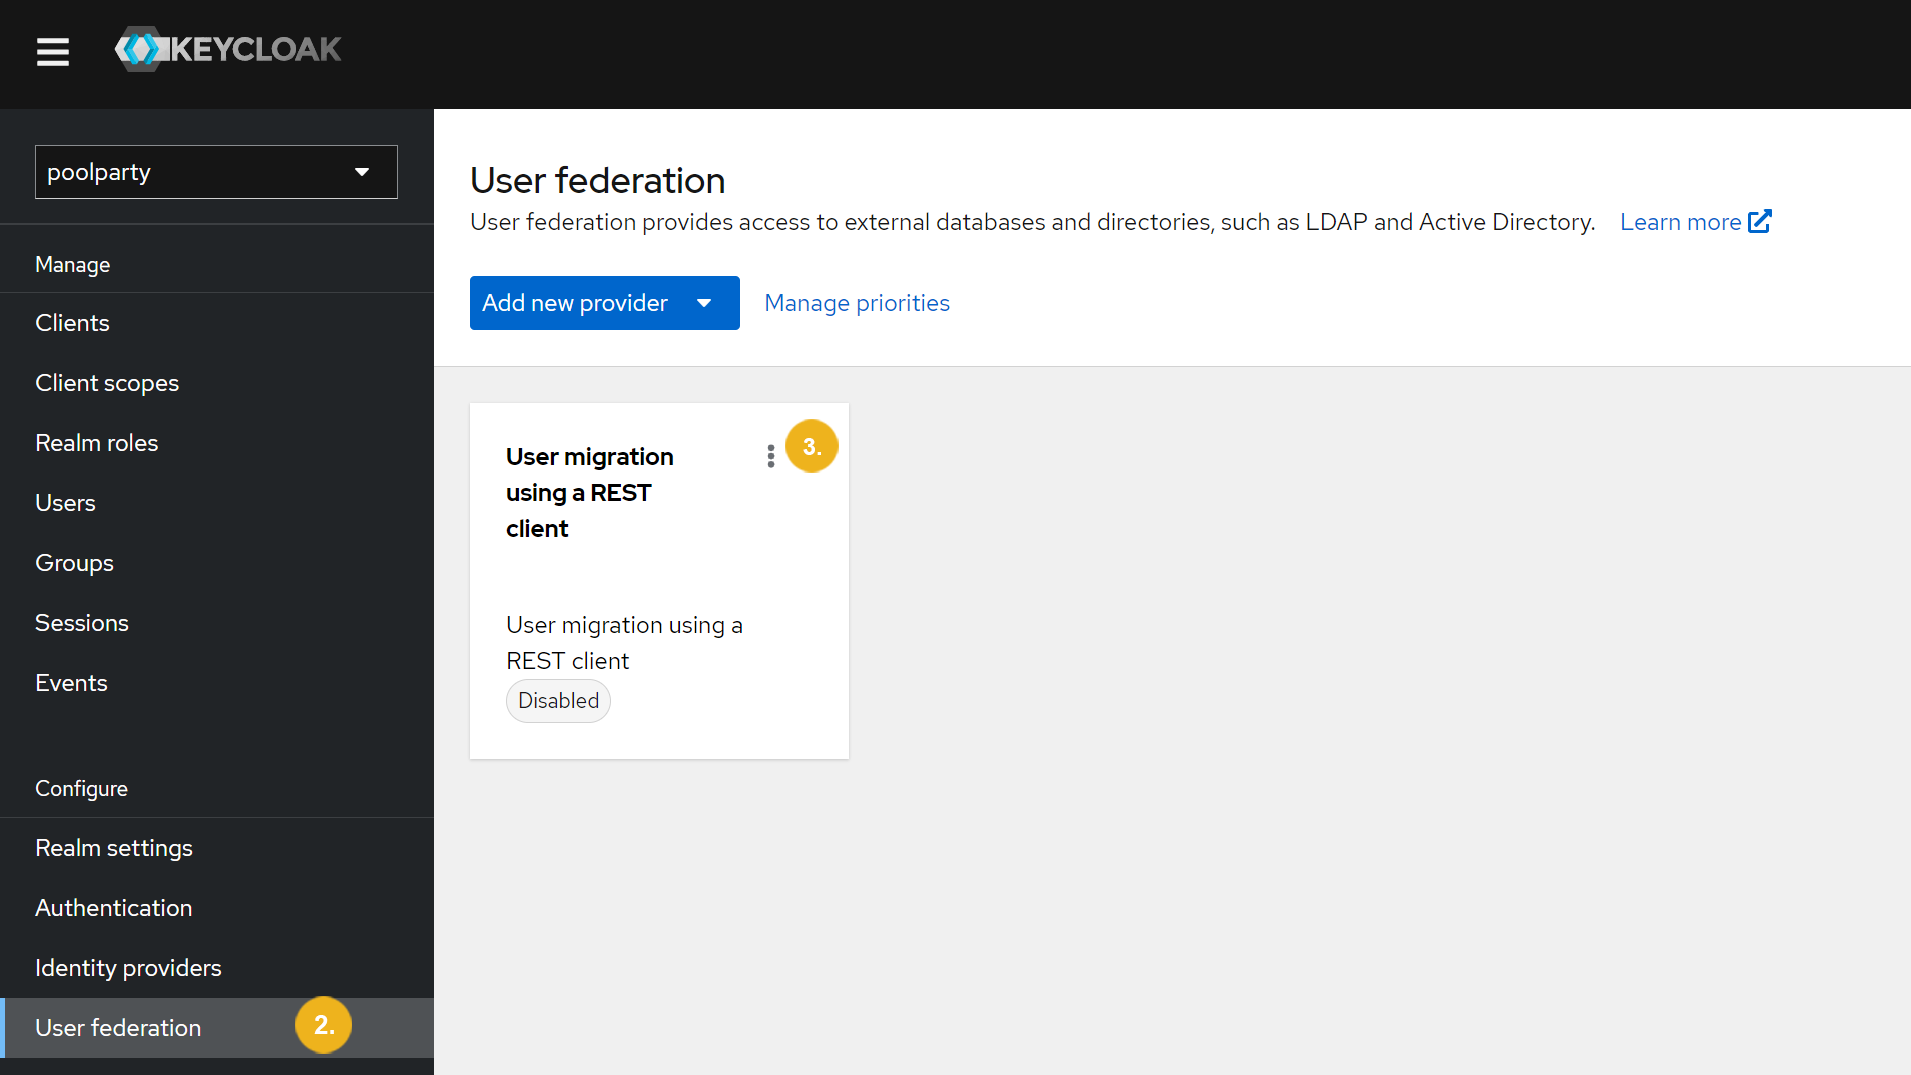
After you upgrade PoolParty, users get migrated on-the-fly when they log in for the first time. To make this possible, the installer creates and preconfigures a user federation called User migration using a REST client in Keycloak. If you run PoolParty on a port different to the default port, you need to adapt the settings of this user federation.
Access Keycloak. For more information, refer to Access Keycloak for PoolParty On-Premise.
Go to User federation.
Select User migration using a REST client.
Change the Rest client URI to include the port number.
For example, if you use port 8081, change it to
http://servername:8081/poolparty-user-migrator/users.Confirm your changes with Save.
Note
Users are migrated only when they log in for the first time. A user does not exist in PoolParty until the user logs in and runs migration. This means in PoolParty user administration view you might find users "disappeared" from the list of all users. It is temporary since a user only shows up in the list after migration. Therefore, the list of all users will grow towards completion gradually as users finish migration.
You have to clear your browser cache after the upgrade as changes to CSS and javascript used in the PoolParty UI have been done.
After you login into PoolParty for the first time after the upgrade, you have to run the PoolParty migration script:
https://<your-serverurl>/PoolParty/!/migrate/upgrade
The script lists all updates that will be done. Trigger the migration by clicking Start Migration.
A progress bar and an info box show the progress and status of the migration. When the process has been finished an overview of the migration steps per project is provided.
For more information, refer to Migrate Data From PoolParty 8 or Higher to 9.0 or Higher.
Changes to the configuration of the PoolParty extraction model have been done. You have to recalculate all extraction models after the upgrade.
Note
You need to have the Superadministrator role assigned to be able to run those scripts.
Tip
For more information on how to secure the PoolParty's backend, refer to Provide Secure Backend for PPT (Linux).
For more information on how to migrate server and project data, refer to PoolParty Data Migration From Version 8 or Higher to Version 9.0.1 or Higher.