Importing a Project
30/09/2025
You can also import an existing project into your Thesaurus Manager.
Tip
Importing a project is very similar to creating a new project.
In the PROJECT menu, select Import Project to import a project. This opens the following dialog:

You have to select a file (1) by clicking on the Choose file field and then selecting the desired project file. To continue click Import (2). If you want to abort this operation click on Cancel (3).
Tip
The supported file import formats include PoolParty archive file (.ppar), RDF file and spaces (.brf, .jsonId, .xml and others) as well as tabular file formats (.csv, .xlsx and .xls). The selected project import file is a compressed .zip archive.
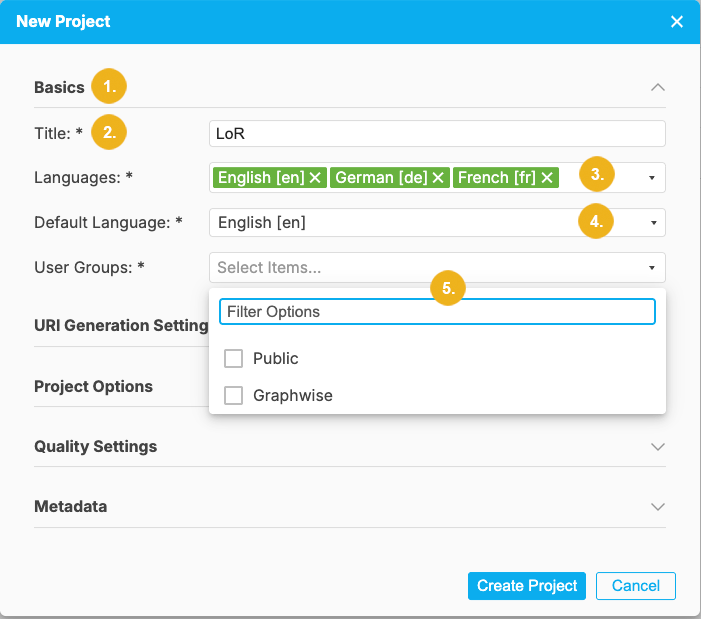
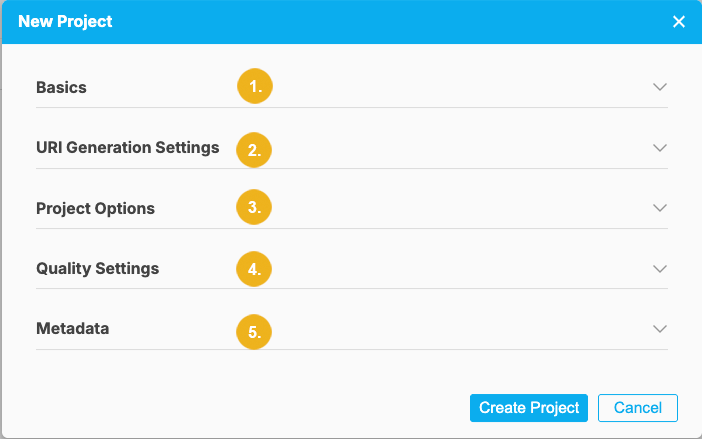
A click on the Import button opens the New Project dialog opens where you can enter information in five different sections:
Tip
All mandatory input fields are marked by a trailing asterisk.
Note
When you click on the arrow on the right pointing down you can access any of the five groups of settings for the new project. The Basics section is always open by default when you click on the New Project menu item.
Basics (1) - contains mandatory fields: Title, Languages, Default Language and User Groups
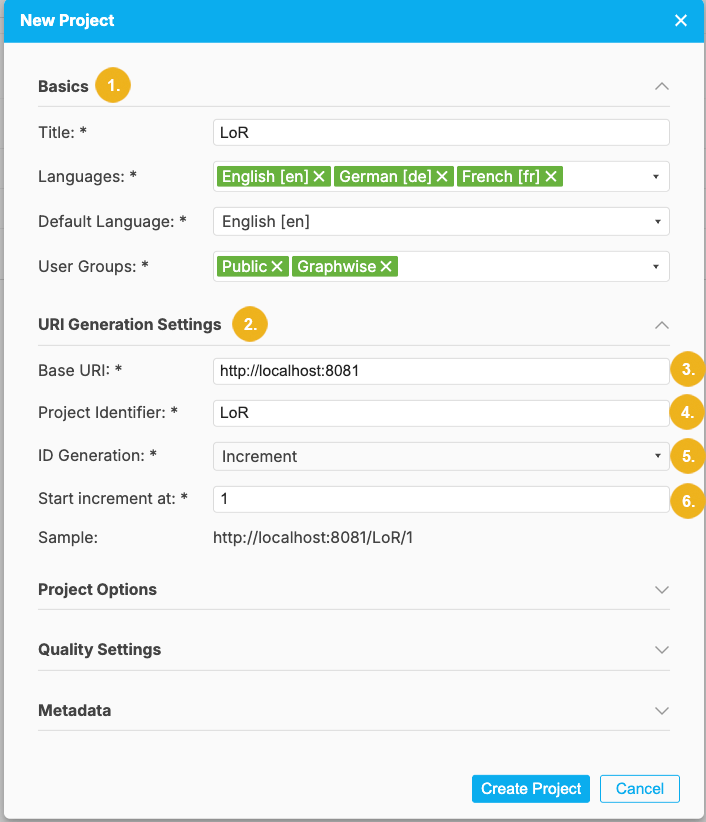
URI Generation (2) - the following mandatory settings are configured in this section: Base URI, Project Identifier, ID Generation, the starting increment for the ID generation. At the end of this section you see the sample of the URI.
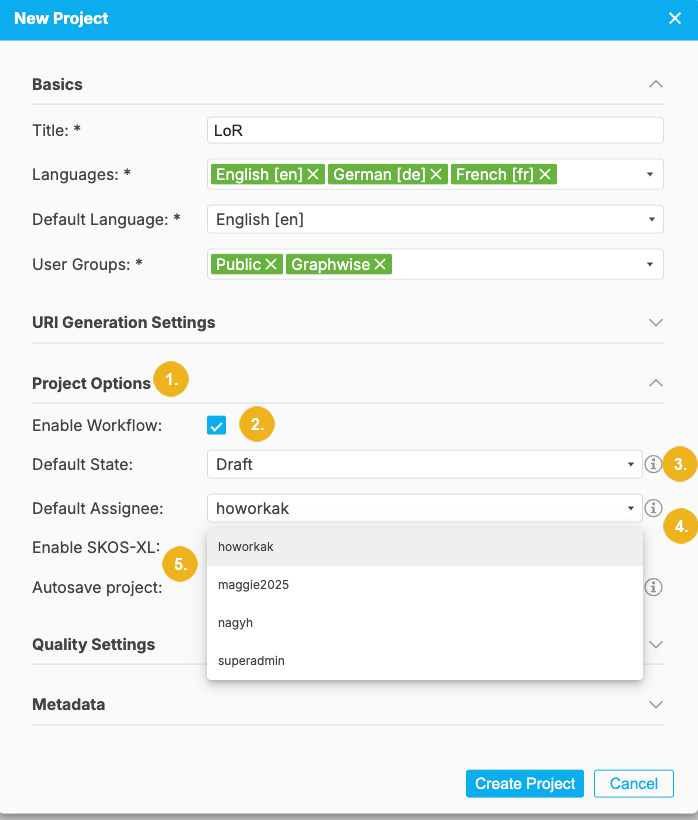
Project Options (3) - this section is comprised of two checkboxes - Enable Workflow and Enable SKOS-XL and three pulldown fields: Default State, Default Assignee and Autosave project.
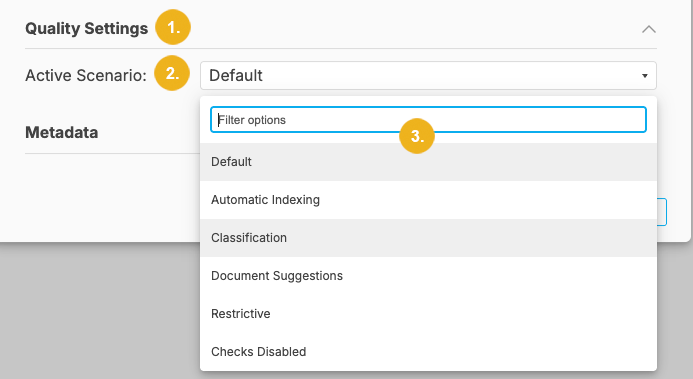
Quality Settings (4) - here you can select an Active Scenario to be used for your project.
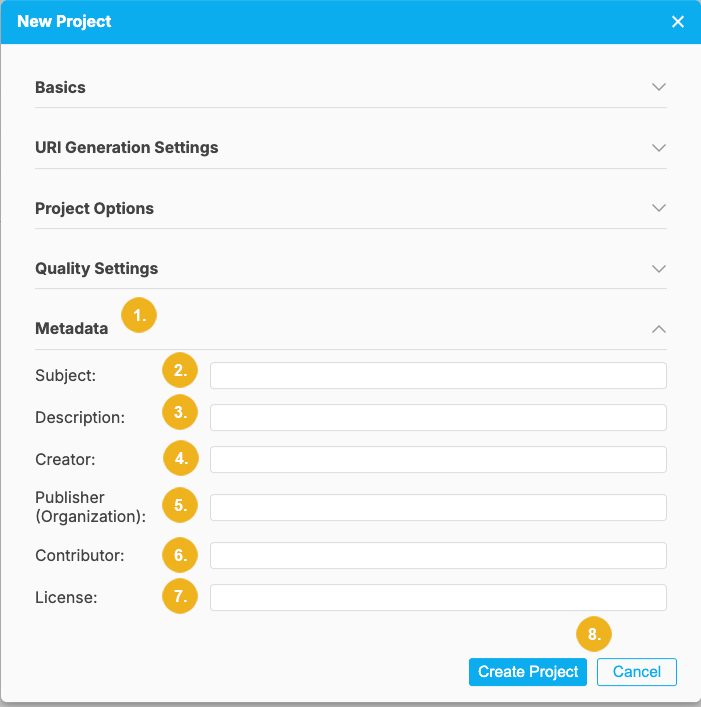
Metadata (5) is the last section containing the following fields: Subject, Description, Creator, Publisher (Organization), Contributor and License.
After having specified all mandatory details and desired optional information click on the Create Project button on the bottom of this dialog window to proceed with the project import or on Cancel to abort the operation and discard all inputs.
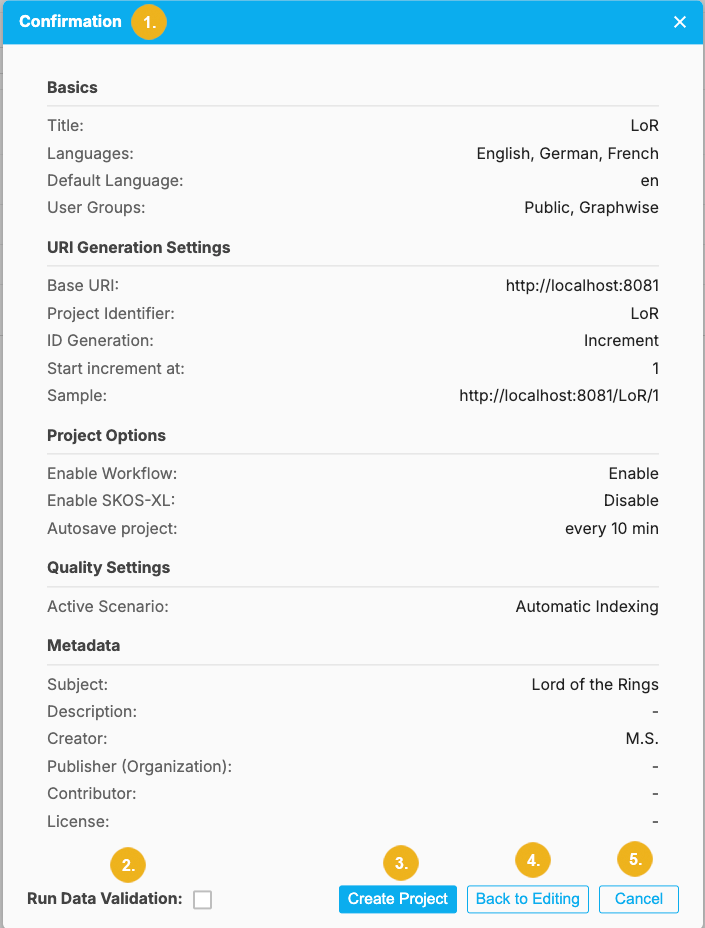
After clicking the Create Project button a new window opens showing all the details you have specified for your new project. At the bottom of this Confirmation window are three buttons and a checkbox:
Run Data Validation (2) checkbox - tick it to validate the imported data to ensure compatibility and data integrity.
Create Project (3) - if all details shown in this window are correct and you want to create this new project click this button.
Back to Editing (4) - if you want to change any of the details and settings, use this button to return to the previous dialog.
Cancel (5) - click this button to cancel the operation and discard all inputs.
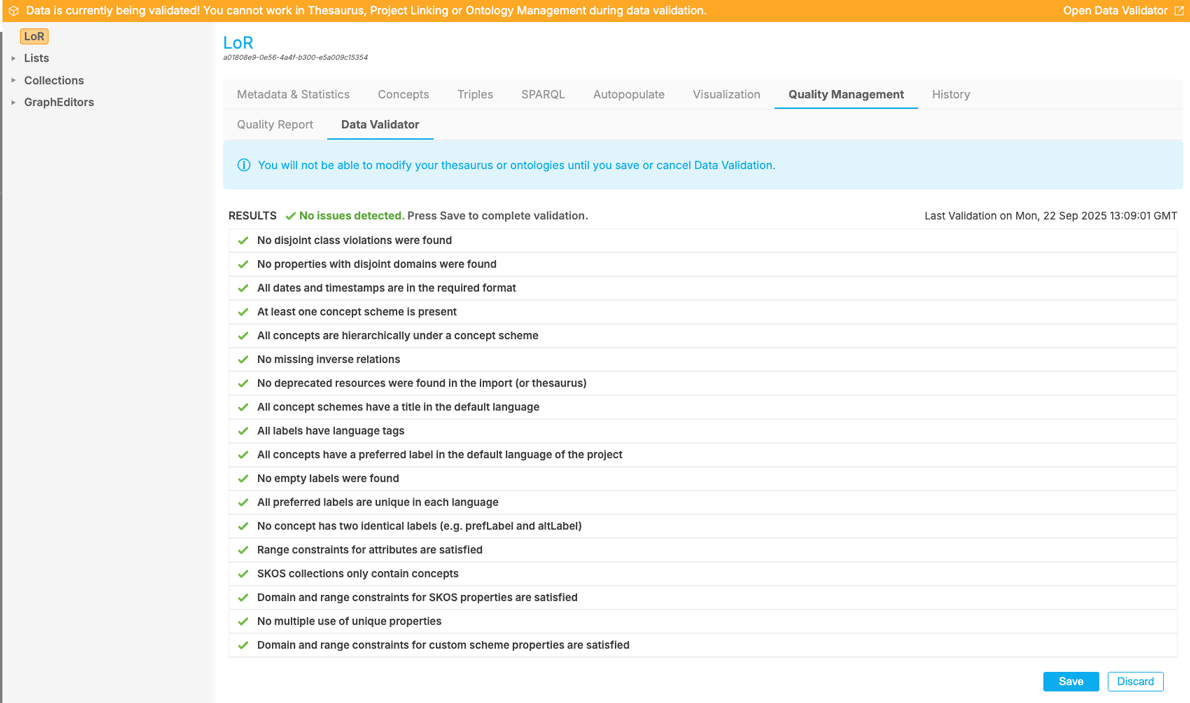
If you ticked the Run Data Validation checkbox the imported project data will be validated. At the end of the validation you will see a report specfiying whether there are any issues to be corrected or whether all data could be imported without problems.
Note
You can rerun data validation at any point. This function is available on the Project Details view by selecting Quality Management tab and then the Data Validator sub-tab displayed below.
