Access and Edit an Existing Jira Configuration
Access and Edit an Existing Jira Configuration
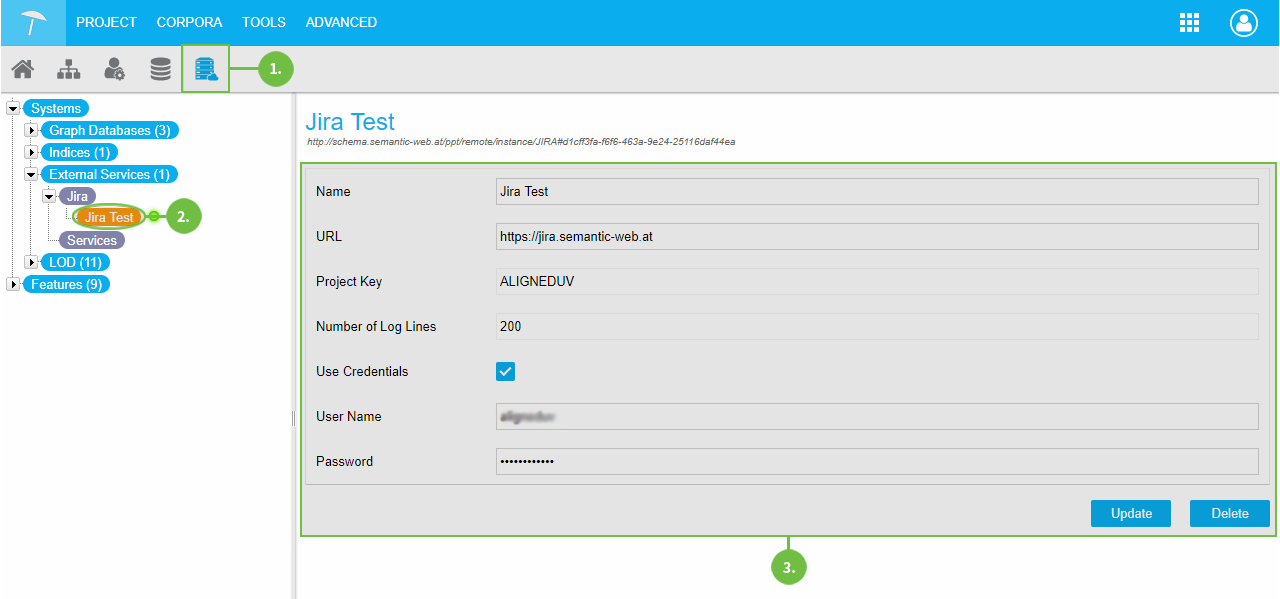
This section contains instructions how to access and configure an existing Jira connection configuration.
After you have accessed the SMC, the External Services node inside the Systems node can be expanded.
Expand the Jira node and find the Jira configuration there, in this case called 'Jira Test'.
Use the fields to edit values. Details on the available options find below.
After you changed the settings, click Update to save them.
Clicking Delete will delete the whole configuration.
Note
Clicking Delete will delete that configuration immediately, so make sure it is alright to delete.
 |
Available Options
Name: change the name to one of your choice for the configuration here.
URL: the URL at which the Jira instance can be reached online.
Project Key: Jira project key.
Number of Log Lines: Jira log file length, default value: 200 (recommended).
Use Credentials: activate the check box, if you want to use alternative user credentials for remote access.
User Name - Password: enter the values for the credentials to be used.