Upgrade PP 5.1 - 5.2 (Windows)
Upgrade PP 5.1 - 5.2 (Windows)
To upgrade your PoolParty installation, follow the steps described below.
Note
In order to upgrade to a specific PoolParty release, you must ensure that your current PoolParty installation is at the immediate previous release. In other words, you cannot skip any intermediate releases when upgrading PoolParty. For example, if your PoolParty installation is at version 5.0 and you want to end up at 5.2, you must perform the upgrade to 5.1 and then to 5.2.
Note that with release 4.1 a 64bit build of the Sun/Oracle Java 7 Runtime Environment is required for running a PoolParty server.
These instructions assume you are upgrading a PoolParty default installation for Windows with Apache Tomcat installed atC:/Programs/Apache Software Foundation/Tomcat 7.0/and PoolParty's data-files residing at C:\Users\Public\PoolParty\ or C:\Users\poolparty\PoolParty\ .
Upgrade Procedure
Before you upgrade, make sure you have a working backup of your existing installation.
STEP 1: Stop the PoolParty server via the Tomcat service application.
STEP 2: Start the PoolPartySetup.exe and follow the instructions on screen.
A dialogue with PoolParty upgrade information is displayed. Read the information carefully and acknowledge them before you proceed.
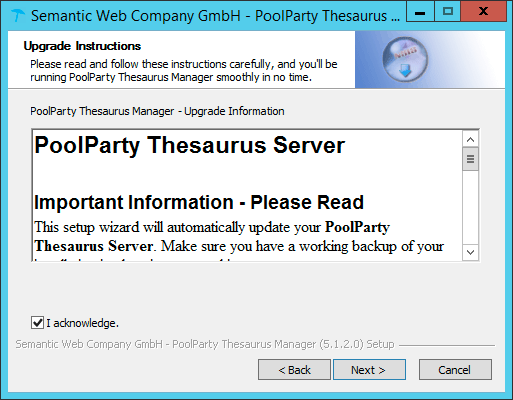
PoolParty Upgrade Information
STEP 3: Confirm correct location of data directory
In the next step you the current location of the data directory of your existing PoolParty installation is displayed. e.g.
C:\Users\Public\PoolParty\
Check if the correct location is preselected. Click Install to proceed with the installation.
STEP 4: Finalize the PoolParty upgrade
In the next step a progress bar indicates the progress of your upgrade. Click Next to proceed with the installation.
The following screen provides information about setting the Base URLs. With 5.2 the
Base URL for custom schemes and ontologies (e.g. http://schema.yourdomain.com) and the
Base URL for projects (e.g. http://vocabulary.yourdomain.com) have to be set explicitly.
The installer adds for both setting http://localhost, as the base URLs may be the same. We recommend to change the setting to appropriate values after the installation.
The setting is stored in the poolparty.properties file and can be changed anytime if needed. Read the information carefully and acknowledge them before you proceed.
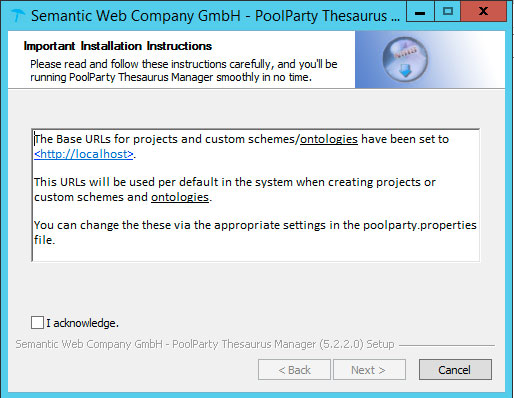
Base-URI info
Klick Finish to close the installer.
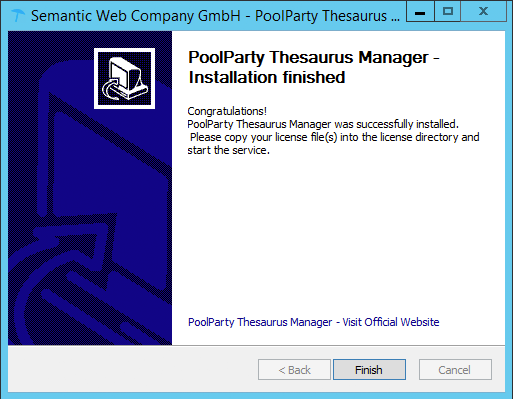
PoolParty upgraded finished
STEP 5: Start your PoolParty server
Run Post Update Scripts
After you login into PoolParty for the first time after the update, you have to run the PoolParty migration script:
http://<your-serverurl>/PoolParty/!/migrate/upgrade
The script lists all updates to twill be done. The migration is triggered clicking the Start Migration button. A progress bar and an info box show the progress and status of the migration. When the process has been finished an overview of the migration steps per project is provided.
Note
You need to have the Superadministrator role assigned to be able to run those scripts.
You have to recalculate all extraction models after the upgrade.