Edit Triggers for an Existing Webhook Notification
Edit Triggers for an Existing Webhook Notification
This section contains a short guide on how to edit Triggers for notifications in the Notifications or Webhook nodes' Details View.
After you have created webhook notifications, you find them below the Notifications node and on activating either the Webhook or Notifications node.
How to Edit Triggers in the Webhook or Notifications Node
The tabular display for the Triggers editing in both nodes look the same, so this is the process to follow:
In your opened PoolParty project, open the Notifications Dashboard by clicking its icon in the toolbar.
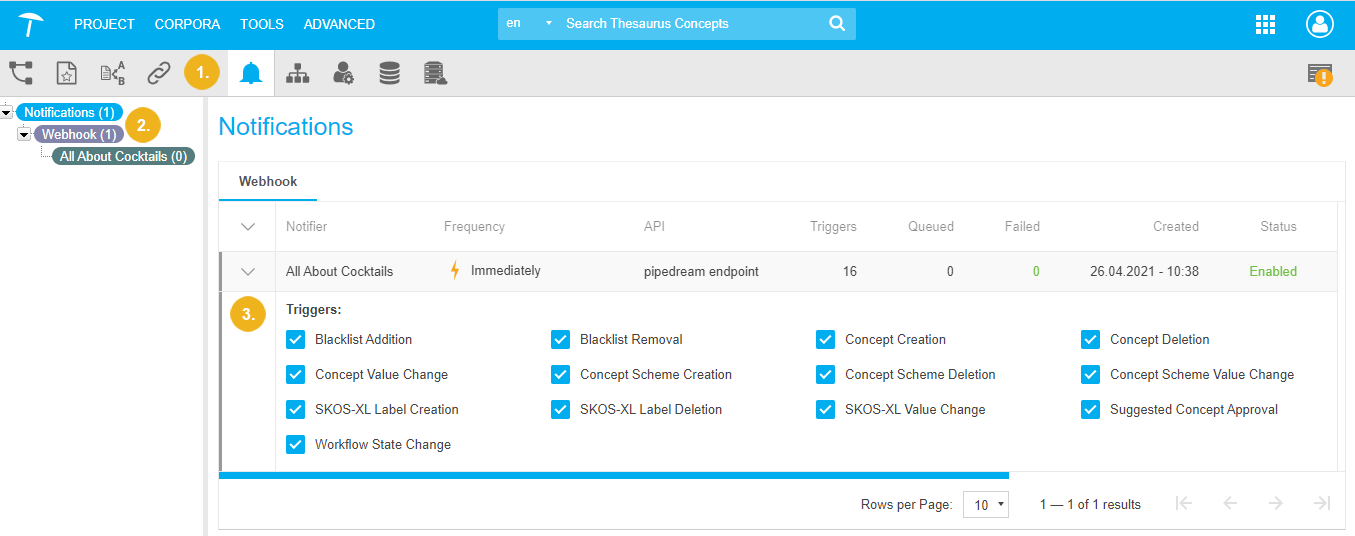
Activate either the Webhook or the Notifications node, click the Webhook tab (opens by default) and expand the Arrow icon to the left of the notification.
The Triggers and their check boxes will be expanded below the notification entry. Activate or deactivate triggers of your choice.
Your changes will take effect at once for the next notification in the queue or the next one to be sent, in case Frequency has been set to Immediately.
 |