Installation Guide (Linux)
Installation Guide (Linux)
This section provides detailed instructions on how to install PoolParty on Linux.
Introduction
Make sure that you have followed the prerequisites defined in the PoolParty System Requirements.
Note
An OpenJDK or a 64 bit build of a Sun/Oracle Java 11 SE Development Kit is required to run PoolParty.
Prerequisites
These installation instructions assume that a PoolParty standard installation will be made using the following options:
You have defined a user (e.g. 'poolparty') on the server assigned to a respective group (e.g. poolparty) that should be used to run the Tomcat server. That user has to be able to execute the sudo command. Refer to the respective Linux distribution's documentation for particulars of commands and permission settings.
The target system is running on a 64 bit Linux server.
PoolParty Tomcat will be running as localhost using port 80
PoolParty's built in Apache Solr server will be running as localhost using port 8983
PoolParty installer (PoolParty.run) has been downloaded from our download area.
Note
Make sure permissions also are set on the /tmp folder, that allow the current user and group read, write and execute rights on it.
The installation files will be extracted to it and be run from there. Although default on Linux, variants are generally allowed and would cause issues.
Installation Procedure
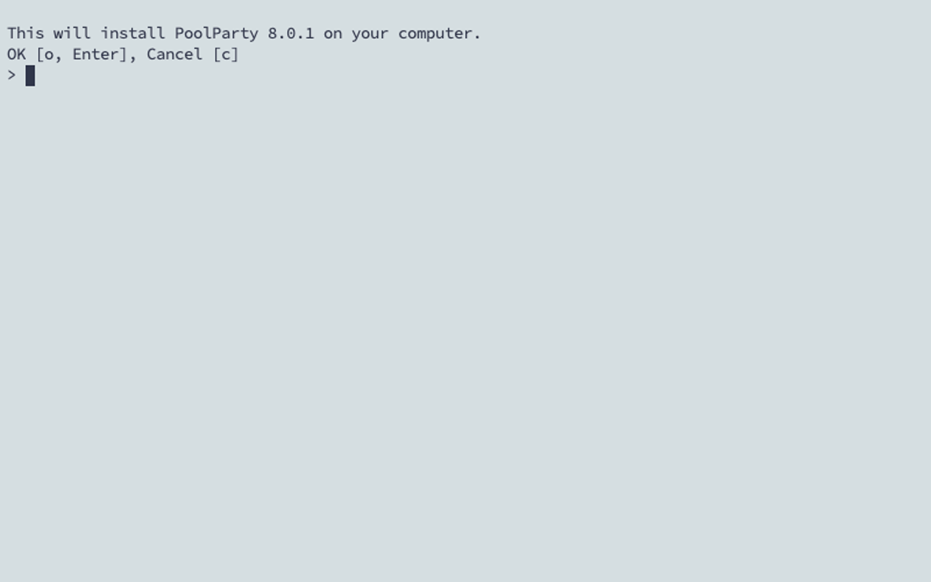
STEP 1: Run the Installer PoolParty.run from a Terminal Window
This will open a dialogue in the terminal. By hitting Enter you start the process.
STEP 2: Start Installation Mode
In the next step choose to do a new installation by hitting Enter.
STEP 3: Check and Adjust the PoolParty Application Directory (PPAppDir) and the Location for the PoolParty Data Directory (PPDataDir)
In this step you can define the path for your PoolParty Directory Structure Linux (default: /opt/poolparty).
Enter the path you want to use or hit Enter to use the default path.
In addition you can define the path for your PoolParty data directory (default: /opt/poolparty/data).
Enter the path you want to use or hit Enter to use the default path.
STEP 4: Define User and Group
In this step define the user that will be used Controlling PoolParty (Linux) (default: poolparty).
Enter the user you want to use or hit Enter to use the default user.
In addition, you can define the group that will be used running the PoolParty application (default: poolparty).
Enter the name of the user group you want to use or hit Enter to use the default group. The group you enter will be created, if it doesn't exist.
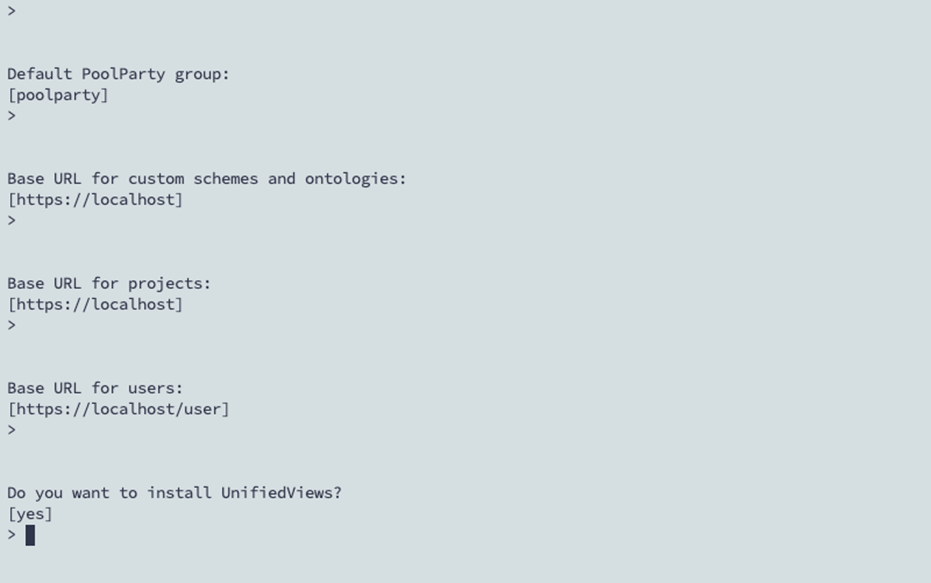
STEP 5: Adapt Base URLs
In this step you can define the base URLs used in PoolParty per default to create projects, ontologies & custom schemes or users.
Note
We recommend to adapt the Base URLs to meaningful values according to the URI Pattern Strategy Planning to be used for creating data in PoolParty. Changing them later might also imply changes in already created data.
Firstly you have to define the base URL for custom schemes and ontologies (default: http://localhost).
Enter the Base URL you want to use or hit Enter to use the default base URL.
Secondly you have to define the Base URL for projects (default: http://localhost).
Enter the Base URL you want to use or hit Enter to use the default base URL.
Finally, you have to define the Base URL for users (default: http://localhost/user).
Enter the Base URL you want to use or hit Enter to use the default Base URL.
Tip
The respective variables are set in the The poolparty.properties File and you can change them at a later time if needed.
STEP 6: Install PoolParty UnifiedViews (optional)
UnifiedViews, available with PoolParty Semantic Integrator, can be installed in this step.
Note
This will install UnifiedViews using the same Tomcat setup that is used for PoolParty, which is not the recommended way of doing it on a productive system.
We recommend using a standalone installation for such cases.
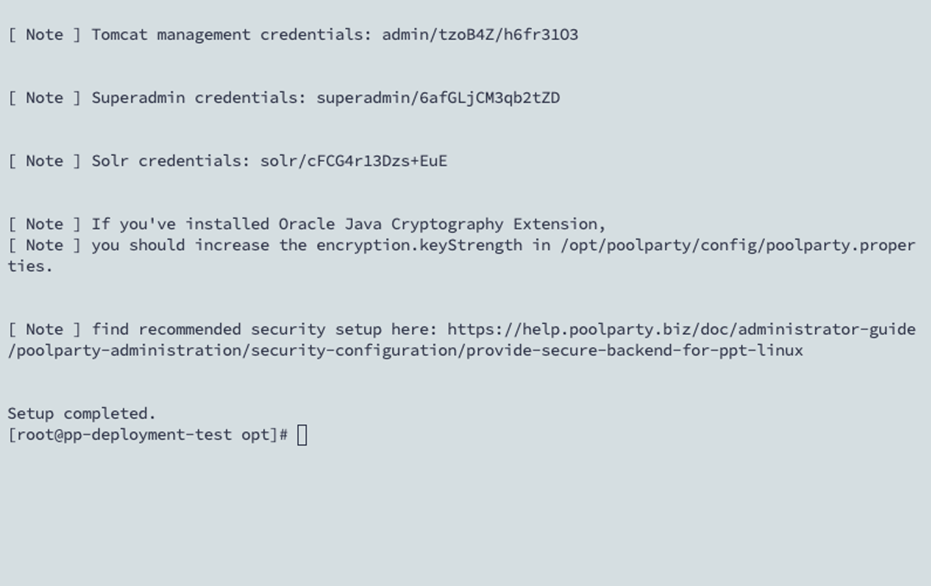
STEP 7: Finalize the Installation
You will be presented with an overview of the settings you made. You can then finalize the installation process by hitting Enter.
You will be presented with the credentials of the The Tomcat Web Application Manager and additional information regarding the installation process:
STEP 8: Move Your License Keys to the License Directory
Add your license keys to the license directory:
<PPAppDir>/config/licenses(default: /opt/poolparty/config/licenses)
STEP 9: Start PoolParty
Open a console and change to root:
sudo -i
Make PoolParty's infrastructure scripts and binaries executable:
chmod a+x /opt/poolparty/bin/*
<PPAppDir>/bin/poolparty start
Note
The PoolParty start script will also start and stop the packaged Solr server.
It may be possible that you need to specifically declare your JAVA_HOME, this can be configured in the\ poolparty.conf file. Similar to what you find in The poolparty.conf File (Linux)
If you are explicitly declaring your JAVA_HOME path as above, then you are able to do this for Solr as well. This can be set in <PPAppDir>/data/solr/solrcore.properties. Simply add the same JAVA_HOME line as you have done in poolparty.conf.
Post Installation Tasks
Open a browser and access your PoolParty installation via:
https://<your-server>/PoolParty/
You can log in with the user credentials created during the last installation step.
The following chapters in the Administrator Guide are relevant too: