Upgrade PP 5.0 - 5.1 (Windows)
Upgrade PP 5.0 - 5.1 (Windows)
To upgrade your PoolParty installation, follow the steps described below.
Note
In order to upgrade to a specific PoolParty release, you must ensure that your current PoolParty installation is at the immediate previous release. In other words, you cannot skip any intermediate releases when upgrading PoolParty. For example, if your PoolParty installation is at version 4.6 and you want to end up at 5.1, you must perform the upgrade to 5.0 and then to 5.1.
Note that with release 4.1 a 64bit build of the Sun/Oracle Java 7 Runtime Environment is required for running a PoolParty server.
These instructions assume you are upgrading a PoolParty default installation for Windows with Apache Tomcat installed atC:/Programs/Apache Software Foundation/Tomcat 7.0/and PoolParty's data-files residing at C:\Users\Public\PoolParty\ or C:\Users\poolparty\PoolParty\ .
Upgrade Procedure
Before you upgrade, make sure you have a working backup of your existing installation.
STEP 1: Stop the PoolParty server via the Tomcat service application.
STEP 2: Start the PoolPartySetup.exe and follow the instructions on screen.
In course of the upgrade Apache Tomcat will be upgrade to Tomcat 7. If no Apache Tomcat installation can be found on the server a message appears. Click Yes to install Tomcat.
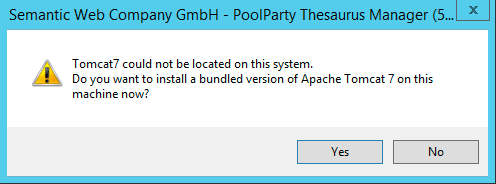
No Tomcat 7 installation
Next you are guided through the Tomcat Setup Wizard.
Note
Tomcat 7 will be setup using the default values (using port 80).
In the final dialogue of the tomcat installation deselect the "Run Tomcat" and "Read Me" checkboxes. Tomcat will have to be shutdown during the PoolParty installation. Not starting it saves one task to be done later.
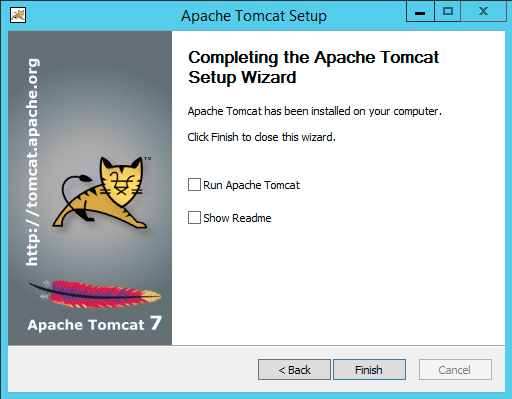
Tomcat installation
STEP 3: Start the PoolParty upgrade
After finishing the Tomcat installation a dialogue with PoolParty upgrade information is displayed. Read the information carefully and acknowledge them before you proceed.
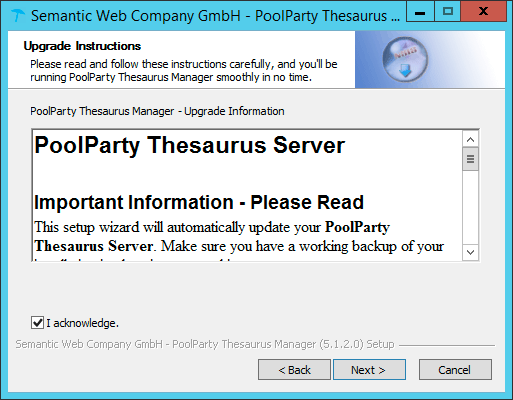
PoolParty Upgrade Information
STEP 4: Select data directory
In the next step you have to select the data directory of your existing PoolParty installation. e.g.
C:\Users\Public\PoolParty\
The correct location of your existing data directory should be preselected. Click Install to proceed with the installation.
STEP 5: Finalize the PoolParty upgrade
In the next step a progress bar indicates the progess of your upgrade. Click Next to proceed to the final installer dialogue.
Klick Finish to close the installer.
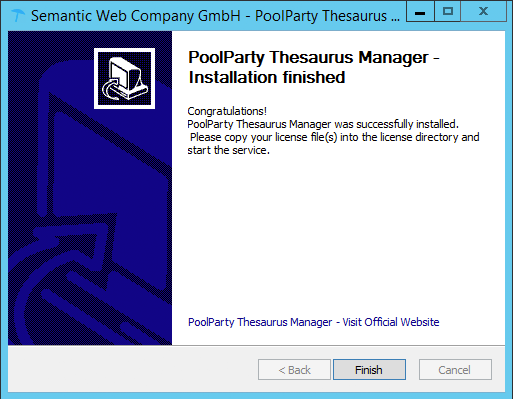
PoolParty upgraded finished
Note
These instructions assume you are upgrading a PoolParty default installation. That means that any custom changes done to the Tomcat or PoolParty Configuration have to be re-applied to the upgraded installation. This includes:
Changing the port or adding SSL support in the Tomcat server.xml.
STEP 6: Start your PoolParty server
Run Post Update Scripts
After you login into PoolParty for the first time after the update, you have to run the PoolParty migration script:
http://<your-serverurl>/PoolParty/!/migrate/upgrade
The script lists all updates to twill be done. The migration is triggered clicking the Start Migration button. A progress bar and an info box show the progress and status of the migration. When the process has been finished an overview of the migration steps per project is provided.
Note
You need to have the Superadministrator role assigned to be able to run those scripts.
You have to recalculate all extraction models after the upgrade.