Resource Nodes - Details Tab
Resource Nodes - Details Tab
This section contains a short guide on what the Details tab of an opened resource in your graph editor displays.
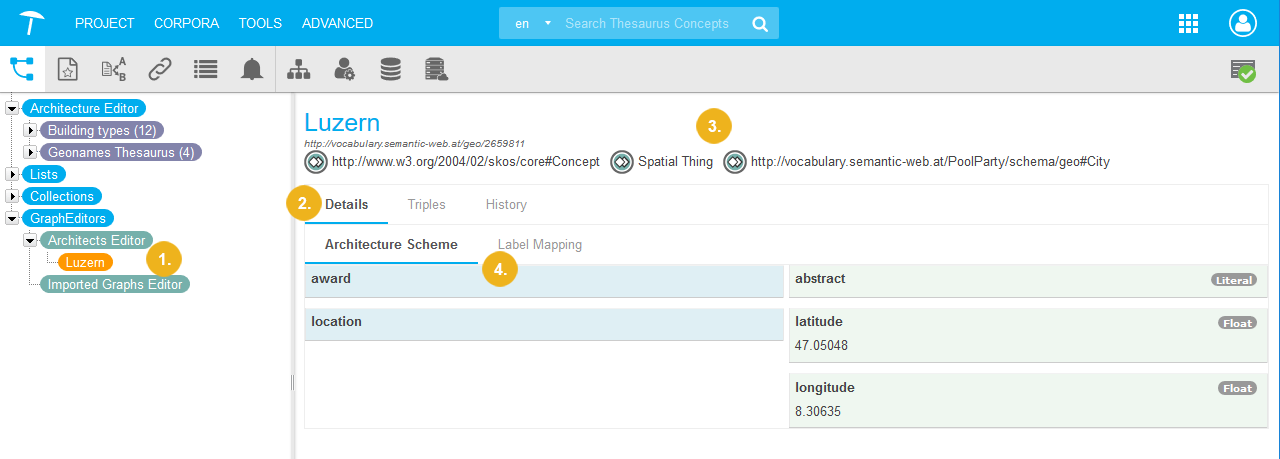
When you have opened a resource in your graph editor (1), the default tab is the Details tab (2). You will see additional tabs available for opened resources inside of it.
At the top below the resource's name (3), you see similar to other places in PoolParty, such as taxonomies or ontologies, in this case the skos:Concept property as well as the RDF types 'class' and 'subclass' from the respective custom scheme.
Right below the Details tab you will see the custom scheme tab active for that resource, in the example below the Architecture Scheme (4).
 |
Resource Nodes - Custom Scheme Tab
Resource Nodes - Custom Scheme Tab
This section contains a short guide on how the Custom Scheme tab inside an opened resource of your graph editor looks like.
The Details tab (1) of an opened resource opens with its child tab, the Custom Scheme tab (2), by default. You see here in the blue sections on the left (3) the relations of the respective custom scheme, the resource is part of, similar to the Custom Scheme tab of your thesaurus. On the right, in the green sections (4), you find the attributes.
The Custom Scheme tab here will display the name of the custom scheme, since resources you open in your graph editor can belong to different custom schemes.
Note
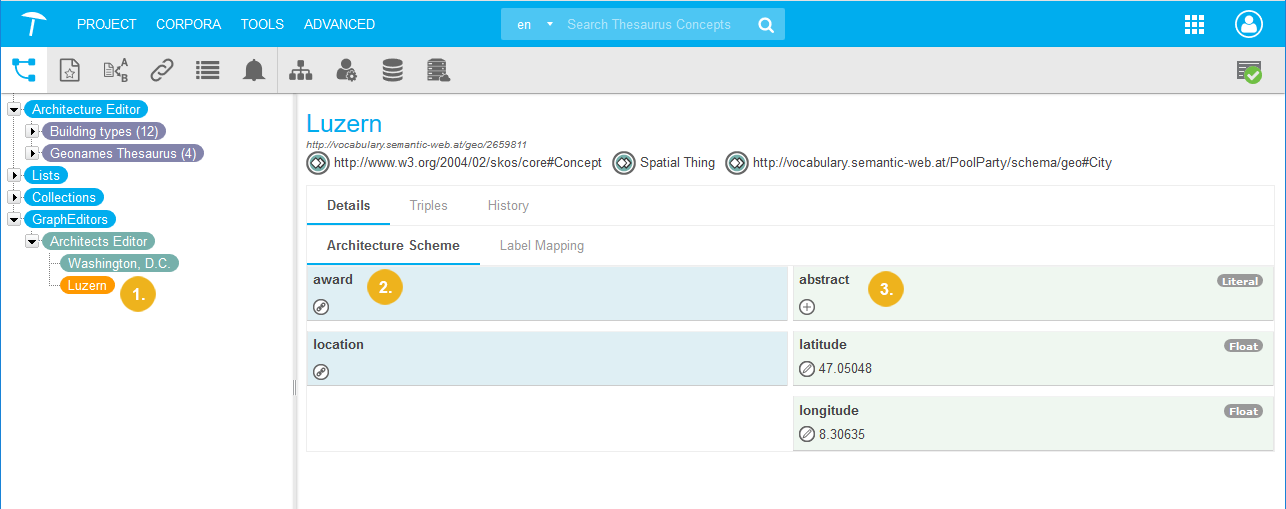
The image below shows an opened resource whose containing graph has not been set to 'editable'. An editable resource and its description find below.
 |
The image below shows the opened resource 'Luzern' (1), in this case editable. This means, the icons in the sections of the custom scheme's relations (2) and attributes (3) are visible.
 |
The following topic will guide you through the editing steps: Edit an Editable Graph's Resource in the Custom Scheme Tab
Edit an Editable Graph's Resource in the Custom Scheme Tab
Edit an Editable Graph's Resource in the Custom Scheme Tab
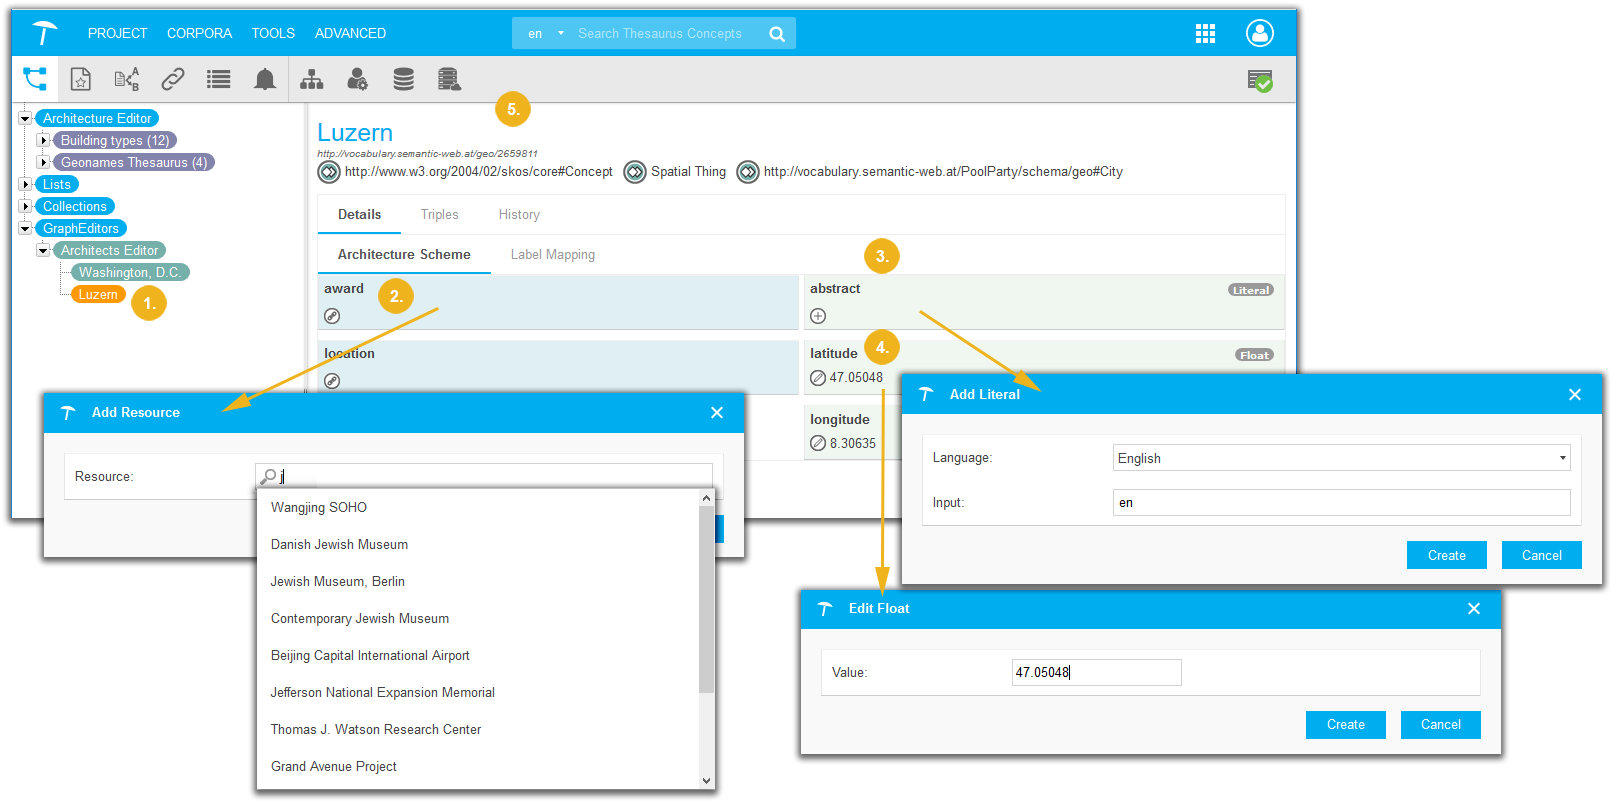
Here the same resource as before is opened, 'Luzern'. Since its graph has been set to editable here, more icons and options are available:
in the relations' section, you can use the Link icon (2) to open the Add Resource dialogue.
Start typing to display a drop down with possible resources to choose from.
In the attributes section, you can use the Add icon (3) to add a value according to the data type given, here 'Literal' for the attribute 'abstract'.
Use the Edit icon (4) to open the attribute's Edit dialogue, also depending on the data type defined, in this example 'Float'.
 |
Resource Nodes - Label Mapping Tab
Resource Nodes - Label Mapping Tab
This section contains a short guide on the Label Mapping tab inside an opened resource of your graph editor.
The Label Mapping tab will be displayed in two different ways, editable or non-editable, depending on which graphs you set to editable in the Configuration tab.
You can retrieve information here about the existing label mappings that you can change in the Label Mappings tab of the graph editor itself.
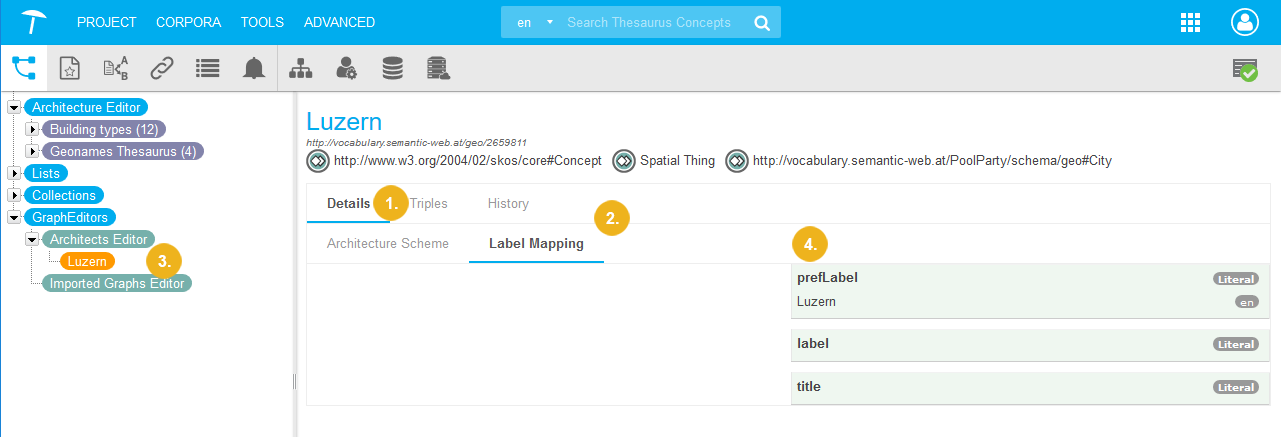
Inside the Details tab (1), you find the Label Mapping (2) tab of an opened resource. In the image below you see the resource 'Luzern' opened (3).
The labels that have been defined and mapped are displayed in the green section on the right (4), together with their values, if any exist.
The data types and language tags of the values are shown as well.
 |
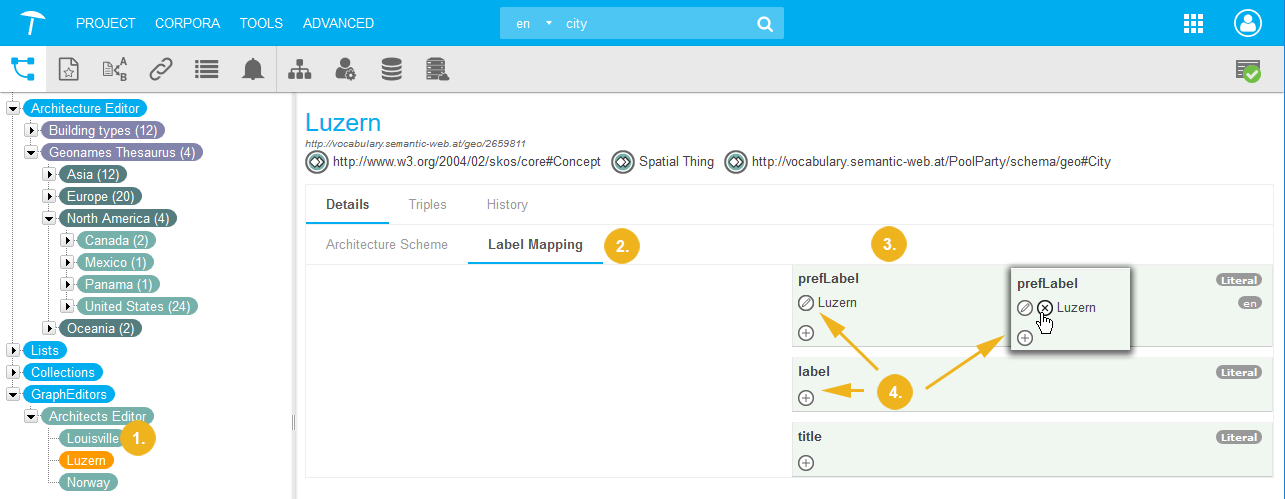
In the image below you see the resource 'Luzern' opened (1).
In the Label Mapping tab (2) on the right the mapped labels are visible (3), this time also showing icons (4) that are common elsewhere in PoolParty.
Use the Edit icon to edit existing values.
Use the Add icon to add more values.
Hover your mouse over the Add icon to display the Delete icon in order to delete values.
Each time the respective dialogue will open to present you with editing fields.
 |
Resource Nodes - How to Delete a Resource Using Its Node
Resource Nodes - How to Delete a Resource Using Its Node
This section contains a short guide on how to delete a resource using its node in the Hierarchy Tree of your PoolParty project.
Note
Using the node of a visible resource in your graph editor to delete a resource from a graph will delete the resource permanently. Use with caution.
The resources contained in an existing graph editor are only visible in the Hierarchy Tree when you open them.
In order to delete a resource, follow these steps:
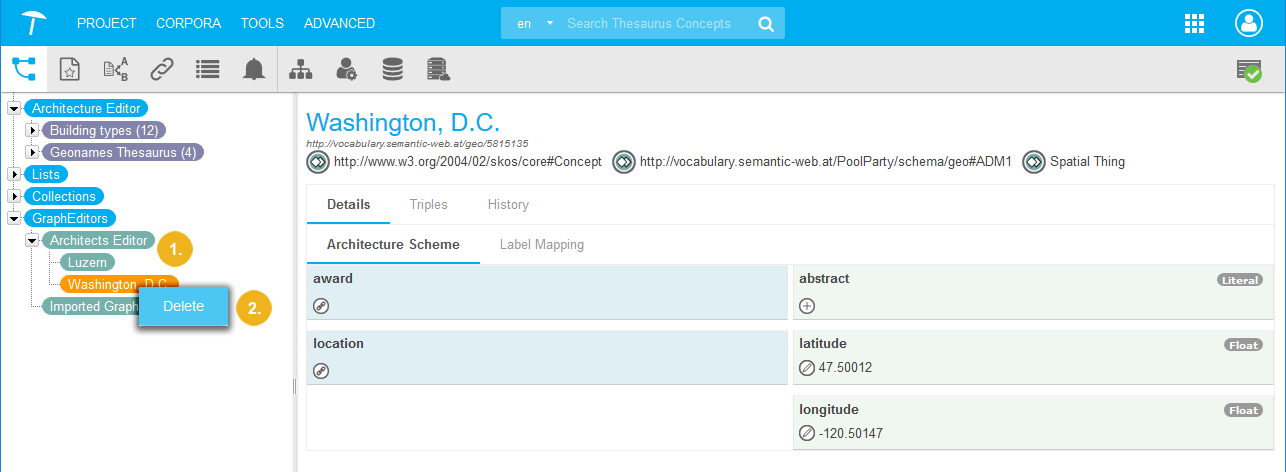
Find and activate the opened resource in your graph editor's Hierarchy Tree.
Right-click it to open the context menu and select Delete.
PoolParty will display a message asking you to confirm your choice.
 |