Create a Train Classifier
Create a Train Classifier
This section provides details on how to create and train a Train Classifier in PoolParty's Semantic Classifier (SC).
A Train Classifier is meant for you to set up a classifier and train it for later to classify any number of documents.
As already mentioned before, this could be any text files the PoolParty extractor supports that you then classify into the categories you created before.
Note
PoolParty supports all common text based file types, for example MS-Office, OpenOffice, pdf, xml, etc.
The following has to be in place in order for you to be able to use the classifier:
A PoolParty Enterprise Server or Semantic Integrator license with Semantic Classifier add-on included.
An opened PoolParty thesaurus project you created.
After you have created a Training Box, you create a Train Classifier.
Note
Creating a Training Box is optional, you can add documents to the classifier itself directly. But adding them to a Training Box first enables you to reuse them in any classifier of your choice.
How to Set Up a Train Classifier
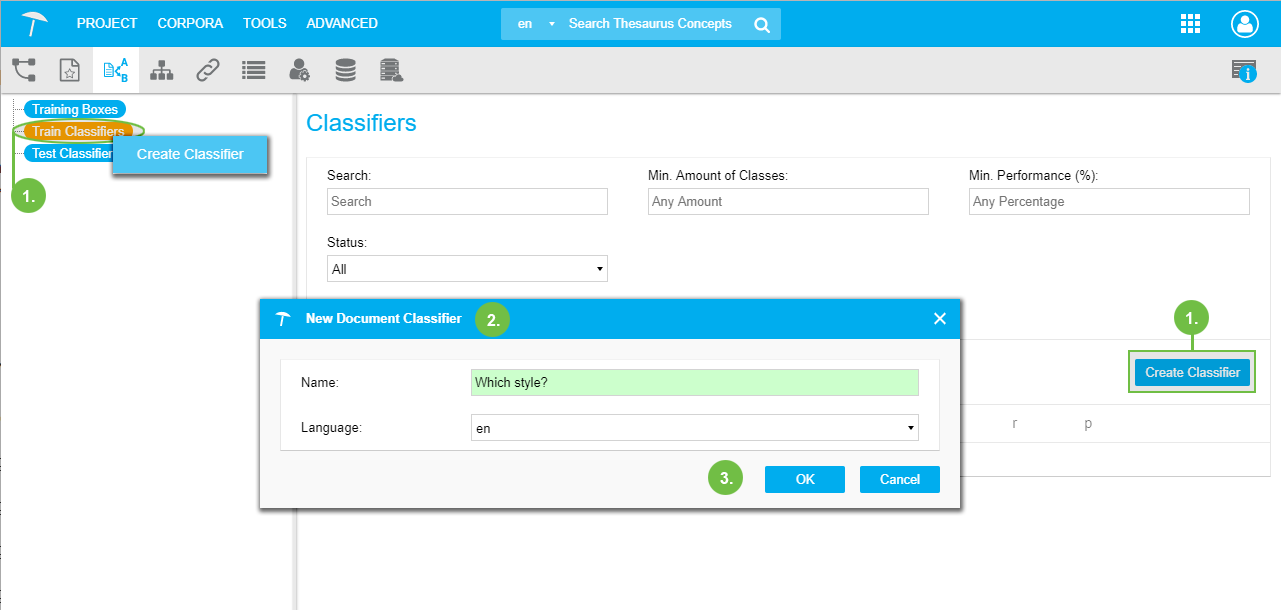
Select the Train Classifiers node, right click or double click it to use the context menu or click Create Classifier on the right.
The New Document Classifier dialogue will open. Add a name and select a language for it from the drop down.
Click OK to confirm your changes.
 |
At the top of the Classifiers Details View you can search for specific classifiers. The following options are available:
Enter a name or search string of a classifier in the Search field.
In the Min. Amount of Classes you can restrict the search to number of classes the resulting classifiers should contain at least.
The Min. Performance (%) field allows to restrict search results by the performance values of a classifier.
The Status drop down offers a further limitation on results as to the calculation status of a classifier: All, New, Calculated and Outdated are available values.
Add Categories to a Train Classifier
Add Categories to a Train Classifier
This section provides a short guide on how to add categories to a classifier you later will train.
As mentioned in the previous sections, in order to classify documents, you need to categorize them. These categories will be the basis for the classification.
After you have created your classifier, follow these steps:
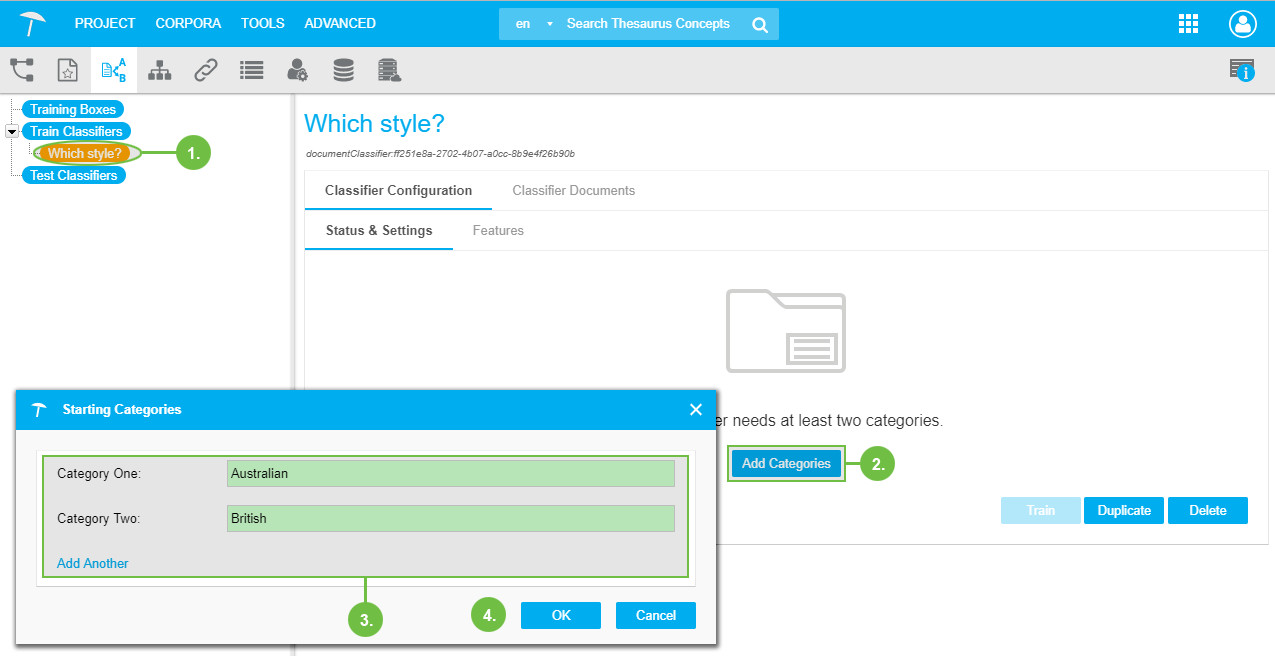
Select the classifier's node, on the right open the Classifier Configuration tab, inside it the Status & Settings tab (default).
Click Add Category to open the Starting Categories dialogue.
In the Category One and Category Two field, enter the first two categories' names respectively. It is also possible to fill out one field only.
Use the Add Another link to add more categories.
Click OK to confirm.
Note
At this point in time PoolParty supports training classifiers with up to 50 categories and about 50-150 documents per category.
 |
Add Documents to a Train Classifier
Add Documents to a Train Classifier
In this section you find a guide on how to add documents to a Train Classifier.
A Train Classifier is the starting point of later classification on a large scale. You should add documents to it you already know about, that is you should have a good idea of the best possible results of classification for them. That way you can train the classifier effectively later, tweaking its settings until results are satisfactory. Supported file types are based on those of the Apache Tika library and in PoolParty all text formats listed there are supported.
After that you will go on using the classifiers together with PoolParty's API to classify documents.
You have two options to add documents to a classifier:
Add Documents to a Train Classifier by Importing a Training Box — You can add documents to a Train Classifier by importing Training Boxes. This section contains a short guide of necessary steps.
Add New Documents to a Train Classifier — You can add documents to a classifier by importing training boxes or adding documents directly. Here you find a short guide on how to add them directly.
Note
At this point in time PoolParty supports training classifiers with up to 50 categories and about 50-150 documents per category.
We strongly recommend to not use the bulk of all existing training documents for training the classifier! Leave a rough estimate of about 10% for testing the trained classifiers, before you use them on new and unknown documents.
Add Documents to a Train Classifier by Importing a Training Box
Add Documents to a Train Classifier by Importing a Training Box
You can add documents to a Train Classifier by importing Training Boxes. This section contains a short guide of necessary steps.
This is one of two ways to add documents to a classifier. If you prefer to add documents to the classifier directly, find details in this topic: Add New Documents to a Train Classifier
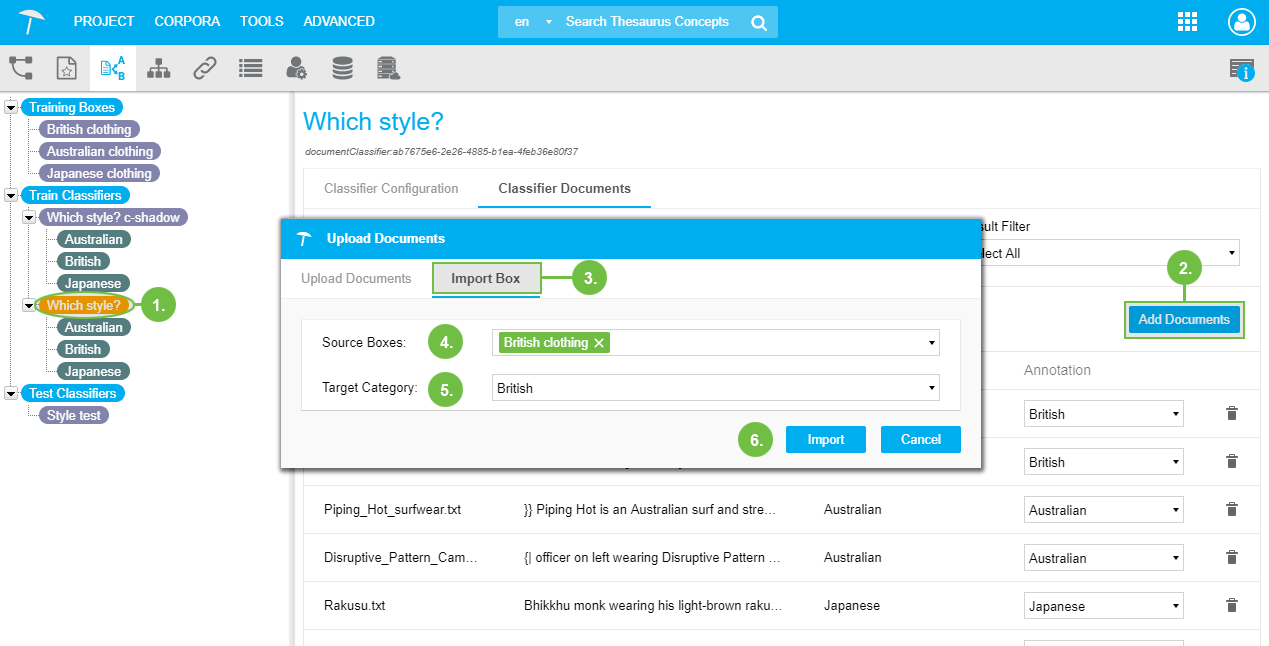
Select the classifier's node in the tree. On the right find the Details View.
Click Add Documents to open the Upload Documents dialogue.
In the Upload Documents dialogue, open the Import Box tab.
In the Source Boxes drop down select one or more Training Boxes you want to import.
In the Target Category drop down, select a category the box shall be imported to.
Click Import to confirm.
 |
Add New Documents to a Train Classifier
Add New Documents to a Train Classifier
You can add documents to a classifier by importing training boxes or adding documents directly. Here you find a short guide on how to add them directly.
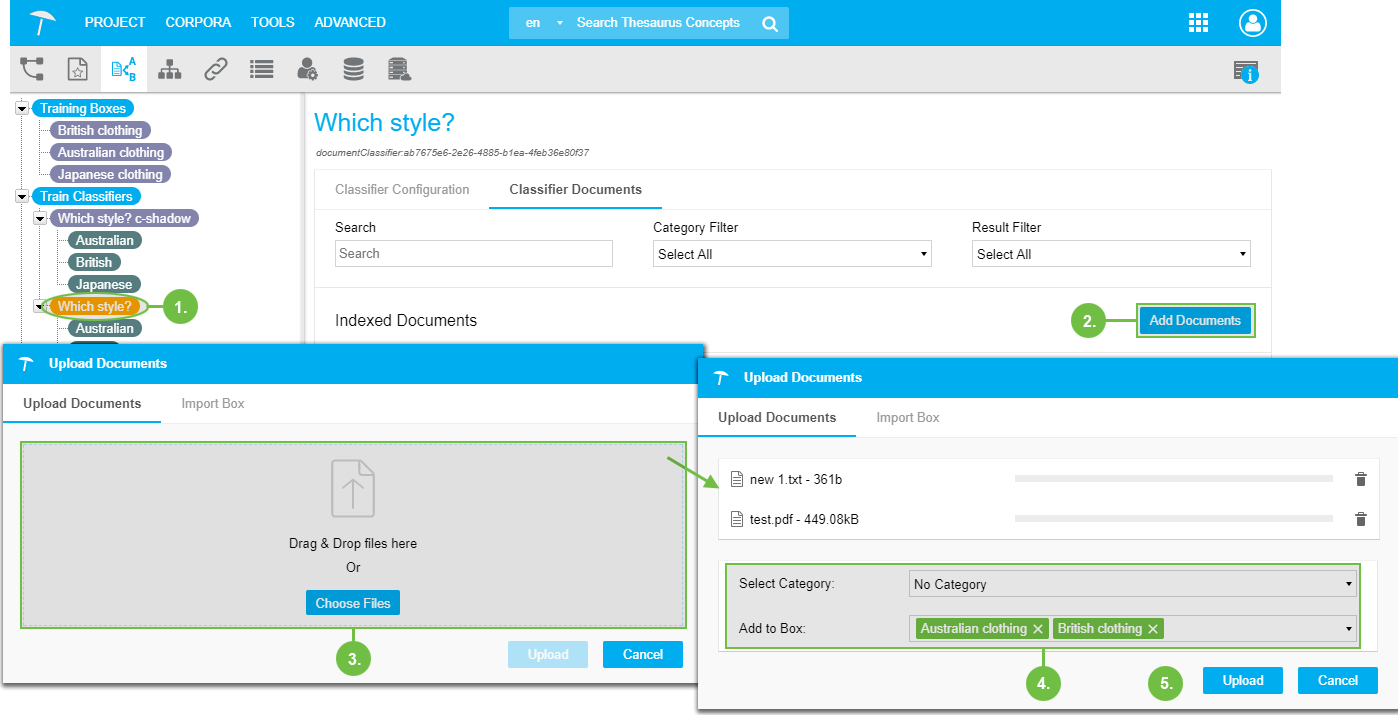
Select the classifier's node in the tree. On the right find its Details View.
Click Add Documents to open the Upload Documents dialogue.
In the Upload Documents tab inside, drag and drop documents onto it or click Choose Files.
After you added the documents, they will be listed inside the dialogue window. You can select documents and delete them from the list using the Delete icon.
Use Select Category to select from existing categories the one you want to add the documents to. In case you have no categories available, you can do this later as well.
Use the Add to Box field and add the documents to a box or several boxes. That way you are able to reuse them from an existing Training Box later. (optional)
Click Upload.
 |
Assign Categories to Documents Manually
Assign Categories to Documents Manually
This section contains a short guide on how to assign a category to a document manually.
After you added documents to your Train Classifier, it is possible that individual or a number of documents are not yet assigned to the right category. In that case you have the option to manually assign categories to them.
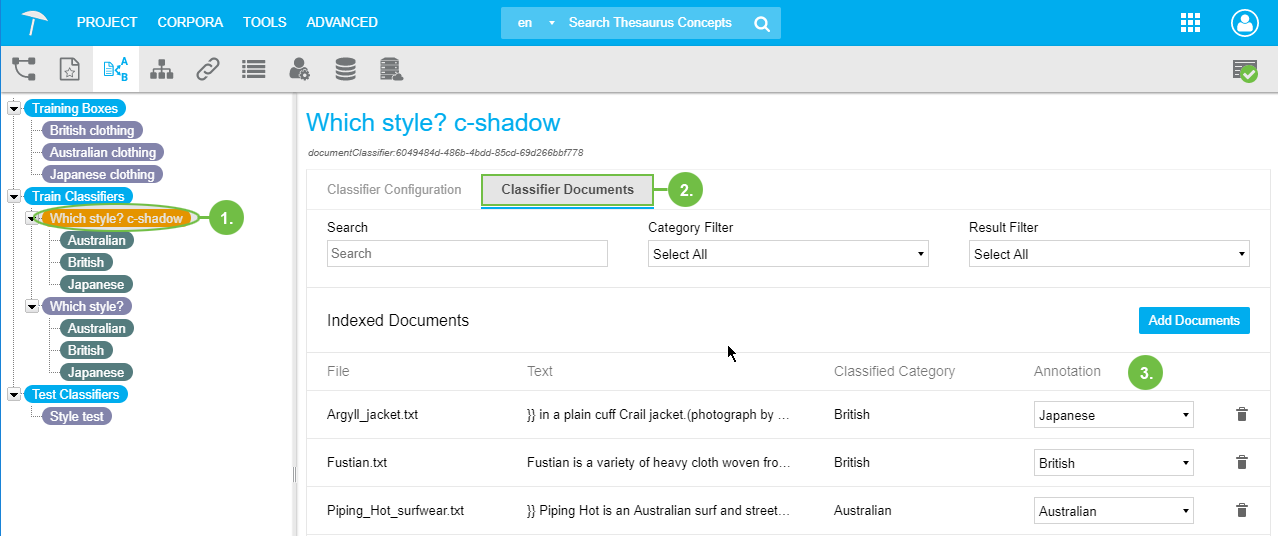
In your opened Semantic Classifier, access the Train Classifier whose documents you want to edit further.
In the Classifier Documents tab, find the document whose category you want to change.
Use the drop down in the Annotation column to assign the category you think fits best. Selecting from the drop down will save that value right away.
Note
The categories you assign here are a starting point only, for training the classifier. After running the classification you may find different categories assigned then the ones you chose.
 |