Create a Training Box
Create a Training Box
This section contains a short guide on how to create Training Boxes in PoolParty's Semantic Classifier (SC).
The following has to be in place in order for you to be able to use the classifier:
A PoolParty Enterprise Server or Semantic Integrator license with Semantic Classifier add-on included.
An opened PoolParty thesaurus project you created.
A Training Box in the Semantic Classifier is used to store and reference documents you need for a Train Classifier or a Test Classifier.
Creating a Training Box is an optional step. We recommend it though because you can easily reuse documents from boxes later in Train or Test Classifiers respectively.
After you added documents to the box, you will see additional information about the documents you added in a table.
How to Create a Training Box in PoolParty's Semantic Classifier
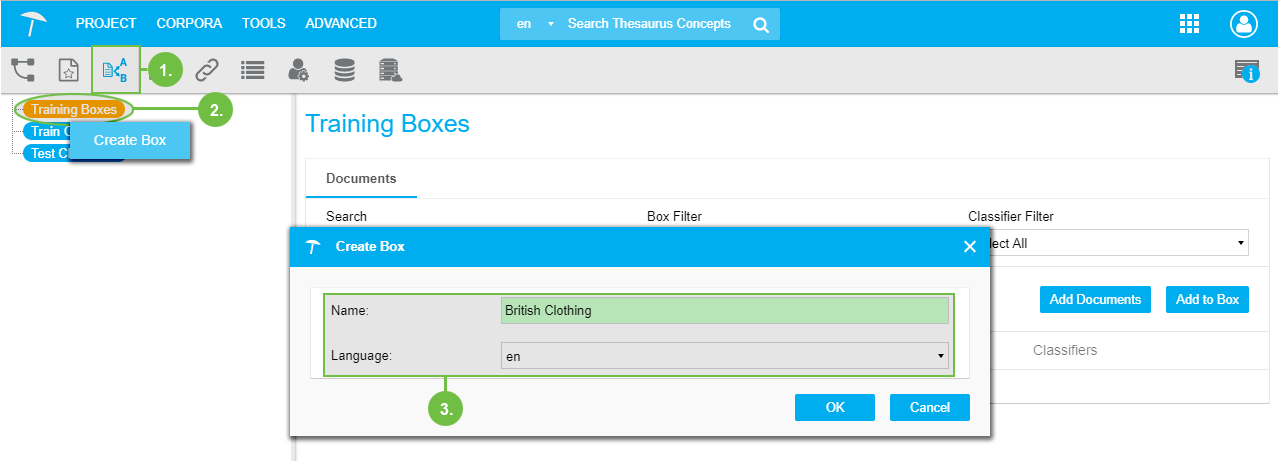
In the toolbar, click the SC's icon to open the Semantic Classifier.
Double-click the Training Boxes node or right-click and use the context menu to open the Create Box dialogue.
Enter a name of your choice, then from the drop down select the language the documents you want to add have been created in.
Note
The languages available in the Language drop down depend on the global settings for the opened project.
Click OK to save your changes.
 |
Add Documents to a Training Box
Add Documents to a Training Box
Find in this section how to add documents to a Training Box in PoolParty's Semantic Classifier (SC).
The following has to be in place in order for you to be able to use the classifier:
A PoolParty Enterprise Server or Semantic Integrator license with Semantic Classifier add-on included.
An opened PoolParty thesaurus project you created.
After you have created a Training Box you need to add documents to it you will later use for training your classifier.
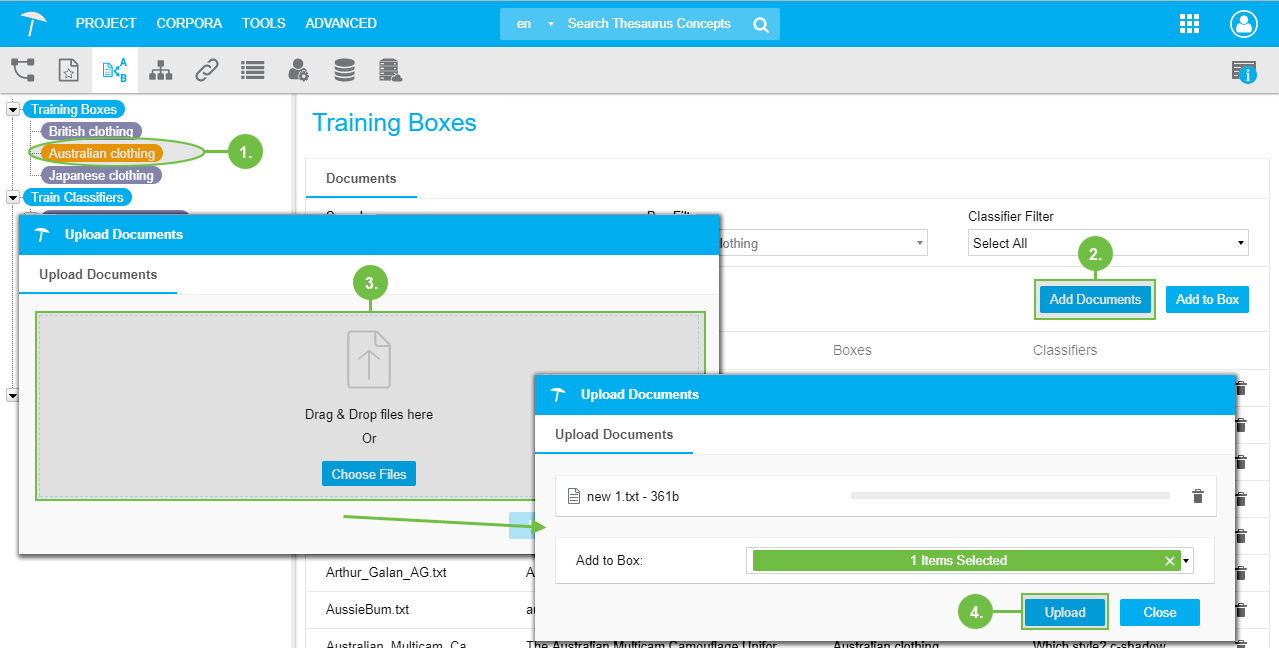
In the opened Semantic Classifier, select the node of the Training Box you created.
Right-click the respective training box node to use the context menu or click Add Documents in the Training Boxes view to open the Upload Documents dialogue.
In the Upload Documents dialogue drag and drop files onto the respective area or use Choose Files to find files in the location of your choice.
The documents you selected will be listed in the dialogue afterwards. You can also choose the Training Boxes you want to add them to, using the Add to Box drop down.
Click Upload to complete the process.
Note
We strongly recommend for you to keep about 10% of the documents out of training classifiers and use them later for testing trained classifiers, in order to evaluate the setup.
 |
Note
Find details on available information and functions here.
Available Document Information in the Training Boxes View
Available Document Information in the Training Boxes View
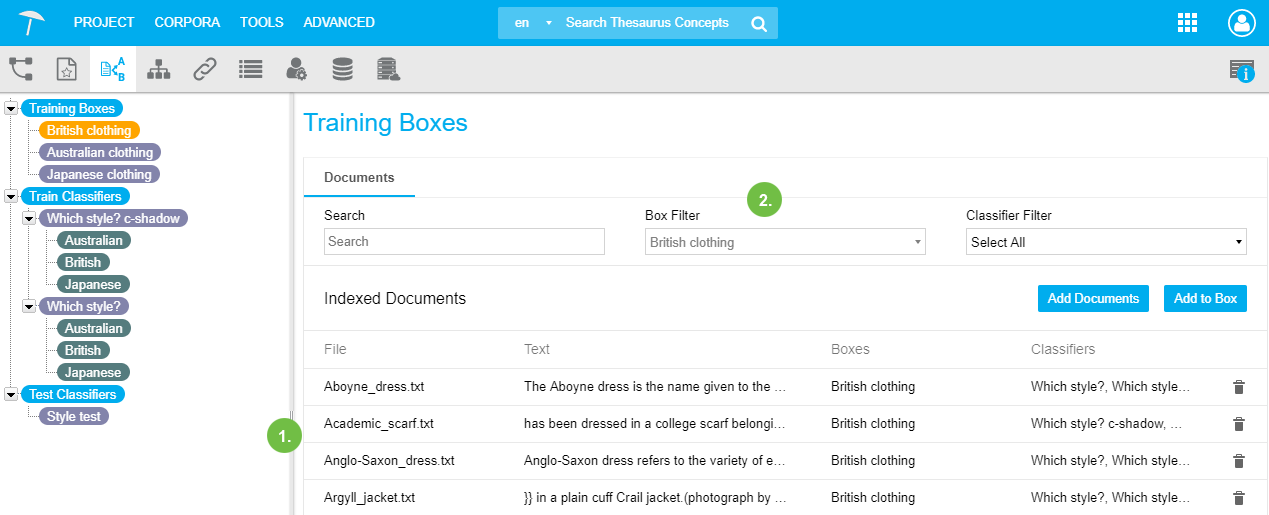
After you have added documents to a Training Box, in a table on the right you will find all documents or the ones of the box you selected in the SC's node.
The following information and functions are available here:
Name | Description | No. in Image |
|---|---|---|
File, Text, Boxes and Classifiers | The table lists all documents, the columns File, Text, Boxes and Classifiers display the respective values: the file's name, any Training Boxes the document is contained in, for example, or Classifiers it is being used for. | 1 |
Box Filter | The Box Filter displays the selected box's name, greyed out.
| 2 |
Classifier Filter | The Classifier Filter allows to filter for classifiers in the same way. | 2 |
 |
Available Document Functions in the Training Boxes View
Available Document Functions in the Training Boxes View
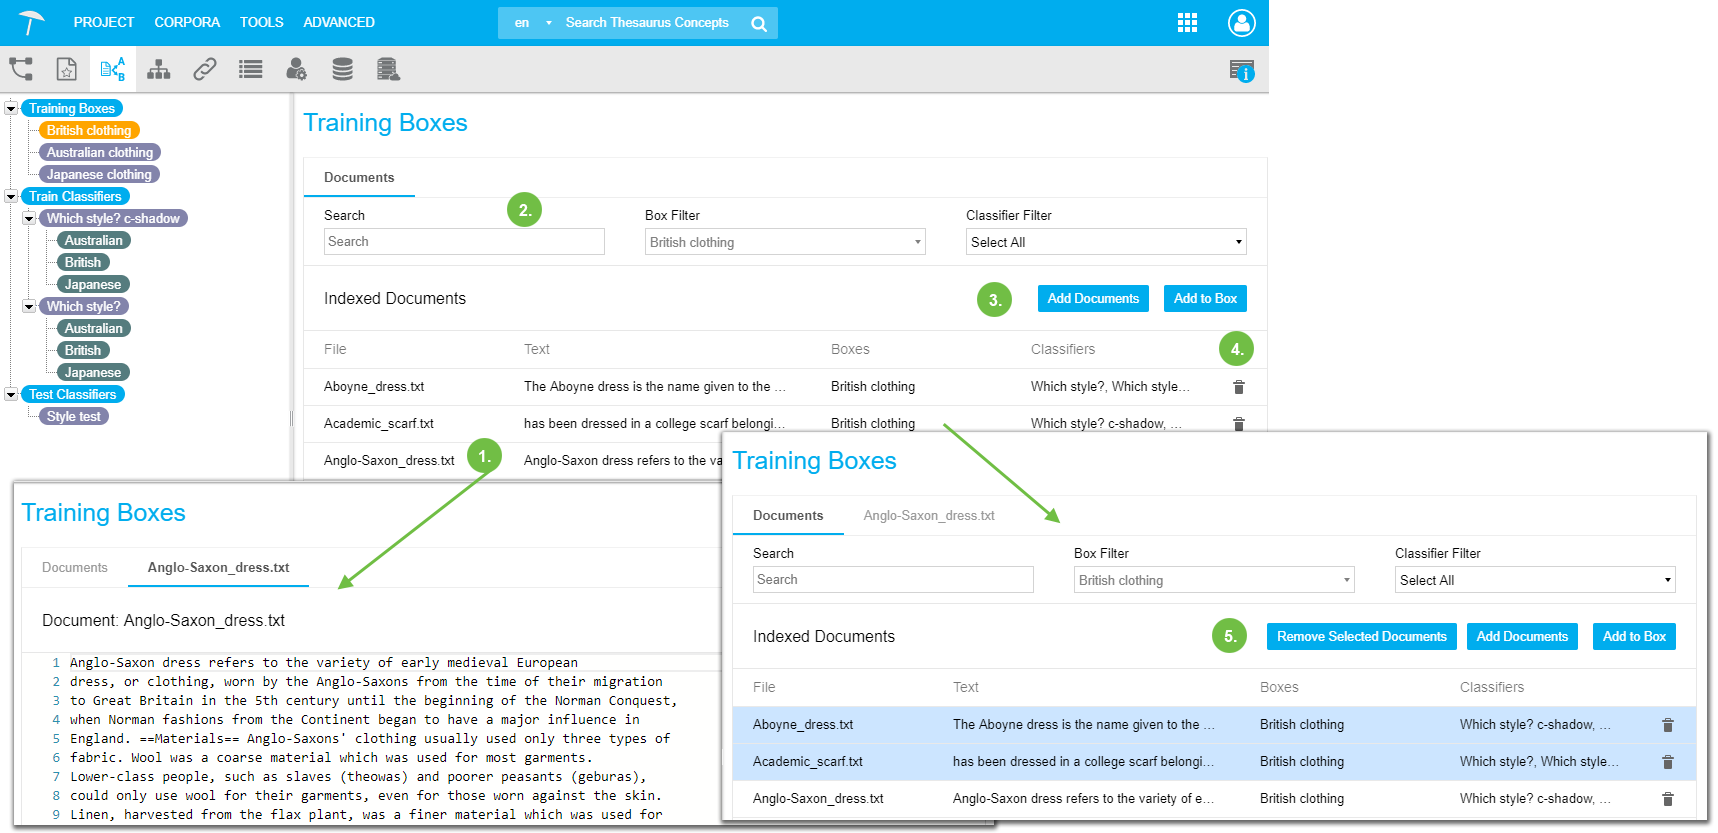
After you have added documents to a Training Box, in a table on the right you will find all documents or the ones of the box you selected in the SC's node.
The following functions are available here:
Name | Description | No. in Image |
|---|---|---|
Open Document | Double click any document to open a new tab displaying the file's content. NoteThis option will only be available once you have trained the classifier and thus built the classifier model. | 1 |
Search | Use the Search field to find particular documents. | 2 |
Add Documents | You can Add Documents to the box from here, too. | 3 |
Add to Box | Multiple selection of documents is possible. You can add the selected documents to another box, using Add to Box. | 3 |
Delete | Use the Delete icon to delete a document.
| 4 / 5 |
 |