Create an Empty Project
Create an Empty Project
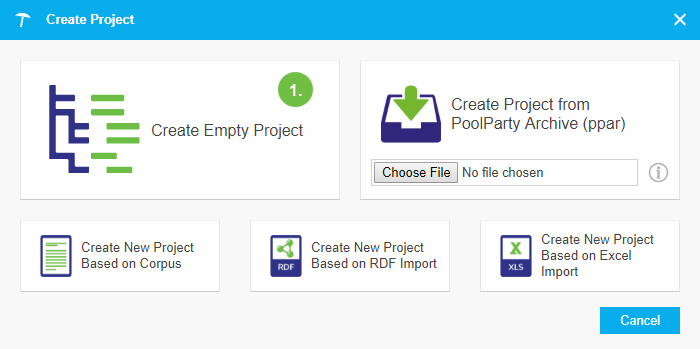
This section contains a short guide on how to create an empty project using the New Project dialogue.
Selecting the Create Empty Project option you can create a new project in PoolParty.
In the Create Project dialogue select the option Create Empty Project.
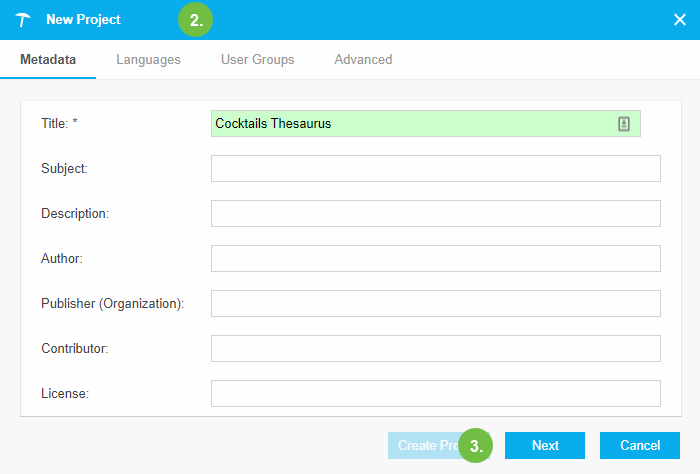
The New Project dialogue opens and you have to add the project's metadata in the Metadata tab.
Click Next to bring up the language selection settings.
Note
You can change the meta information of your project later in the Details View of your project.
New Project - Languages
New Project - Languages
This section contains a short guide on how to set languages in the New Project dialogue.
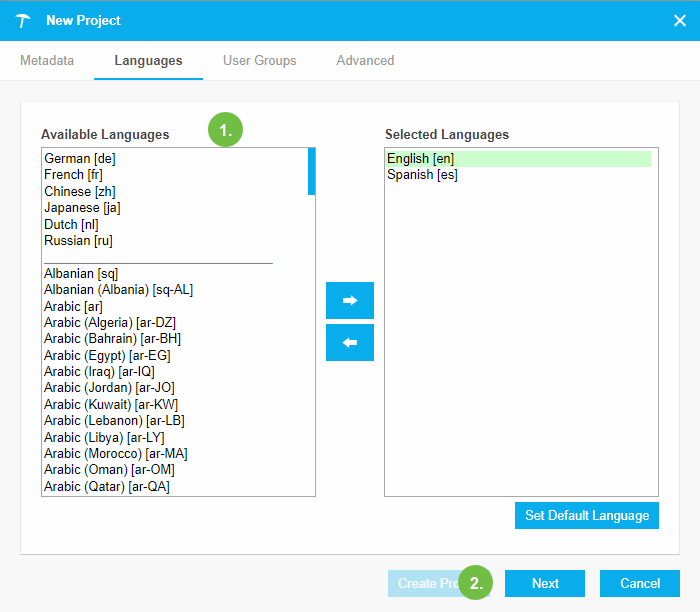
In the Languages tab, the following settings are available:
Scroll through the list of available languages to select the languages used in your project, multi-select is possible.
Add or remove them by clicking the right/left-facing arrows, or double click the respective language.
The first language you select, will be highlighted in green and is defined as the default language for the project.
You can change the default language by selecting a language and clicking Set Default Language.
When you are done selecting languages, click Next to define access rights for your project.
Note
Choose the default language for your project carefully, because you cannot change it, once the project has been created.
Note
The languages are divided into two groups so the most common languages are displayed at the top of the list.
You have to choose at least one language as default language for the project. All languages installed on the PoolParty server are available.
Theses settings, except the default language, can be changed after the creation of a project. You can view the project settings in the Details View of your project.
New Project - User Groups
New Project - User Groups
This section contains a short guide on how to select user groups in the New Project dialogue.
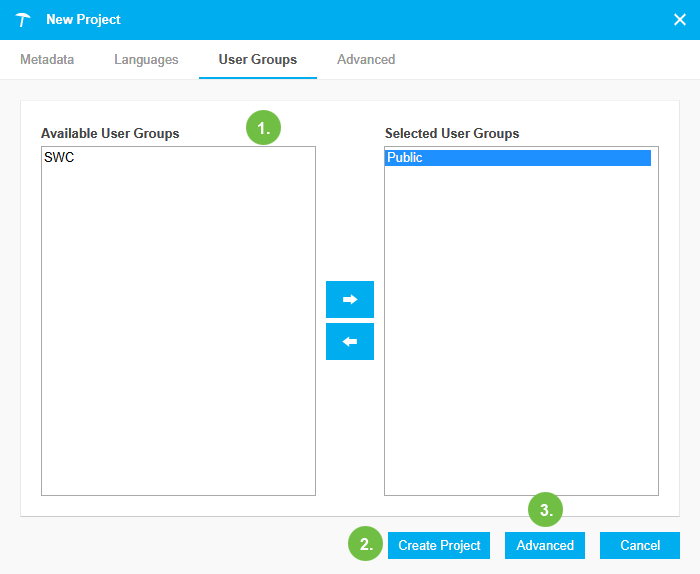
The User Groups tab lets you define the user groups that should have permission to view and edit a project.
Scroll through the list of available groups to select the user groups used in your project, multi-select is possible.
Add or remove them by clicking the right/left-facing arrows, or double click the respective group.
If you select the Publicgroup, the project is publicly available. See: User Groups in PoolParty.
Click Create Project to finish the project's creation. The Project Details will be displayed.
Click Advanced to open the Advanced tab of the New Project dialogue. There you can define Advanced Project Settings.
Now you are ready for Creating and maintaining thesauri or Import, Export and Reporting with PoolParty.
Note
The group selection will only show user groups you are a member of that group.
You can change the user group setting also later in the Project Details of your project.
Advanced Project Settings
Advanced Project Settings
This section contains a short guide on the Advanced project setting options when you create a new PoolParty project.
The Advanced tab of the New Project Options dialogue is where you can define the advanced project setting options for a PoolParty project. Settings are divided into sections:
URI Generation Settings
URI Generation Settings
The URI represents the unique identifier for every resource such as concepts, concept schemes, skos-xl labels in PoolParty. In this section of the Advanced tab, the pattern for the generation of this URI is defined.
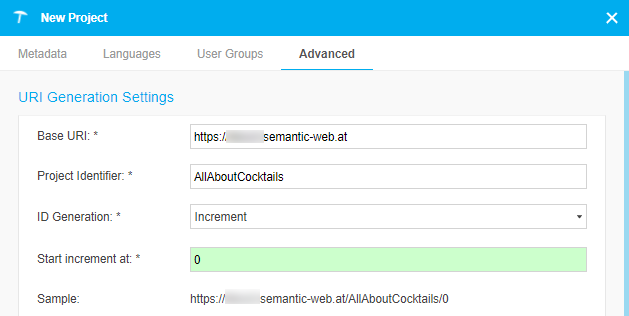
The following parameters are available:
Base URI
Project Identifier
ID Generation
Start increment at
Sample
The mandatory settings are marked with an asterisk.
The Base URI represents the first part of a URI. The URI default value is defined in the The poolparty.properties File file. It has to start with 'http://' or 'https://' followed by the domain that should be used for URIs.
The Project Identifier represents the second part of a URI and is used to distinguish between different projects on a PoolParty server The default value is the project name. The PoolParty project ID is derived from the project name by removing spaces and special characters.
The ID Generation represents the last part of a URI and defines the method for creating a unique identifier for a concept.The following methods are available:
Increment (Default)
(Default value: 0)
You need to define a starting number from which the incrementation starts.
All concepts get a single incremented number starting at the defined starting number.
UUID
All concepts are represented by their 'Universal Unique Identifier' (UUID).
From Preferred Label
All concepts are represented by the preferred label of the default language of the project.
If two concepts with the same preferred label exist, a number is added to the preferred label (e.g. Label_(1)).
Manual
Every child of the project, that are concept schemes, top concepts and concepts, will have the ID you enter manually for it.
If you set this on project level, the method will be inherited by the child resources.
You can change this by using the Advanced URI Settings dialogue.
Set the Start increment at if you selected Increment in the ID Generation. The default is set to 0.
Note
The settings for URI Management - Overview cannot be changed after creating the project.
If you are Exporting a Project to RDF, delete the project and Create New Project Based on RDF Import. That way you can adjust the URI settings to your needs.
This will not change the URI of data already created in the project.
Note
To achieve a more specific URI pattern you can define an additional identifier per concept scheme. For more information, see: Define a URI Pattern for Concepts in a Concept Scheme.
To make the created linked data publicly available, the defined Base URI must exist and point to the PoolParty server. How you can configure a web-server for linked data publishing is described in the Setting up the Linked Data Publishing Feature.
If linked data publishing is properly configured on your server and you enter the URI of a concept in a browser you will get to PoolParty's Linked Data Frontend.
The Sample shows how the URI is going to look like based on the current project settings.
Project Options
Project Options
The following parameters are available:
Enable Workflow
Enable SKOS-XL
Store Project On
Repository Type
Autosave project
Mandatory settings are marked with an asterisk.
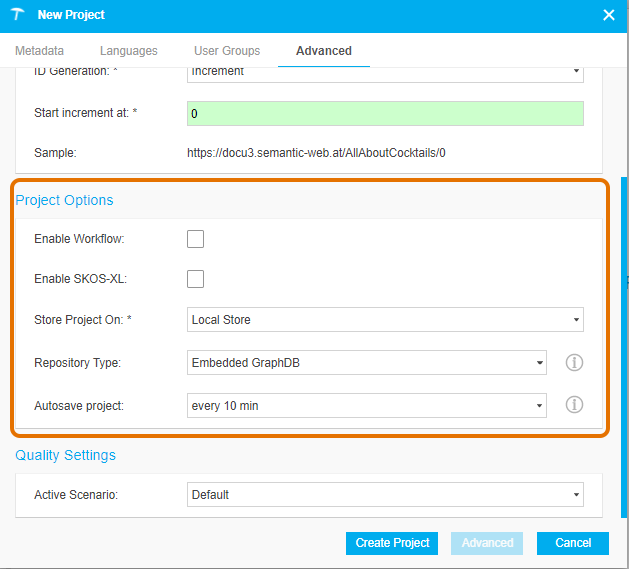
Select to Enable Workflow.
Note
The Workflow function is available from Enterprise Server and available as an additional module for the Advanced Server. You can enable it here, or after creating the project in the Advanced menu options.
Select to Enable SKOS-XL function.
Note
SKOS-XL is an additional module available from Advanced Server and not included in any server bundle. You can enable it here, or later using the Advanced menu options.
There are two main options for storing your PoolParty data: Local Store and Remote Store. For more information, see: PoolParty External Graph Database Support.
Note
Storing data in a external graph database is an additional module and it is available for the Enterprise Server. It is not included in every server bundle. You can select the external graph database here.
If you selected the to Store Project On, you have these pre-configured options:
Embedded GraphDB: The Local Store default repository type. You need a valid license to use this option.
Local Native RDF4j: All data is directly written to and read from PoolParty's file system. This option should be used for projects that are static and unlikely to change, and on PoolParty servers that have little main memory assigned.
Local Memory RDF4j: All data is kept in PoolParty's server memory and synced to the file system regularly.
Note
If you have many projects using memory repositories, make sure your PoolParty server has enough memory.
If you selected a Remote Store toStore Project On, you getRemoteand no other options.
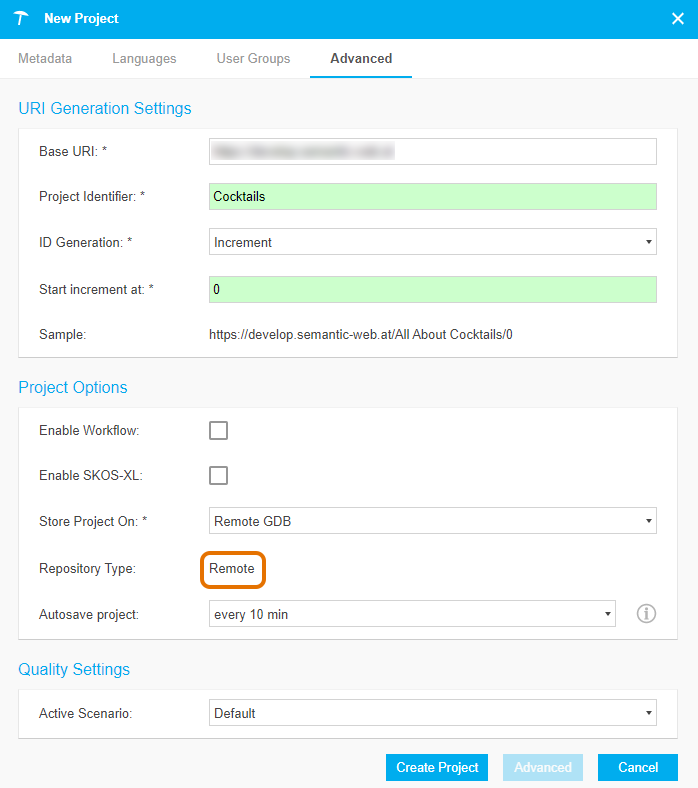
For all repositories an autosave function is enabled by default taking a snapshot of the project in the defined interval. Via the Autosave project drop down you can choose the snapshot interval - the following options are available:
disabled
every 5 min
every 10 min (Default)
every 15 min
every 30 min
Note
If you disable snapshots for a project you cannot restore a project if the repository becomes corrupted or deleted.
Quality Settings
Quality Settings
In the Active Scenario drop down define the quality settings for your project. They are used for generating quality reports but also determine what rules are used when generating content.
The following settings are available:
Default (Default)
Automatic Indexing
Classification
Document Suggestions
Restrictive
Checks Disabled
Custom
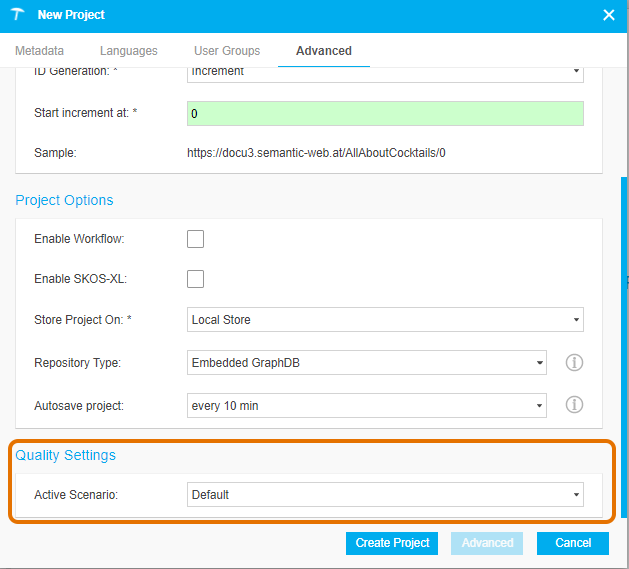
Note
The Quality Management function is available from Advanced Server. You can define the default setting here, or later using the Advanced menu options.