Create a Custom Scheme
Create a Custom Scheme
You can use custom schemes to extend concept schemes and concepts of your thesauri or use them in other applications.
Open the Ontology Management by clicking its icon in the toolbar.
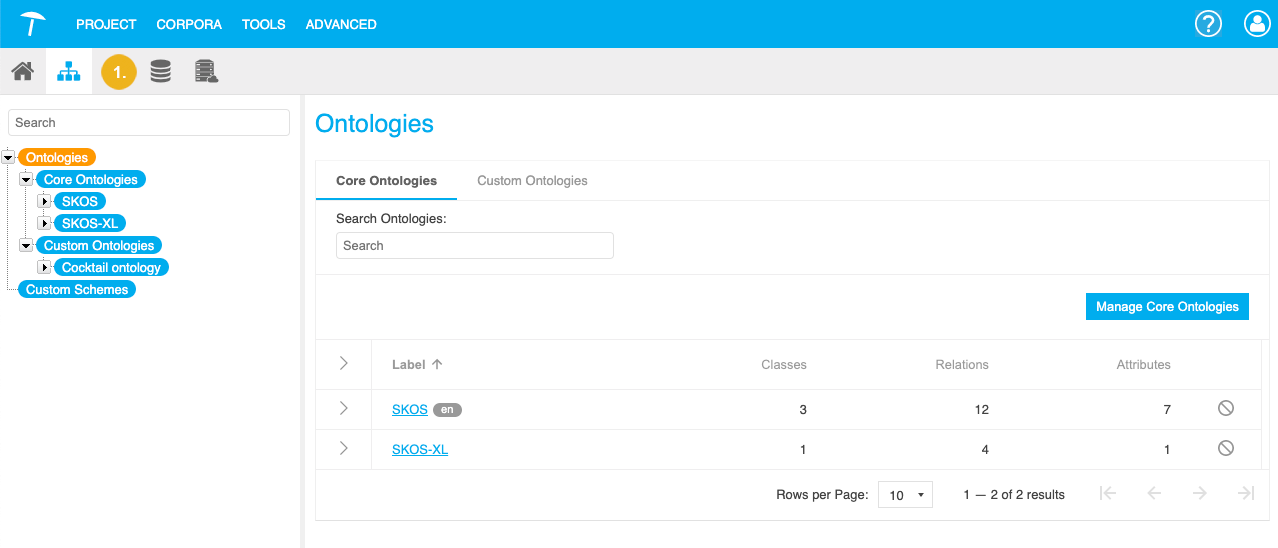
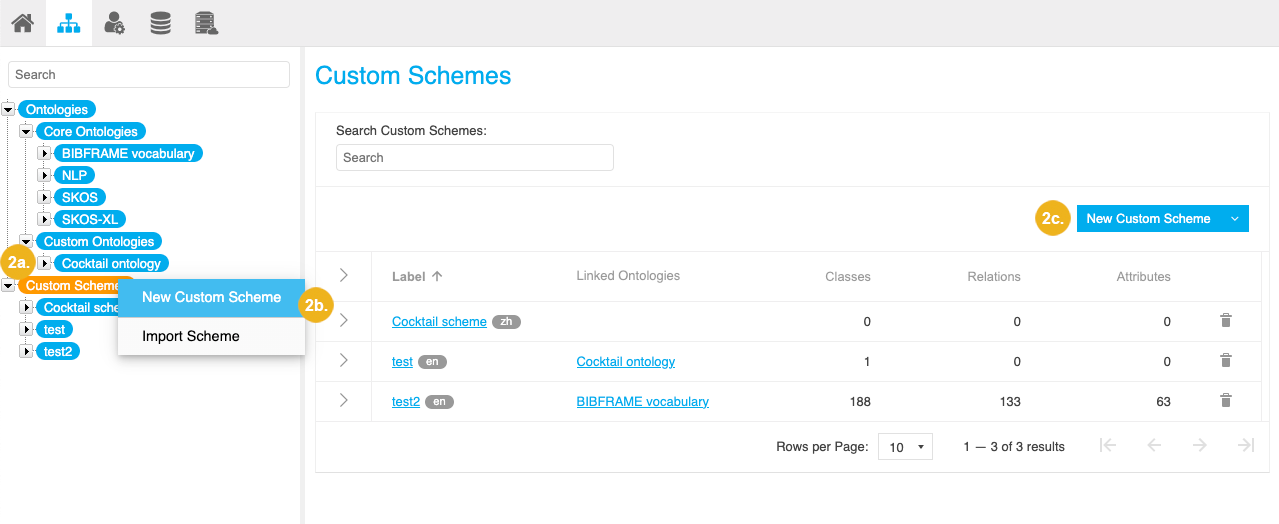
Bring up the New Custom Scheme dialogue with one of the following actions:
On the left in the Hierarchy Tree, double click the Custom Schemes node.
On the left in the Hierarchy Tree, right click the Custom Schemes node and select Create Scheme from the context menu.
On the left in the Hierarchy Tree, activate the Custom Schemes node.
In the Details View on the right, click New Custom Scheme.
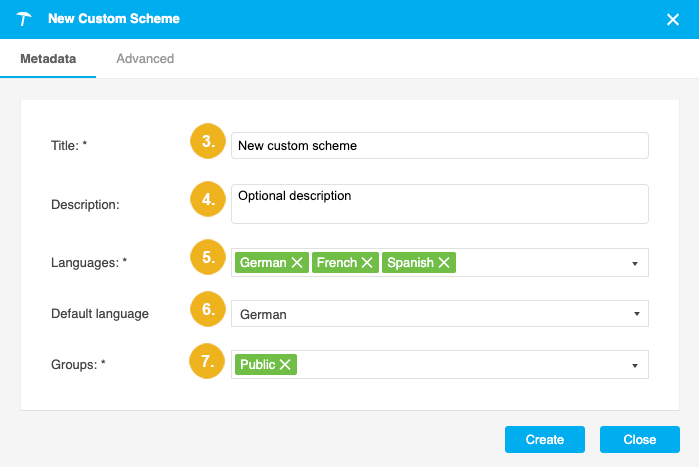
The New Custom Scheme dialogue opens with the Metadata tab activated by default.
Enter the the title for your custom scheme.
Optional: Enter the description.
Select one or more languages for the scheme. The languages you select here will be available to define labels and descriptions for classes, relations and attributes respectively.
If you selected more than one language in the previous step, select the default language for the custom scheme.
Assign user groups to the new custom scheme to define which users should be able to access and edit the custom scheme.
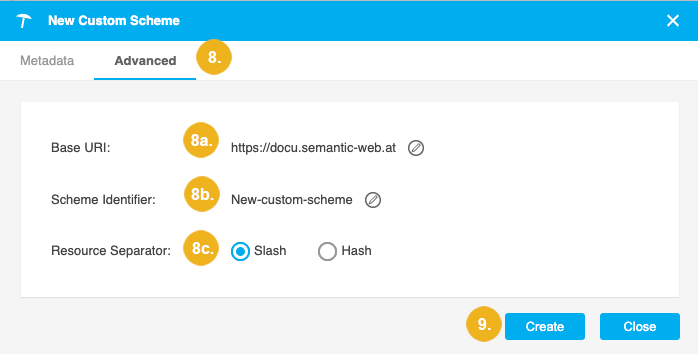
Optional: In the Advanced tab, you can define URI pattern used for your custom scheme. Details find in this topic: Define the URI Pattern for a Custom Ontology or Custom Scheme
Base URI: this will already be filled with the setting defined for custom schemes in The poolparty.properties File, but you can change it to a Base URI of your choice after you click the pencil icon.
Scheme Identifier: this will already be filled with the title of the scheme you chose, which will be used without spaces as part of the URI. You can change it after you click the pencil icon.
Resource Separator: use the radio buttons to specify the type of separator you want to be used in the URIs based on this scheme (Default: Slash).
Confirm with Create.
A new custom scheme is created. You can find it in the Custom Schemes list.
Once the scheme has been created you can:
Populate Custom Schemes via Autocomplete
Populate Custom Schemes via Autocomplete
This section contains a short guide on how to add elements to your custom scheme by using autocomplete.
You can use all classes, relations and attributes defined in your ontologies in your custom scheme.
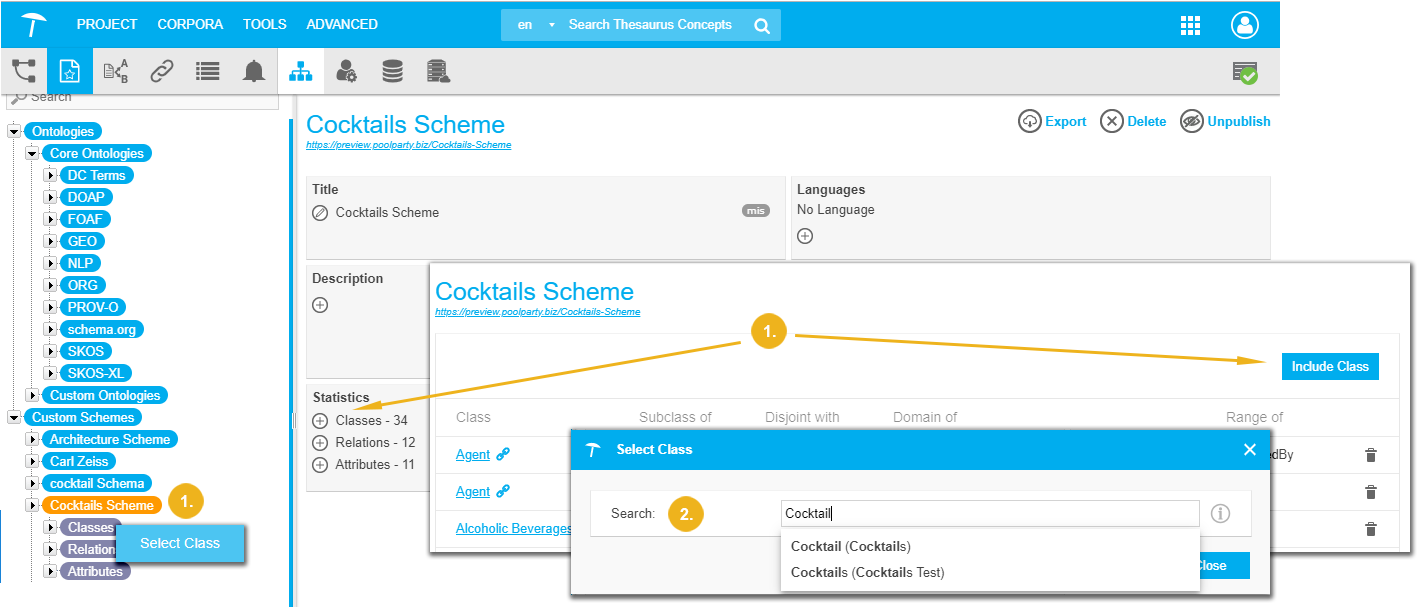
Use Include Class, Include Relation or Include Attribute in the respective node to open a dialogue, which allows you to select classes, relations or attributes using autocomplete.
Alternatively, you can use the Add icon in the Statistics section of the Details View of the active custom scheme.
You can also double click the active Classes, Relations or Attributes node or use their context menu.
Start typing in the Search field of the dialogue to bring up the suggestions.
The selected class, relation, or attribute will be linked into your custom scheme.
 |
Note
If you select a class defined as subclass, the respective parent classes will be added too.
If you select a relations or attribute defined as subproperty, the respective parent property will be added too.
For relations, the inverse relation will be copied, as well as the class/classes defined as domain or range restrictions.
The same holds true for attributes, the class/classes defined as domain restrictions will be copied.
Add Classes, Relations and Attributes to Your Custom Scheme
Add Classes, Relations and Attributes to Your Custom Scheme
This section contains a short guide on how to add classes, relations and attributes to a custom scheme.
Custom schemes can be built or enriched by using classes, relations and attributes from imported ontologies.
Open the Ontology Management by clicking its icon in the toolbar.
Below the Ontologies node, select an ontology in one of the two nodes, Core Ontologies or Custom Ontologies.
Expand the ontology and activate one of the three nodes below it, Classes, Relations or Attributes.
In the Details View on the right, click the "+" icon next to a class, relation, or attribute, to open the scheme selection.
Select an existing custom scheme from the drop-down menu to copy the class, relation, or attribute to that custom scheme.
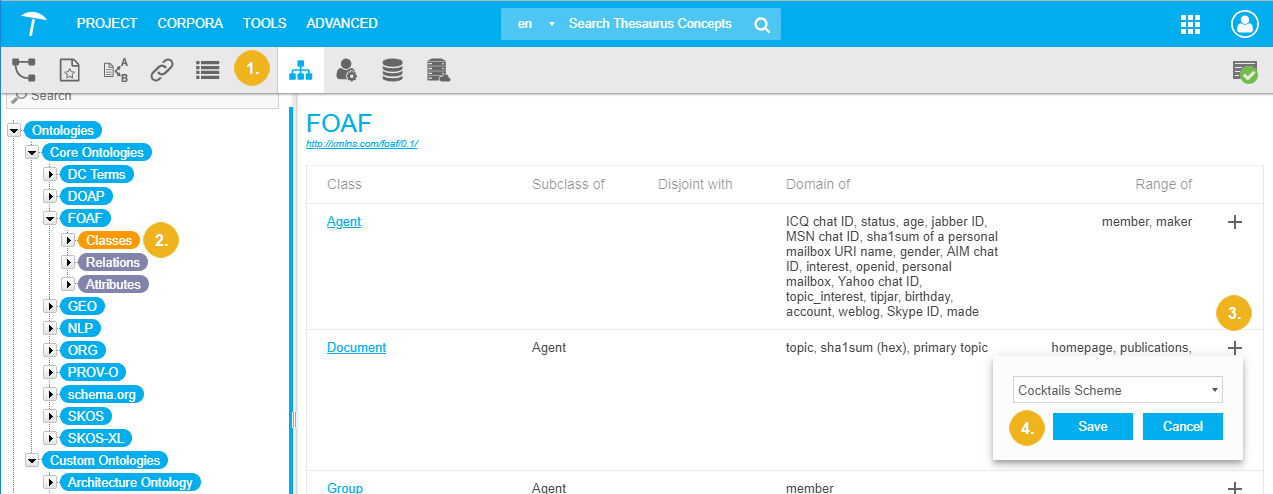
Click Save to confirm your changes.
Note
If you select a class defined as subclass, the respective parent classes will be added too.
If you select a relations or attribute defined as subproperty, the respective parent property will be added too.
For relations, the inverse relation will be copied, as well as the class/classes defined as domain or range restrictions.
The same holds true for attributes, the class/classes defined as domain restrictions will be copied.
Note
Classes, relations and attributes from imported ontologies can only be copied to already existing custom schemes. Building a custom scheme purely by reusing classes, relations and attributes from imported ontologies still requires that an empty custom scheme is defined before the first class, relation or attribute can be copied. See Create a Custom Scheme on how to create a Custom Scheme from scratch.