Searching and Filtering Resources
Searching and Filtering Resources
A very important aspect of the GraphEditor feature is the searching and filtering of resources inside of it. This section covers the topics related to these functions.
Find the following topics in this section:
GraphEditor - Search & Edit Tab
GraphEditor - Search & Edit Tab
This section provides a short guide about what to find in and how to use the Search & Edit tab in a PoolParty graph editor.
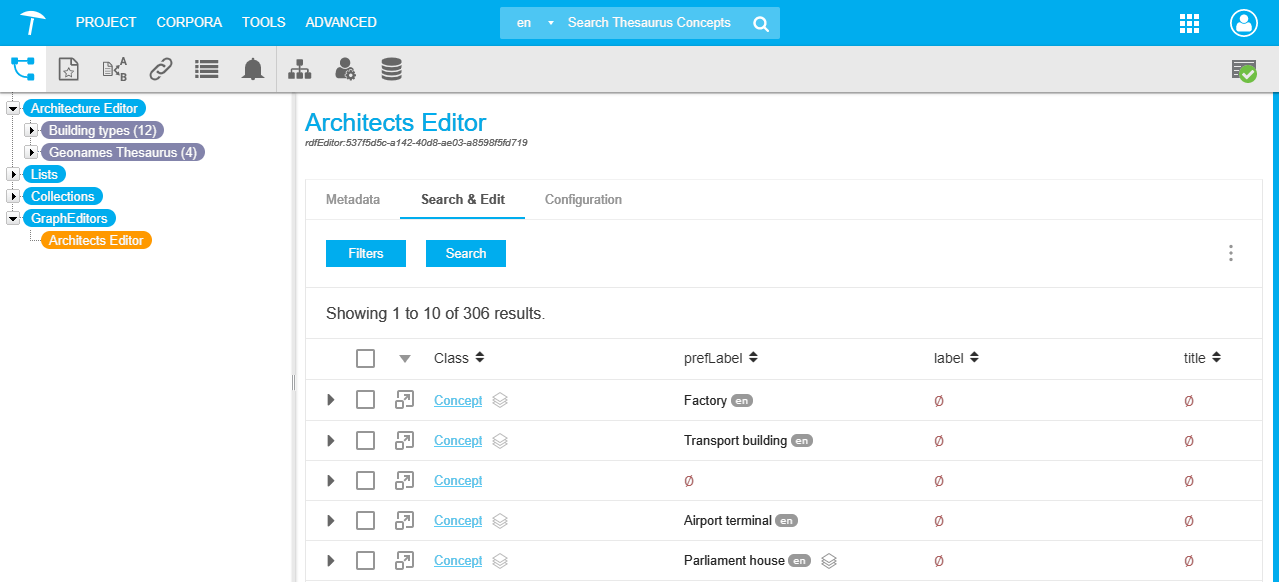
The Search & Edit tab is the most important tab in a graph editor. You find all RDF data resources based on your graph editor's configuration here.
In this section you will see an overview of the available options and settings that are visible when opening it.
The additional topics in this section will guide you through editing functions:
Available Options and First View of the Search & Edit Tab — This section contains a short guide on the available options and functions in the Search & Edit tab of a PoolParty graph editor.
GraphEditor - Filter for Values — This section contains a short guide on how to filter for one or more values in a graph editor.
 |
Available Options and First View of the Search & Edit Tab
Available Options and First View of the Search & Edit Tab
This section contains a short guide on the available options and functions in the Search & Edit tab of a PoolParty graph editor.
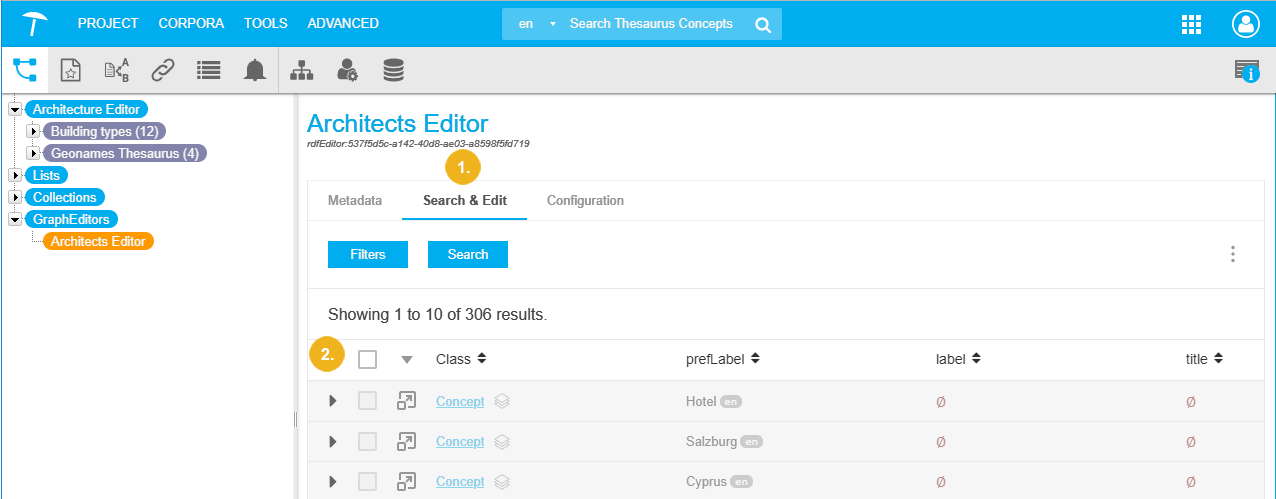
After you have created a graph editor or opened an existing one, click the Search & Edit tab to activate it.
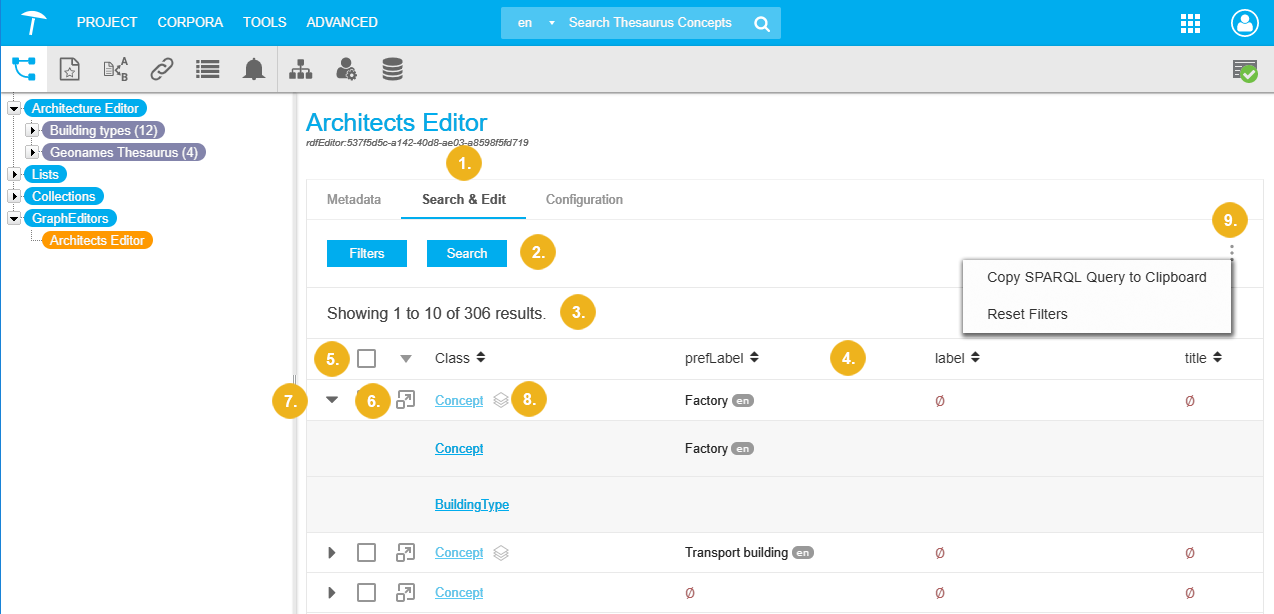
The resources are collapsed by default, below you see one expanded by its small Arrow icon at the left (7).
The buttons Filters and Search provide options to filter and search your graphs in great detail by the graph's resources, such as Attributes, Relations or Classes (the custom schemes' resources).
At the top of the table you see a counter for all visible elements and the whole number of existing ones in this graph editor.
The table column headers show the respective element available, the class names, prefLabels, labels and particular relations or attributes of the connected custom scheme.
The check boxes beside the classes' rows let you select one, several or all you want to batch edit.
The Open Resource icon lets you open the respective resource's detail in a new Details View pane.
The Arrow icon lets you expand individual resources' entries.
The Stack icon depicts which of the resources has multiple values as information for you when they are collapsed.
Clicking the three dots will expand a menu:
You can use the Copy SPARQL Query to Clipboard item from here.
Filters you may have selected can be cleared at once from here using Reset Filters.
 |
GraphEditor - Filter for Values
GraphEditor - Filter for Values
This section contains a short guide on how to filter for one or more values in a graph editor.
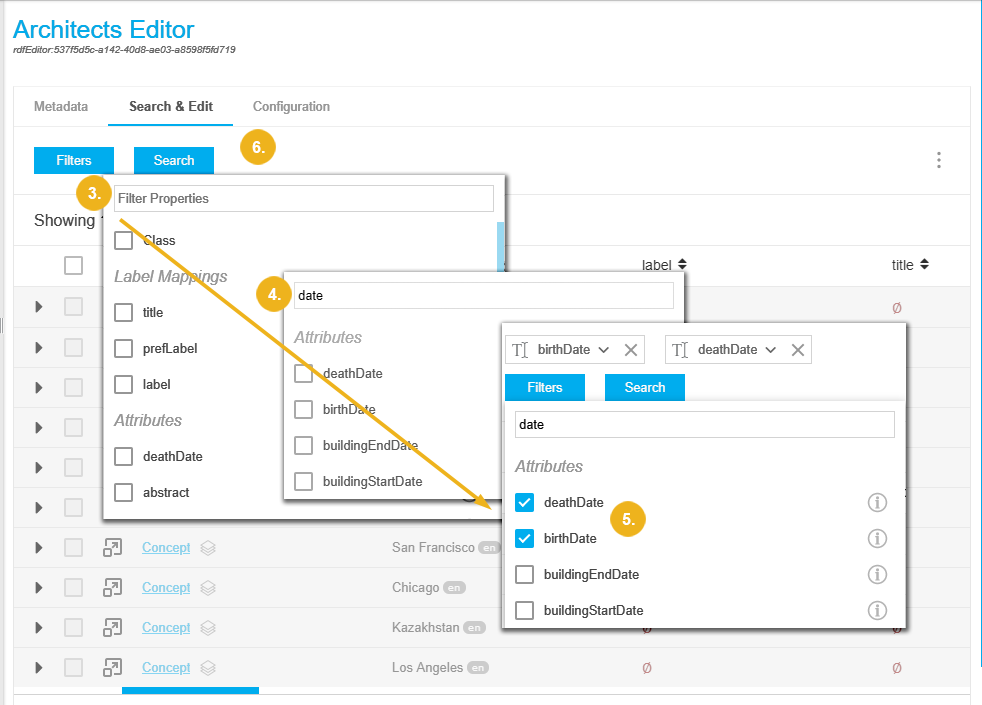
In order to filter in a graph editor, follow these steps:
After you havecreated your graph editor, you activate the Search & Edit tab.
In the Details View you find the table displaying the classes, prefLabels (preferred labels) and additional information based on the current project and the custom schemes you chose for your graph editor.
Click Filters to expand the drop down containing the available filters. They consist of the entities your graph is built on, namely the Label Mappings, Attributes or Relations.
Use the Filter Properties field to start typing and find desired values via autocomplete.
Activate one or more check boxes to use the respective values for filtering.
Click Search to display search results in the table.
Note
Filters defined here, are user specific.
Any filters you define here, will be saved and even persist across user sessions or after you re-open a previously closed project.