Display All Tags
Tags extracted in automated way must meet the requirements specified in the PoolParty for SharePoint Administration application to appear in a SharePoint list or library. To display all extracted and manually added tags of a list or library item, do the following:
Go to the site contents page. For more information, refer to the Microsoft SharePoint documentation.
Open the library or list.
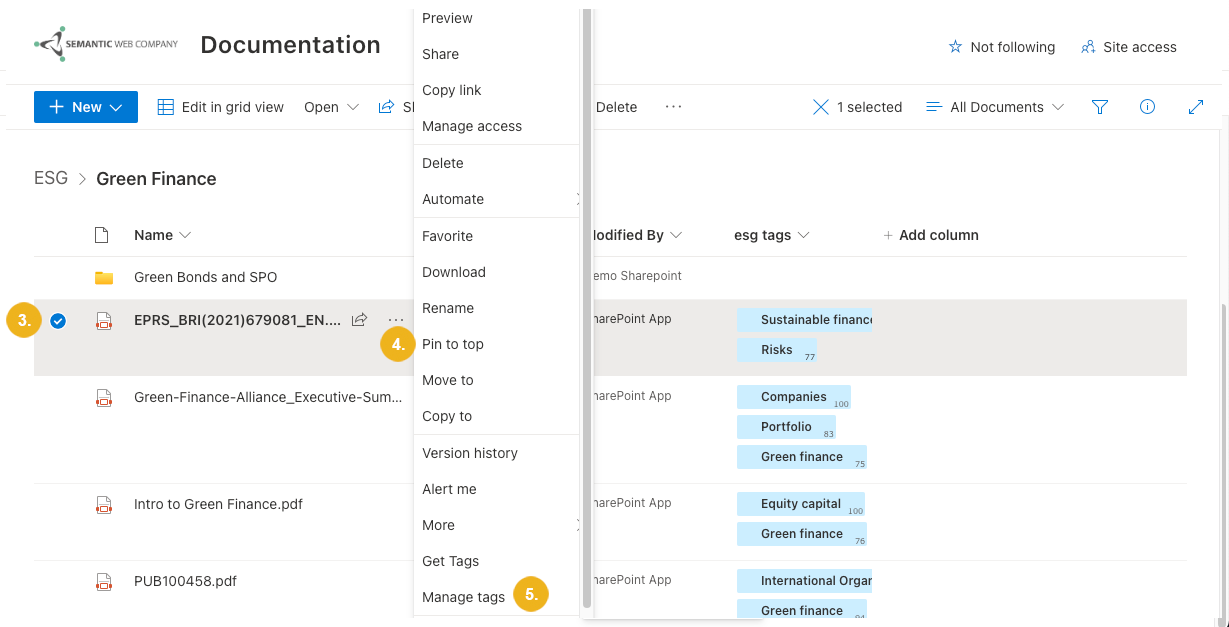
Select the item for which you want to see all tags.
Click Show actions.
Select Manage tags.
The Manage tags dialog box opens.
If the content has been tagged using multiple taxonomies or concept schemes, select the connection for which you want to see the tags.
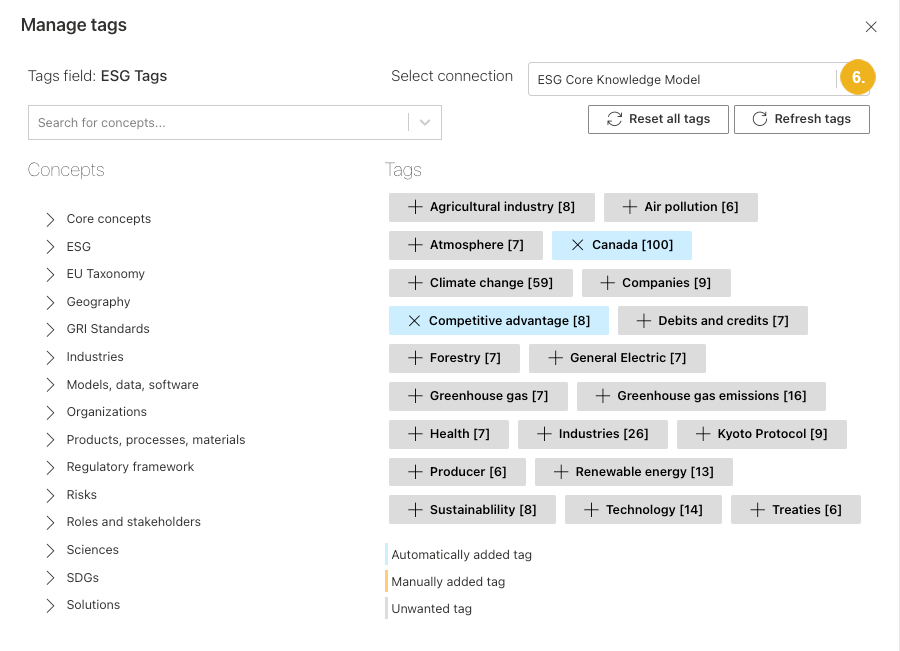
You can see all tags of the selected item for the selected connection.
The tags extracted in automated way are marked in blue (if they meet the minimum tag score and have not been marked as unwanted) or grey (if they don't meet the minimum tag score or have been marked as unwanted). The tag score of individual tags is indicated in the square brackets next to them. The higher the number, the more relevant the tag is for the given library or list item.
Note
The minimum tag score is set in the PoolParty for SharePoint Administration application.
Manually added tags are marked in orange.