Connect Library or List
Users can connect PoolParty to a SharePoint library through a helpful wizard. This article provides info on how to make a successful connection.
The wizard in the Connect content section allows you to connect individual SharePoint libraries and lists to PoolParty and Term Store taxonomies, to specify which fields of the documents or list items will be tagged and to set tagging parameters.
Important
If you in addition to the PoolParty-based tagging also want to enable the Term Store-based tagging for the Managed Metadata field, use the Term Store synchronization module to make sure that the Term Store and PoolParty taxonomies are in sync before you start. GUID synchronization is not required.
On the page with PoolParty for SharePoint Administration, select Connect content.
The PoolParty for SharePoint wizard opens.
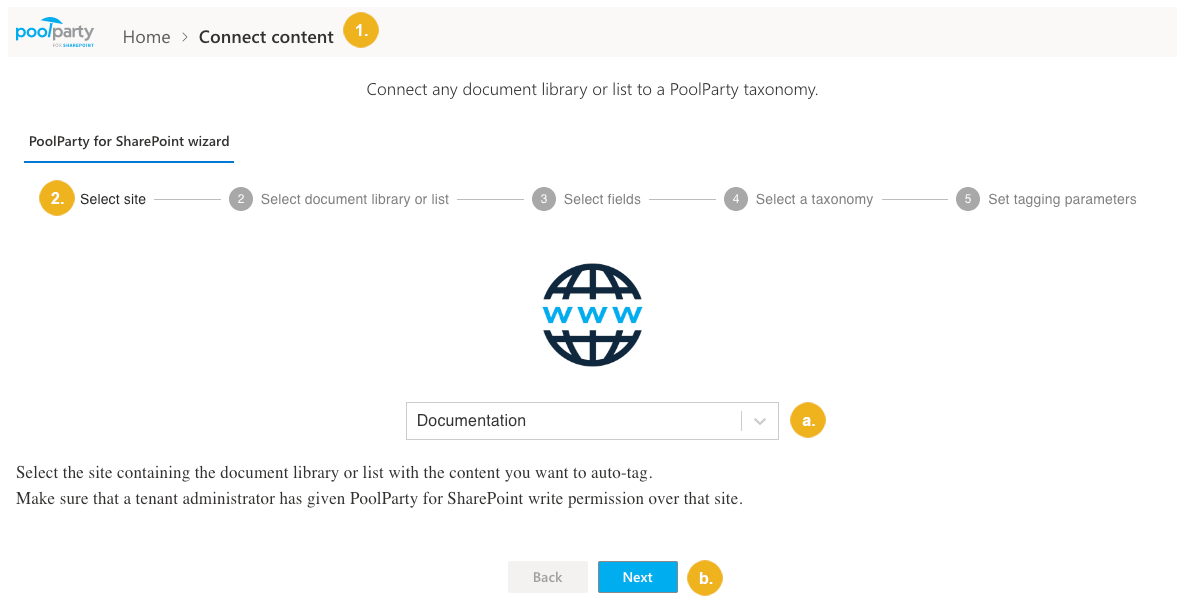
On the Select site page:
Select the site containing the document library or list with the items you want to auto-tag.
Note
Make sure that a tenant administrator gives PoolParty for SharePoint write permissions for that site. For more information, refer to Configure Site Permissions.
Confirm with Next.
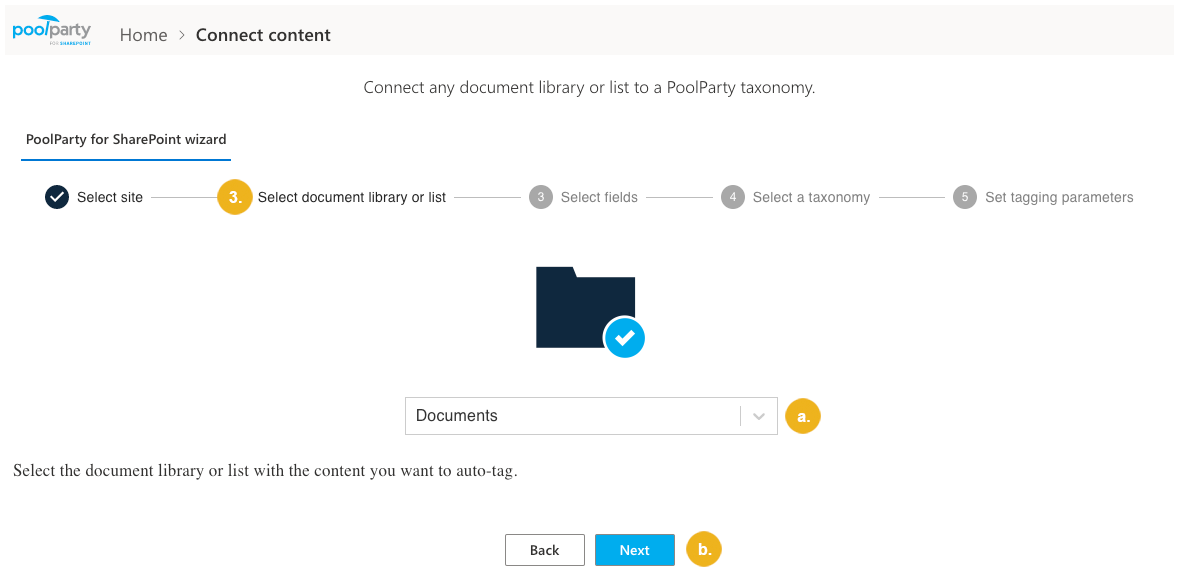
On the Select document library or list page:
Select the document library or list with the items you want to auto-tag.
Confirm with Next.
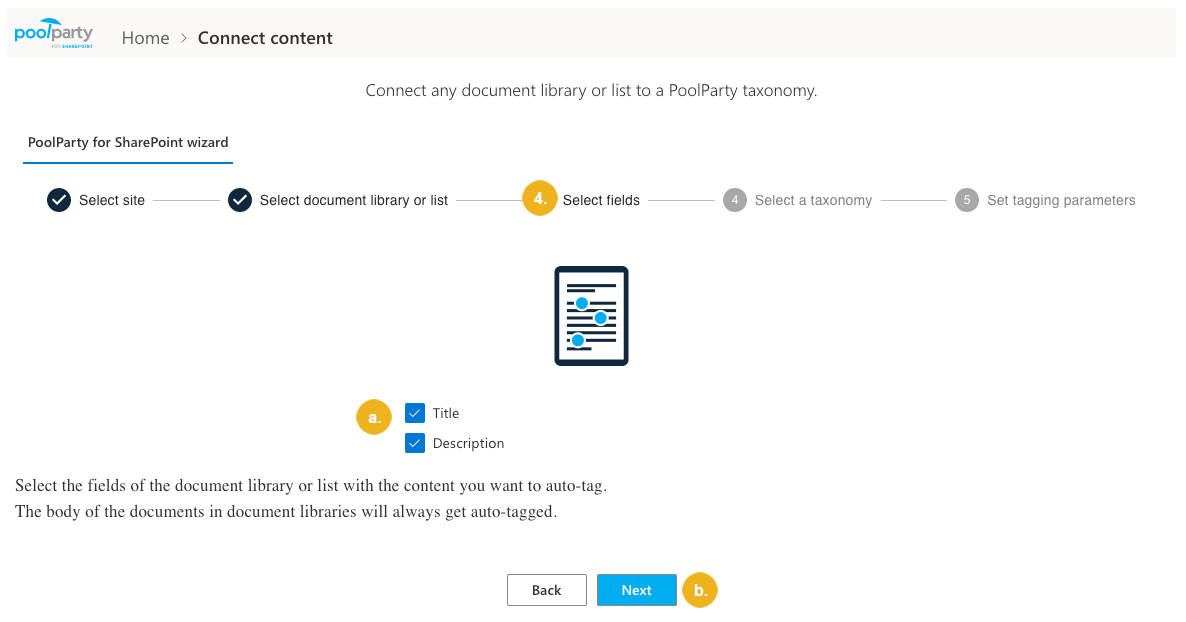
On the Select fields page:
Select the fields of the document library or list with the content you want to auto-tag.
Note
The body of the documents in document libraries will always be auto-tagged.
Confirm with Next.
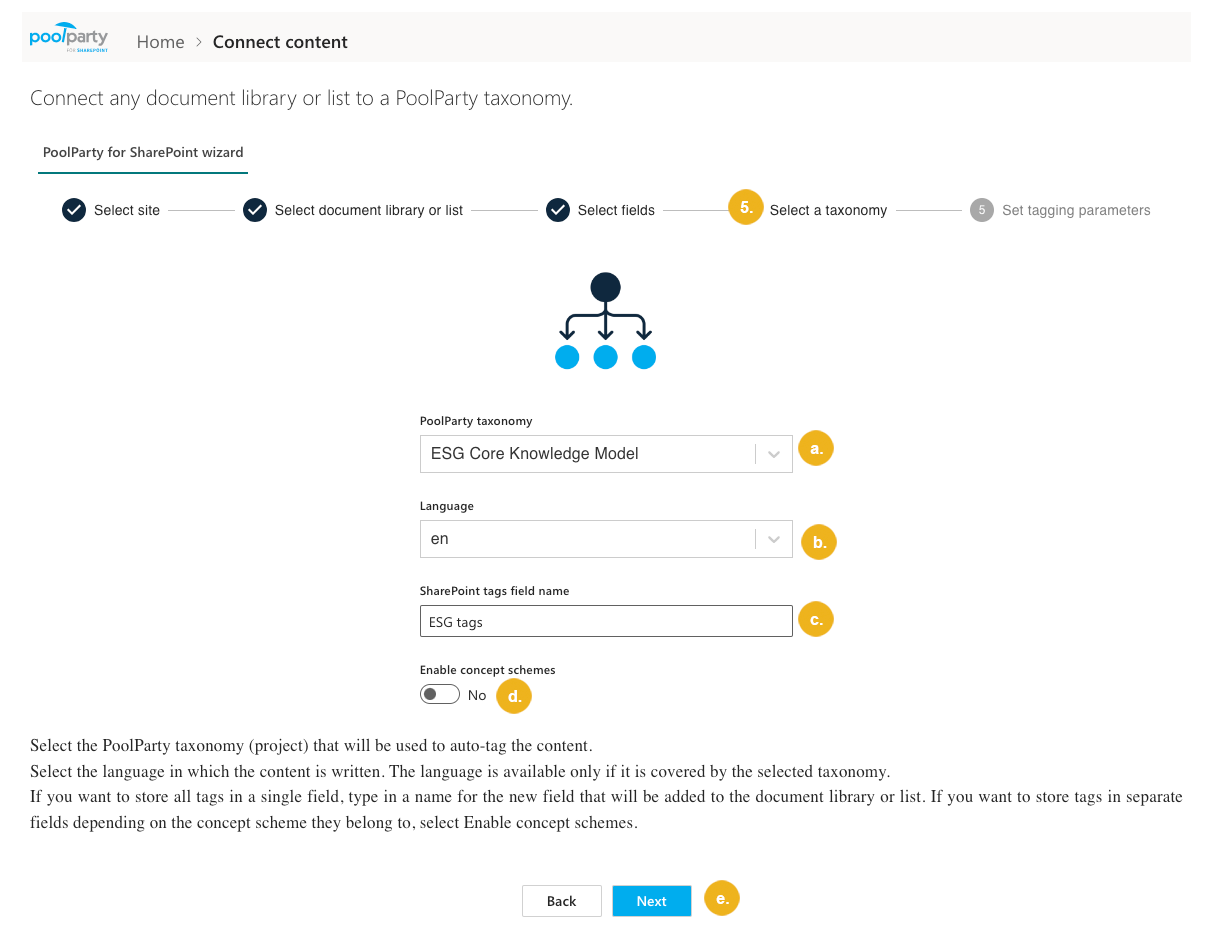
On the Select a taxonomy page:
Select the PoolParty taxonomy (project) that will be used to auto-tag the content.
Note
In this step, you can select only one taxonomy. If you want to tag any list or library with multiple taxonomies, please repeat the entire connection procedure.
Even if you want to only use Term Store-based tagging for managed metadata fields, you need to select a Poolparty taxonomy. To learn more about the interdependence between the PoolParty-based and Term Store-based tagging, refer to PoolParty-Based vs. Term Store-Based Tagging with PoolParty for SharePoint.
Select the language of the content. The language is only available if it is covered by the selected taxonomy.
If you want to store all tags in a single PoolParty for SharePoint field, type in a name for the new field that will be added to the document library or list.
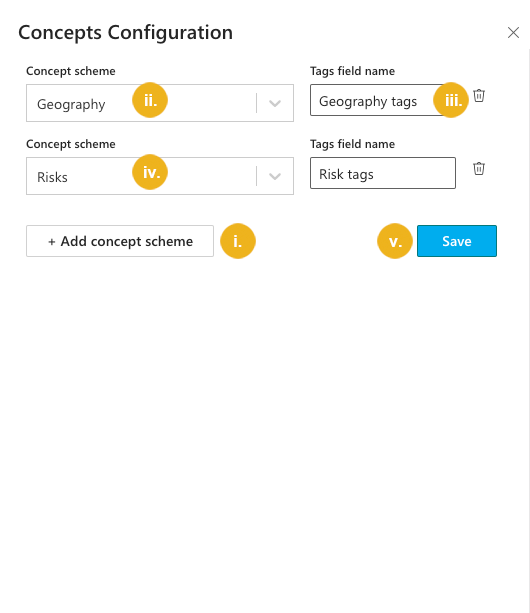
If you want to store tags in separate PoolParty for SharePoint fields reflecting the concept scheme they belong to, select Enable concept schemes and continue with the configuration on the newly opened pane:
Click Add concept scheme.
Select a concept scheme from the list of all concept schemes contained in the taxonomy you selected in step a.
Type in a name for the new field that will contain tags from this concept scheme and will be added to the document library or list.
Tip
To delete an inserted row, click Remove.
Repeat steps i. to iii. for as many concept schemes as you wish. You can select each concept scheme only once.
Tip
If you want to store tags from multiple concept schemes in a single field, use the same field name.
Confirm with Save.
Tip
If you want to edit the concept scheme configuration after saving it, click the Configure concept schemes button.
Confirm with Next.
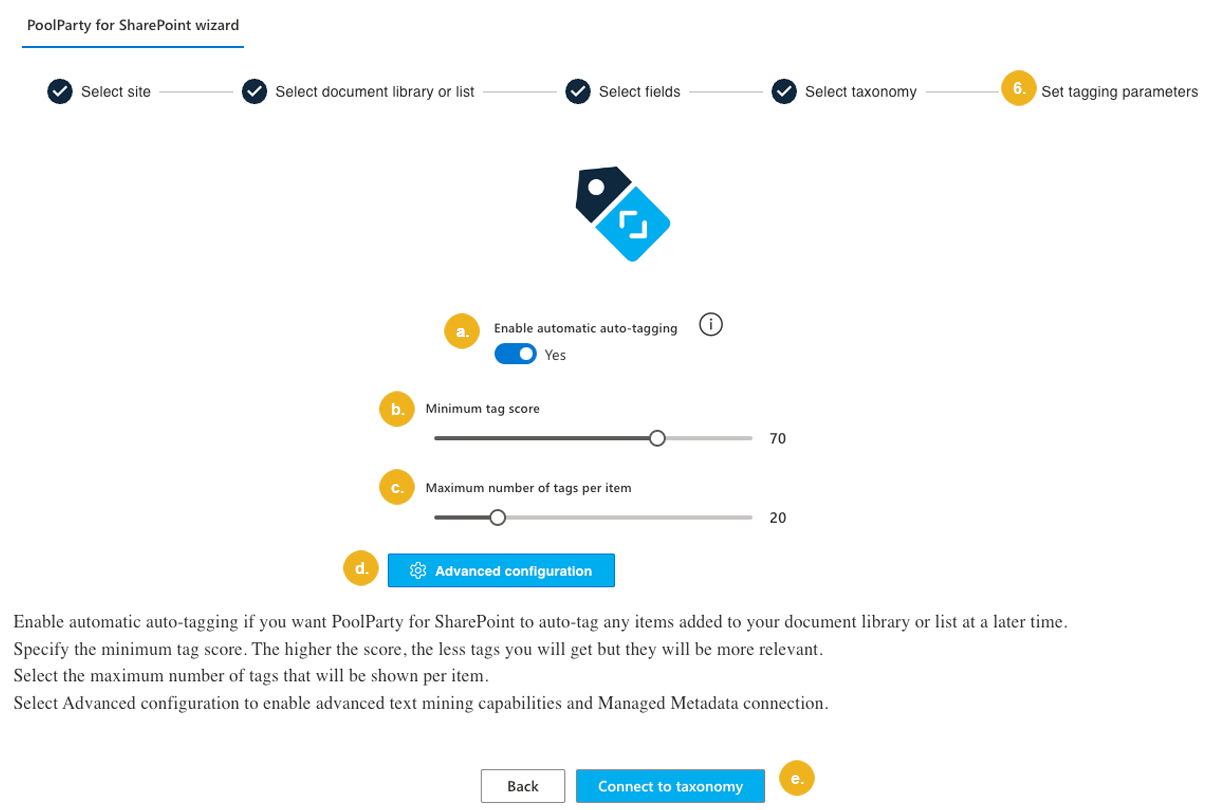
On the Set tagging parameters page:
Select the Enable automatic auto-tagging checkbox if you want PoolParty for SharePoint to automatically auto-tag items added to your document library or list at a later time. Items that are there at the moment won't be automatically auto-tagged.
Note
If you don't select this option, you can manually trigger auto-tagging of new items from the Connection settings section. For more information, refer to Edit Tagging Parameters.
Specify the minimum tag score. The higher the score, the less tags you will get but they will be more relevant.
Specify the maximum number of tags to be shown per item.
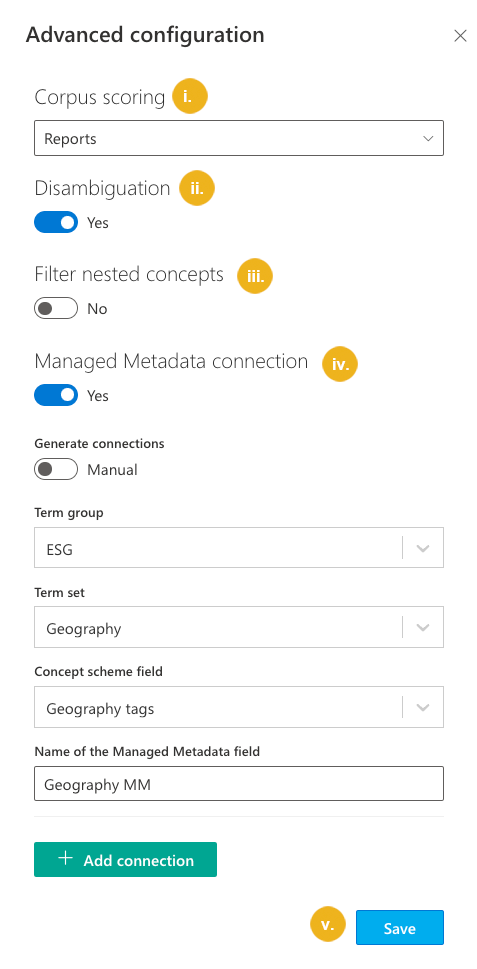
Optional: Select Advanced configuration to enable advanced text mining capabilities and Term Store-based tagging for Managed Metadata fields.
Select a corpus to be used for corpus scoring. If you select a corpus, the relevance scores the extracted terms have in this corpus will be taken into account. This is particularly useful for short documents where the term frequencies are low and the scoring based on the document alone does not provide satisfying results. For more information on corpus scoring, refer to the PoolParty documentation.
To enable the system to use the thesaurus and local context to resolve potential ambiguities, select Disambiguation. For more information on disambiguation, refer to the PoolParty documentation.
To exclude nested concepts from extraction, select Filter nested concepts. A nested concept is a concept that occurs within another concept in a text. For more information on nested concepts, refer to the PoolParty documentation.
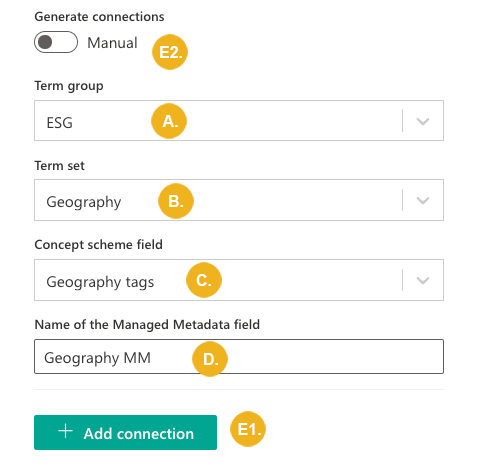
If you want to tag your content with a Term Store taxonomy and store the tags in the SharePoint-native metadata columns (Managed Metadata fields), select Managed Metadata connection.
Select a term group containing the term set to be used for tagging.
Important
The term group you select should be in sync with the PoolParty taxonomy you selected in step 5. Use the Term Store synchronization module to make sure that they are exact copies of each other. GUID synchronization is not required.
Select the term set to be used for tagging.
Note
In SharePoint, one Managed Metadata column can only contain terms from one term set (not from the whole term group). If you selected a taxonomy of multiple concept schemes for PoolParty-based tagging, in step E, you will have an option to decide if you want to map to this connection to only some or all term sets of the corresponding Term Store term group.
If you enabled concept schemes in step 5, select the name of the PoolParty for SharePoint tag field for the concept scheme that is equivalent to the term set you selected in step B.
Type in a name for the new Managed Metadata field that will contain tags from this term set and will be added to the document library or list.
Note
Using existing metadata columns is not supported.
If you want to tag content with multiple term sets, you can:
Important
The term sets you select must belong to the term group you specified in step A.
E1. connect the term sets manually by clicking Add connection and repeating steps A to D.
E2. OR connect the term sets of the specified term group in bulk by selecting Generate connections and then providing a name for the new Managed Metadata field.
Note
There can only be one Managed Metadata field per term set.
Tip
To delete connections to term sets you don't want to use for tagging, select Delete connection.
Confirm with Save.
Confirm with Connect to taxonomy.
The content has been successfully connected. If you want to start auto-tagging, select Go to library or list. For more information, refer to Trigger Auto-tagging.
Tip
You can use the settings of this connection to connect other SharePoint lists and libraries. For more information, refer to Use Existing Connection Settings to Connect Multiple Libraries and Lists.
One SharePoint list or library can be connected to multiple PoolParty taxonomies. To connect the library or list to another taxonomy, repeat the steps above.
One SharePoint list or library can be connected to a single PoolParty taxonomy more than once, each time with unique settings. To connect the library or list to the same taxonomy, repeat the steps above.