Reference: Connection Settings and Details
After you have accessed Connection Settings and Details, you can see the following details:
Connected libraries and lists (1) – list of all SharePoint libraries and lists connected a PoolParty taxonomy or concept scheme
Note
A single library or list can be connected to multiple PoolParty taxonomies and concept schemes. Additionally, the same taxonomy can be connected to the same library or list multiple times, each time with unique settings. Each connection is represented by a separate entry within the list.
Tip
You can sort the list by clicking a column header.
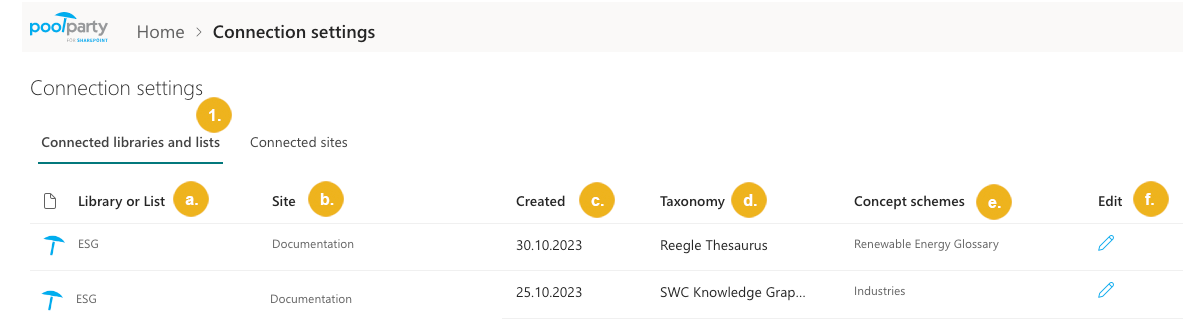
Library or list (a) – name of the library or list connected to a PoolParty taxonomy
Tip
Click the name to go to the library or list.
Site (b) – name of the site containing the library or list connected to a PoolParty taxonomy
Tip
Click the name to go to the site.
Created (c) – date when the library or list was connected to a PoolParty taxonomy
Taxonomy (d) – name of the PoolParty taxonomy (project) to which the library or list is connected
Concept schemes (e) – if tagging based on concept schemes was enabled, the connected concept schemes appear here
Connection settings (f)
Note
You need to click the pencil icon in the Edit column to open this section. For more information on how to access this section and edit the individual settings, refer to Edit Tagging Parameters.
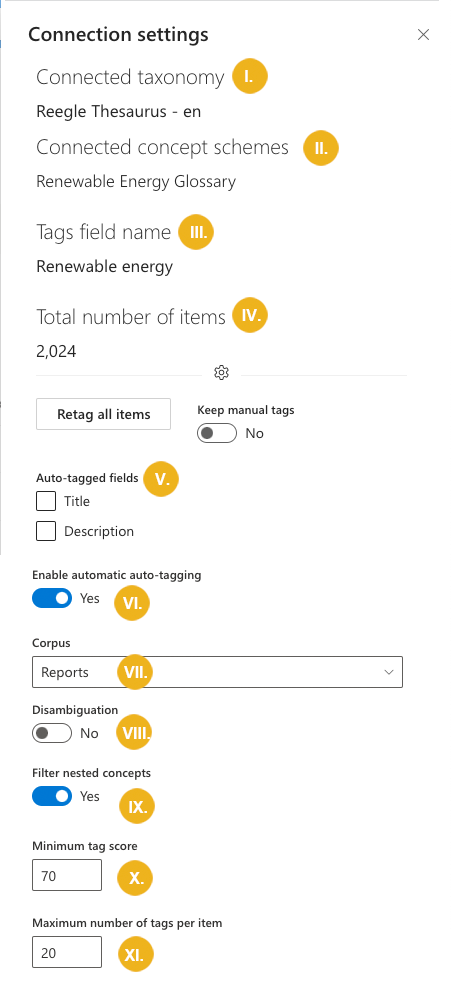
Connected taxonomy (I) – name and language code of the PoolParty taxonomy (project) to which the library or list is connected
Connected concept schemes (II) – if tagging based on concept schemes was enabled, this field contains names of the connected concept schemes
Tags field name (III) – name of the field with tags added to the document library or list
Total number of items (IV) – number of the documents in the library or items in the list
Auto-tagged fields (V) – fields of the library or list that get auto-tagged
Note
The body of the documents in document libraries will always be auto-tagged.
Enable automatic auto-tagging (VI) – if selected, PoolParty for SharePoint will automatically auto-tag items you may add to the library or list at a later time
Corpus (VII) – if a corpus is selected, the relevance scores the extracted terms have in this corpus will be taken into account. This is particularly useful for short documents where the term frequencies are low and the scoring based on the document alone does not provide satisfying results. For more information on corpus scoring, refer to the PoolParty documentation.
Disambiguation (VIII) – if selected, the system will use the thesaurus and local context to resolve potential ambiguities. For more information on disambiguation, refer to the PoolParty documentation.
Filter nested concepts (IX) – if selected, nested concepts will be excluded from extraction. A nested concept is a concept that occurs within another concept in a text. For more information on nested concepts, refer to the PoolParty documentation.
Minimum tag score (X) – the higher the score, the less tags you will get but they will be more relevant. Default is 70.
Maximum number of tags per document (XI) – maximum number of tags that will be shown per item in a dedicated column. Default is 20.
Connected sites (2) – list of sites containing a library or list connected to a PoolParty taxonomy
Tip
You can sort the list by clicking a column header.
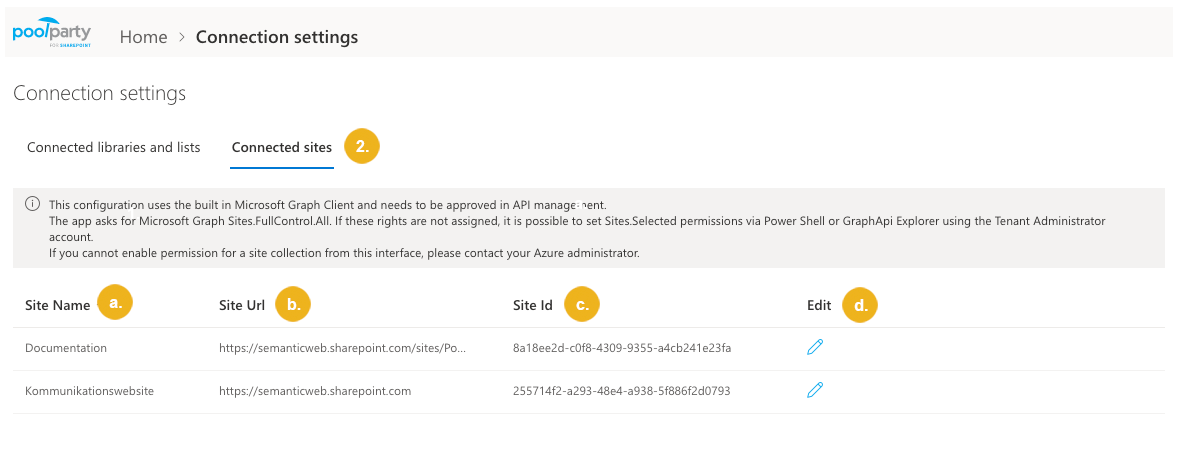
Site name (a) – name of the site containing a library or list connected to a PoolParty taxonomy
Site URL (b) – URL of the site containing a library or list connected to a PoolParty taxonomy
Site ID (c) – ID of the site containing the library or list connected to a PoolParty taxonomy
Site collection permissions (d) – states whether PoolParty for SharePoint has write permissions for the site
Note
You need to click the pencil icon in the Edit column to open this section. For more information on how to access this section and how to grant or revoke the permissions, refer to Configure Site Permissions.