Verifying Workbench Settings
26/09/2025
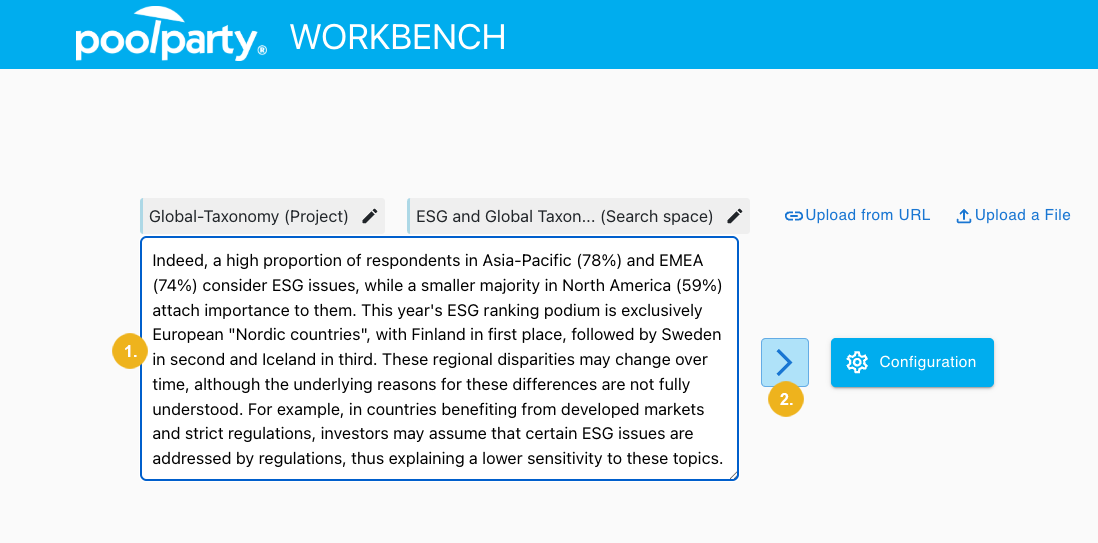
After you have finished configuring your Workbench settings, you can validate them by examining the results they return. The Workbench offers two functionalities which can be tested directly in the application: Inference Tagging and Recommendation.
Enter a piece of text or a list of concepts which you want to evaluate with respect to your configuration (1).
Tip
You can expand the Workbench input field for better visibility of your input text. To do so, simply hold and drag it by the bottom right corner.
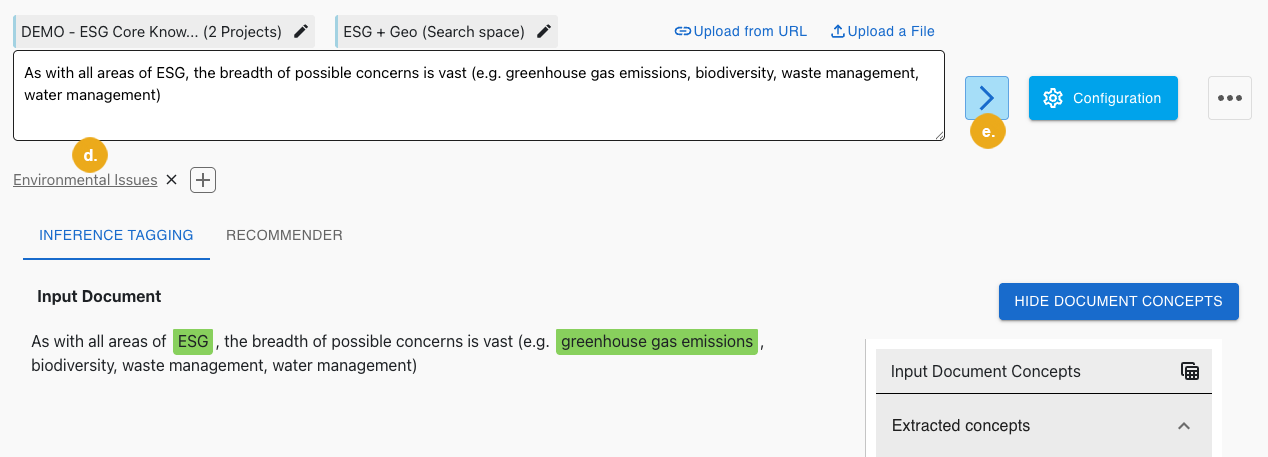
Click the Arrow icon (2).
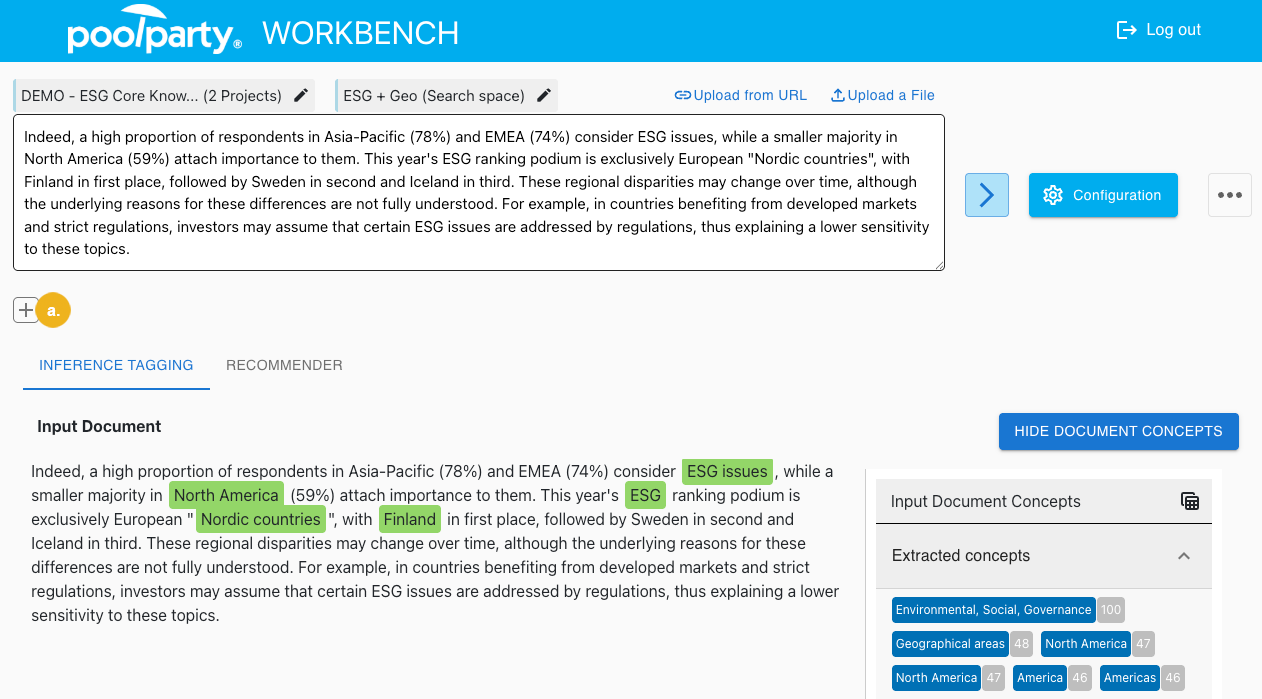
You will be directed to the results page with the Inference Tagging tab being open by default.

Below the Input Document (1) heading you see the input text with identified concepts. In the Inference Tagging tab, hover over a concept to view more information on the concept, such as the project it derives from and its score (2).
To the right you see all Extracted concepts (3) and all Expanded concepts (4). Next to each concept you can see its score, highlighted with a grey background.
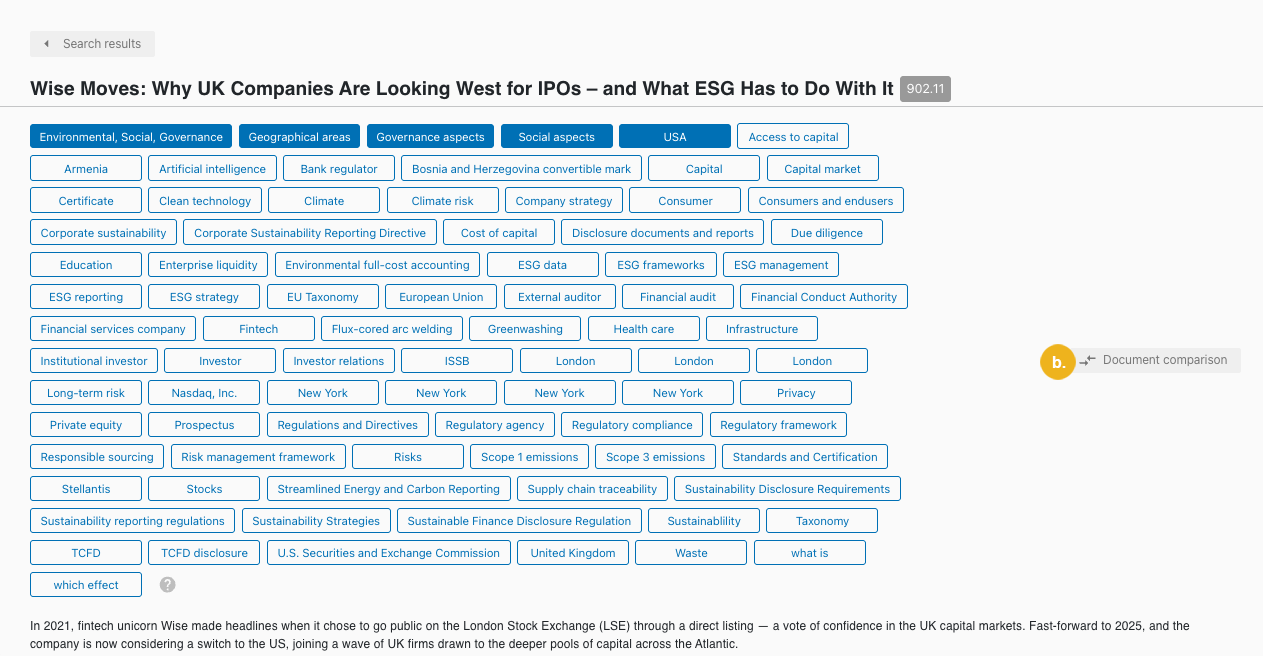
Navigate to the Recommender tab (1) to see a list of recommended documents based on your input and configuration.
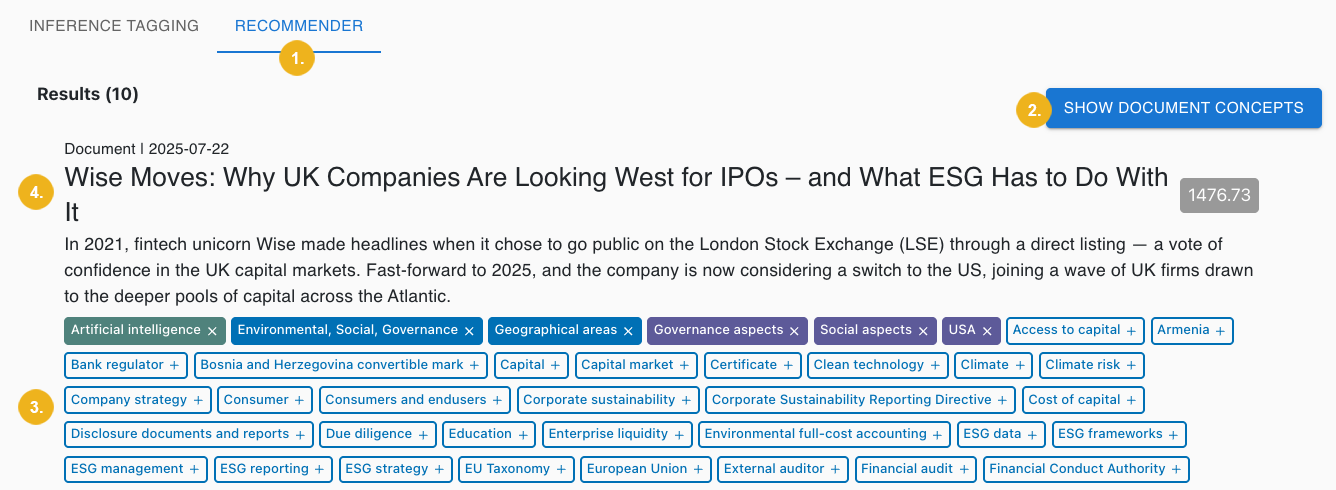
Each document has color-coded concepts displayed beneath its title and abstract, as well as annotated concepts with a clear background. These concepts can be added manually by clicking on them (3). In the example above, the concept "Artificial Intelligence" has been previously selected from the list of annotated concepts and is now highlighted in dark green.
Note
You can remove a concept by clicking the X icon next to it.
Click the Show Documents button (2) to reveal a panel listing similarly color-coded concepts.
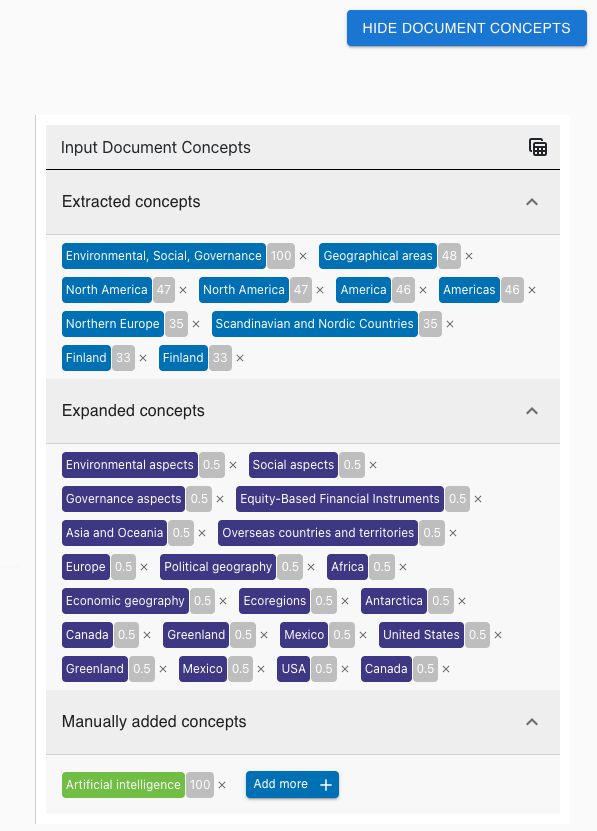
These are the extracted, expanded concepts generated by the input query and configuration, as well as any manually added concepts which may have been selected. The screenshot above illustrates what this panel of extracted, expanded, and manually added concepts might look like.
To see the concepts from your input compared against concepts from a recommended document:
Click the title of the document (a).
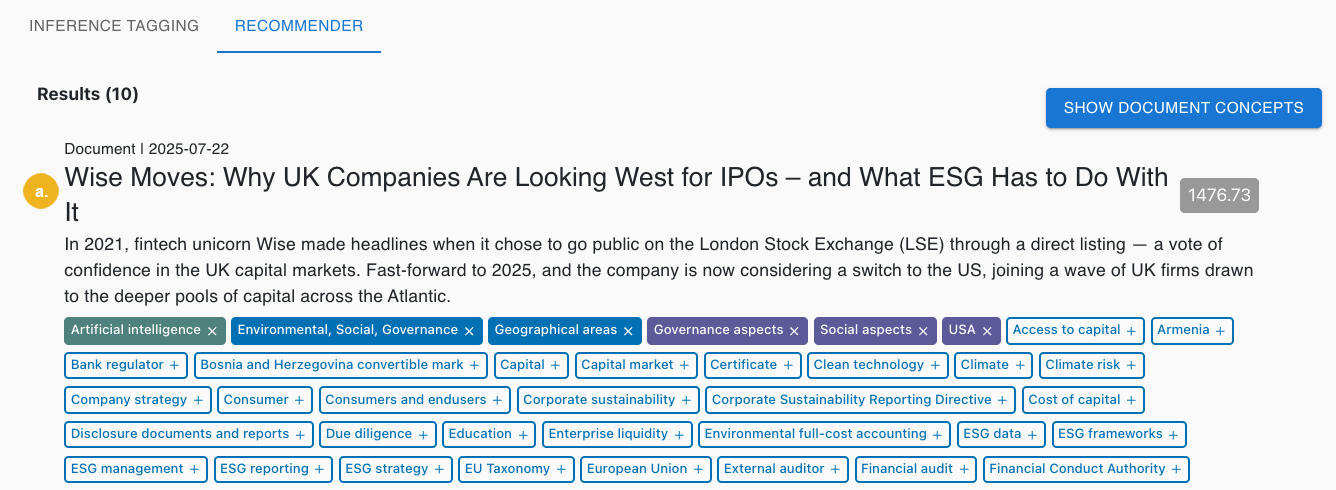
This will open the document's details view.
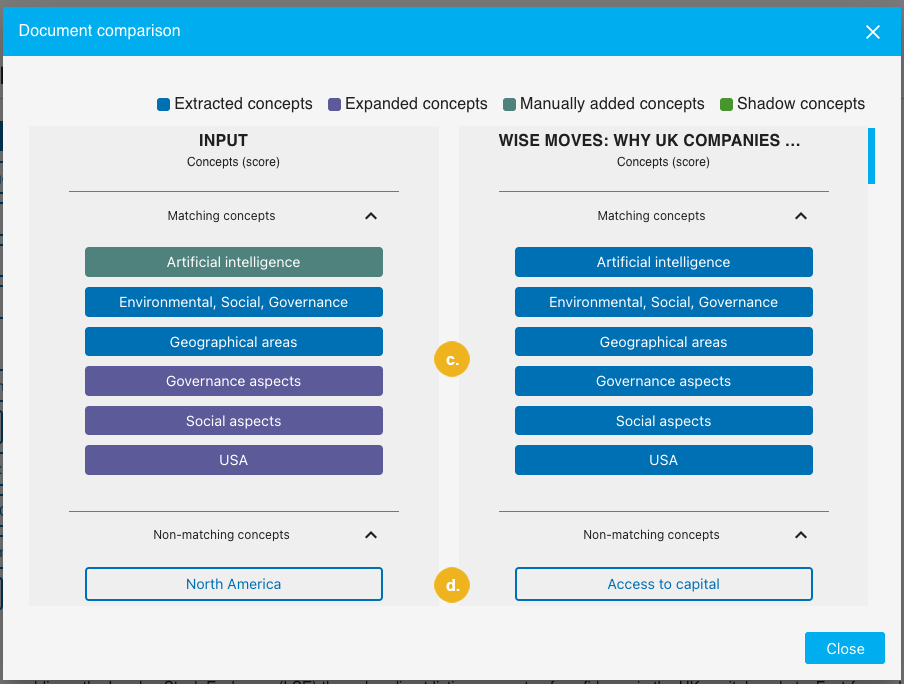
Select Document comparison.
The Document comparison dialog box opens. Here you can see a list of matching (a) and non-matching (b) concepts for the input text and recommended document ordered by their score compared against each other.
To switch between results returned for various input texts:
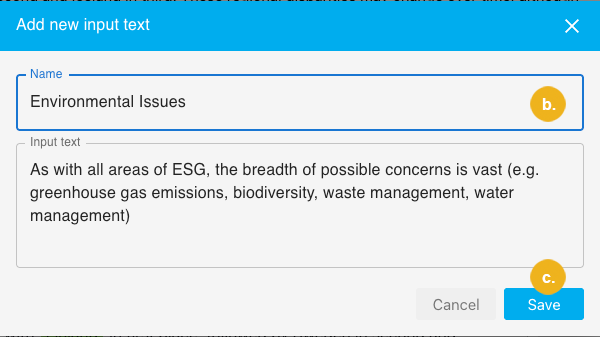
Click the + icon under the input field (a).
Provide the name and the input text (b).
Confirm with Save (c).
Caution
Input texts are only saved in the application's memory for the duration of the current session. They will be erased as soon as you refresh your browser or log out.
If you want to keep them, you can save or export them as part of a recommender configuration.
Select the input text from the list underneath the search box.
Tip
You can delete a saved input text by clicking the cross icon next to it.
Click the Arrow icon to restart the search.
Tip
Once you have found an optimal combination of recommender settings, you can export them as cURL requests.
Alternatively, you can save them to the application's database or export them in JSON for future import into this or another instance of the PoolParty Recommender Workbench.